Cranberry-Almond Oat Bars


I enjoy a good granola bar from time to time, especially when I am in a hurry and don’t have time for breakfast. It’s also great for an afternoon snack when you’re on the run. Store-bought granola bars tend to have too much sugar and unnecessary preservatives, though, so I prefer to I bake my own, which lets me control the sugar and also use the best ingredients. This oat bar recipe has dried cranberries, sliced almonds, coconut, coconut oil and other healthy ingredients. The egg white helps bind all the dry ingredients. This recipe is relatively easy as long as you have everything in front of you, as you should be able to assemble these granola bars in less than 30 minutes. They are perfect to pack in your kid’s lunchbox or to wrap up and keep one in your bag. Enjoy!


Cranberry-Almond Oat Bars

Yield: 2 dozen


2 3/4 cups of quick cooking rolled oats, like McCann’s

1/2 cup of unbleached all-purpose flour

3 tablespoons of flax seeds

3/4 teaspoon of baking soda

3/4 teaspoon of flaky sea salt

1/2 teaspoon of ground cinnamon

3/4 cup of dried cranberries

1/2 cup of sliced almonds, toasted*

1/2 cup of sweetened shredded coconut

1/3 cup of honey

1/4 cup of packed light brown sugar

1/2 cup of coconut oil, melted

1 egg white, beaten until foamy


1. Heat the oven to 325°. Spray 13 x 9 aluminum baking pan with nonstick spray. Set aside.

2. Add the oats, flour, flax seeds, baking soda, cinnamon and salt. Stir well with a fork.

IMG_5619

3. Stir in the dry cranberries and almonds.

IMG_5620

4. Whisk the honey, light brown sugar and coconut oil in a small bowl, until well blended.

IMG_5622

5. Pour the honey mixture over the dry mixture and mix well with a rubber spatula. Then fold in the beaten egg whites.

IMG_5623

6. Pour into the greased baking pan and press down evenly until nice and firm.
Place pan in the oven and bake for about 20 minutes until nice golden brown.

IMG_5626

7. Remove from oven and let it cool on a wire rack until cool.

IMG_5628

8. With a serrated knife, cut into 24 squares.

IMG_5633

9. Store in an air tight container for up to 1 week.


*To toast sliced almonds, place them in a 350° oven for 5 minutes. Let the almonds cool completely before using.

Advertisement

Gumbo Ya-Ya

One of my favorite culinary destinations is New Orleans, Louisiana. New Orleans is a melting pot of many immigrant cultures, but the French influence is quite apparent all around the city, but especially in the French Quarter. From the beignets at Cafe du Monde to escargot at Galatoire’s, the French culture is a major influence on their cuisine. And of course Mardi Gras is French for “Fat Tuesday”, the last day to eat rich and party before fasting for lent. Today, we celebrate Mardi Gras and it’s the perfect reason to share my gumbo recipe.

Gumbo is one of my favorite New Orleans dishes because it is delicious, spicy, hearty and full of great flavors. The key to a good gumbo is slow-cooked dark roux (a thickener made with butter and flour). In this recipe, the roux takes about an hour to cook. The original recipe for Gumbo Ya-Ya was created by the late Paul Prudhomme, who was an amazing New Orleans chef. This gumbo has chicken and andouille sausage (a firm Cajun sausage full of great spices), but if you can’t find andouille sausage, you can alway substitute Louisiana hot or mild links. This is not a quick recipe, but completely worth it in the end. I aways reserve making gumbo for special occasions and there’s no better time than Mardi Gras. Enjoy!

Gumbo Ya-Ya

Serving Size 4-6

2 lbs of organic chicken thighs

Kosher salt

1 tablespoon of sunflower oil or other neutral oil

10 cups of water

1 carrot, cut into 3 pieces

1 stalk of celery, cut in 3 pieces

1 onion, quartered

1 bay leaf

1/2 cup (1 stick) of unsalted butter

3/4 cup of Sonora wheat or unbleached all-purpose flour

1 bell pepper, small dice

1 sweet onion, small dice

1 celery stalk, small dice

2 garlic cloves, minced

1/2 teaspoon of fresh thyme leaves, finely chopped

1 tablespoon of Creole Seasoning  (can be store bought)

1/2 teaspoon of ground black pepper

1/2 teaspoon of chili powder

1/4 teaspoon of dried hot red pepper flakes

1 bay leaf

2 teaspoons of Kosher salt, more to taste

2 andouille sausages or Louisiana smoked hot links (about 10 ounces), cut into 1/4 inch-thick slices

1/2 teaspoon of file powder

3 cups of steamed long-grain rice, converted

Chopped parsley

Louisiana hot sauce for serving (optional)

1. Sprinkle the chicken thighs with a generous amount of Kosher salt on the skin side. Heat a large pot, preferably enamel coated cast-iron, to medium-high heat. Add the oil. Place chicken thighs in the pot, skin-side down. Sprinkle the other side of the chicken with more Kosher salt. Sear the chicken skin until it gets golden and crispy (about 5-7 minutes). Turn the chicken thighs over and cook for another 5 minutes.

img_5577img_5579

2. Remove the chicken thighs and place on a plate. Pour the chicken grease into a small Pyrex bowl or a heat-proof bowl and reserve for later. You should have about a 1/4 cup.

img_5581

3. Add the chicken thighs back to the pot, along with 10 cups of water, the carrots, celery, onion and bay leaf. Bring to a boil. Then reduce to a low simmer and place the lid on top. You will braise the chicken for about an hour.

img_5580

4. Meanwhile, heat another large pot to low heat. Add the butter and the reserved chicken grease into the pot. Once the butter is completely melted, gradually add in the flour while stirring with a wooden spoon. You will continue to stir and cook the roux for about 1 hour until you get a dark chocolate color. Don’t get tempted to leave the roux unattended. It is important to constantly stir throughout the whole process.

5. Check on the chicken. It should be tender, almost falling off the bone. Remove the chicken thighs using tongs, place on a plate and cover with plastic wrap. Quickly strain broth through a chinois (or a fine mesh sieve) into a large bowl and reserve the broth for the gumbo.

img_5597img_5589

6. Once the roux is nice and dark, add all the diced bell peppers. Stir for 1 minute. Add the diced onions and celery, stir for another minute. Add the garlic and chopped thyme and stir for 15 more seconds.

img_5593

7. Slowly add the broth to the roux mixture while stirring, two cups at a time, for a total of eight cups. (Save any remaining broth to thin out the gumbo later.) Add all the dry seasoning, bay leaf and the andouille sausage. Give it a good stir and bring to a boil.

img_5598

8. Reduce heat and simmer uncovered for 30 minutes, stirring occasionally. Make sure you skim the fat on the surface.

img_5600

9. While the gumbo is simmering, take the braised chicken and remove the meat off the bone, pulling it into to bite-sized shreds. Discard the bones.

10. After the gumbo has simmered for 30 minutes, add the file powder and the shredded chicken pieces. Add more broth or water if the broth is too thick. Give it gentle stir. Simmer for another 20 minutes.

img_5601

11. Taste for seasoning and adjust as need.

12. To serve, ladle the gumbo into shallow bowls. Add some steamed rice into the gumbo and sprinkle some chopped parsley on top. Serve with your favorite Louisiana hot sauce.

img_5613

Toffee with Dark Chocolate and Mixed Nuts

Last year, my husband brought home some delicious toffee. I’m not a huge fan of toffee or candy in general, but this was quite amazing. What I loved about the toffee was the texture – each piece was crunchy but not jaw-breaking, light and not too dense. The toffee also had a nice layer of dark chocolate and some chopped mixed nuts on the top. Overall it was delicious and it inspired me to work on a recipe for it.

Making toffee isn’t difficult, but it does require some attention and timing, as sugar can be a little tricky to work with during the candying process. I find that adding some corn syrup helps prevent crystallization in the sugar. Also, make sure you turn off the heat once you hit soft crack phase, which is at 285°. 300° is hard crack, and some people would argue that it needs to hit this temperature in order to be proper toffee. I my opinion, 300° makes of the toffee a little too hard. Finally, another trick I use is adding a little baking soda to the recipe, which helps lighten up the toffee. With some extra dark chocolate and mixed roasted nuts on top, you won’t be able to have just one piece. Enjoy!

Toffee with Dark Chocolate and Mixed Nuts

Yield: About 1 1/2 lbs.

Non-stick baking spray

1 cup of unsalted organic butter (2 sticks), at room temperature

1 cup of granulated sugar

1 tablespoon of organic corn syrup

1/2 teaspoon of Kosher salt

1 teaspoon of vanilla extract

1/4 teaspoon of baking soda

6 1/2 ounces of finely chopped dark chocolate, preferably 65% cacao

1/2 cup of salted and roasted mixed nuts (peanuts, almonds, Brazil nuts, walnuts, and cashews), finely chopped

Fleur de sel or flaky sea salt


Special Equipment:

1/4 sheet pan (8 1/2″ x 11″ at the base)

Parchment paper

Candy thermometer

Wooden spoon

Pastry brush

Water

Off-set spatula

1. Cut a sheet of parchment paper to 8 1/2″ x 11″ to fit the bottom of the baking sheet. Line the baking sheet and spray lightly with non-stick baking spray. Set aside.

img_5552

2. Have the vanilla extract and baking soda ready in small mise en place bowls.

3. Add the butter,  sugar, corn syrup, and salt in a medium heavy-bottom copper or an enamel coated cast iron pot. Heat on medium.

4. Gently stir with a wooden spoon until it comes to a boil. Stop stirring. Then attach the candy thermometer.

img_5568

5. Get a small bowl of water and a pastry brush ready. Set aside.

6. Stir the toffee mixture occasionally as the temperature reaches 285° on the candy thermometer. You will stir about five different occasions. Do not overstir or the toffee will separate. Also, during this process, you will use the wet brush to mix in any sugar mixture that comes up along the sides of the pan. This helps prevents crystallization.

img_5569img_5570

7. Once the temperature reaches 285°, immediately remove the pot from the stove and stir in the baking soda and vanilla extract. The baking soda will help lighten the toffee.

8. Pour the toffee mixture on the prepared parchment-covered baking sheet. Tap the baking sheet a couple of times. Let the toffee cool for 2 minutes.

img_5571

9.Sprinkle the chopped dark chocolate evenly over the toffee. Let it sit for 1 minute.

img_5559

10. Using an off-set spatula, gently spread the melted chocolate.

img_5560

11. Sprinkle the chopped nuts evenly over the melted chocolate. Sprinkle a few flakes of sea salt. Using another piece of parchment paper to gently press the nuts into the chocolate.

img_5562img_5563

12. Place the toffee in the refrigerator for about 45 minutes.

13. When is the chocolate has hardened, remove the toffee from the refrigerator. Peel off the parchment paper.

img_5564

14. Break it up into bite-size pieces.

img_5565

15. Store in an airtight container. You can also place them in small cellophane bags for gifts.

img_5576.jpg

Jajangmyeon

Growing up, we’d often order jajangmyeon at our local Korean-style Chinese restaurant. Jajangmyeon is a traditional Korean noodle dish that is a combination of pork and wheat noodles in a black bean sauce. It originated in China but made its way to South Korea with Mandarin Chinese immigrants, who adapted the dish for the Korean palette. The Korean version has more sauce and a richer flavor, and usually has less fat on the pork and in the sauce.

One of my fondest food memories was watching the chef hand-pull the noodles, transforming the dough into even strands of beautiful noodles by pulling, stretching and twisting it in the air. I was in awe whenever I watched the chef perform his magic, as the noodles danced and floated in front of him until they were the perfect thickness. He did this all for a single bowl of jajangmyeon. Today, most Korean-style Chinese restaurants serve jajangmyeon with factory-made noodles, so finding hand-pulled noodles is a real treat.

My version of jajangmyeon is a healthier version of the dish, as I use less oil and and leaner pork to try and cut down on the fat. I also pre-marinate the pork, which ensures tender pieces of meat. This sauce is rich and full of great flavor, and I love to eat a big bowl of these noodles with a side of cabbage kimchee or takuan. Enjoy!

Jajangmyeon

Serving Size: 4

Sunflower oil or organic canola oil

1 large sweet onion, chopped into 1/2″ in pieces

1/2 large zucchini, cut into 1/2″ pieces (3/4 cup)*

1 small Yukon gold potato, 1/2 ” dice (3/4 cup) – parboiled for 5 minutes

8 ounces of par-cooked, marinated pork (recipe below)

2/3 cup of fermented black bean paste**

2 teaspoons of organic sugar

1 tablespoon of organic soy sauce

1 1/2 cups of water

2 tablespoons of organic cornstarch

22 ounces of fresh jajangmyeon noodles or Chinese wheat noodles (medium thickness)**

1/2 cup of julienned cucumbers (seeds omitted)


1. Heat a wok to medium-high heat. Add 1 tablespoon of oil. Once the oil starts to smoke, add all the chopped onion. Sauté for about 3 minutes until the onion becomes translucent.

img_5510
2. Meanwhile, bring a large pot of water to boil.
3. Add the cut zucchini pieces to the wok with the onions. Sauté for 2 more minutes.

IMG_5513.JPG

4. Add the par-cooked pork and potatoes to the wok.

img_5514

5. Add the black bean paste. Stir to incorporate.

img_5515

6. Add the soy sauce, sugar and water and bring it to a boil.

img_5517

7. Meanwhile, add the noodles into the boiling water. Follow the instructions on the package. Rinse and set aside. (You want to time the noodles so they will be ready when the sauce is done)

img_5522img_5525

8. Mix the cornstarch with 2 tablespoons of water to create a slurry. Stir into the sauce.

img_5519


9. Cook and stir until thickened.

img_5524

10. Divide the noodles evenly into four bowls. Ladle a generous amount of sauce into each of the bowls. Top with some julienned cucumbers and serve with cabbage kimchi.

img_5542img_5531

* When cutting the zucchini, remove the center seedy potion.  The section with the seeds becomes mushy when cooked. Then dice the  zucchini to 1/2″ pieces as shown.

img_5507img_5508

**  Fermented black bean paste and jajangmyeon noodles can be found at your local Korean supermarket.

img_5511img_5504


Marinated pork recipe 

8 ounces of lean pork chuck or tenderloin

1/4 teaspoon of baking soda

1 teaspoon of organic cornstarch

1 teaspoon of organic soy sauce

1 teaspoon of Shoxing wine or Sake


1. Dice the pork into small pieces just shy of 1/2″

img_5496
2. Place the cut pork in a small bowl and sprinkle with baking soda. Mix well and let it sit for 10 minutes (I would suggest using a timer for this step because you do not want exceeded the time allotted or the pork will be too tender.)

img_5497
3. After the 10 minutes, add the cornstarch, soy sauce and the wine. Stir and let sit for 2 minutes.

img_5498
4.Meanwhile heat a wok to high. Add 1 tablespoon of oil. Once oil gets hot, add the marinated pork. Leave undisturbed for 30 seconds.

img_5500
5. Using a wooden spoon stir and sauté for about one minute.
Place in a bowl and set aside until ready to use.

img_5503

Korean-Style Fried Chicken Wings

Super Bowl LI is just around the corner and thinking about it is making me crave fried chicken wings. Buffalo chicken wings with blue cheese dressing is the quintessential Super Bowl party food and I guarantee there will be a large platter at somebody’s Super Bowl party. For this Super Bowl Sunday, if you want to change things up, you can prepare this Korean version with a soy-garlic glaze. The chicken wings are crispy, sweet, salty, and garlicky with an umami kick. This recipe was inspired by my favorite chicken wings at Kyochon in Koreatown Los Angeles. There were many Kyochon take-out nights back when I lived in LA and ordered both soy-garlic and the spicy ones. I created recipes for both versions, but decided to share this soy-garlic wings since it’s more kid-friendly.

To ensure the perfect fried chicken wings, there are few important techniques: 1) Dry-brining ensures even seasoning through out each wing. 2) Keep the chicken wings as dry as possible before dredging them in cornstarch. This step helps create a thin crispy skin on each wing. 3) Keep the temperature as constant as possible. If you let the oil temperature drop too much, the chicken will get soggy. You may want to fry the wings in three batches, recalibrating the heat of the oil after each batch. Using a candy thermometer will help you get consistent results. Follow these tips and I guarantee you’ll have some of the best chicken wings ever. Enjoy!


Korean-Style Fried Chicken Wings

Yield: 18-20 wings

2 lbs of organic chicken wings, frozen or fresh

1 teaspoon of Kosher salt

1 teaspoon of sunflower oil or organic Canola oil

2 garlic cloves, minced

1/2 teaspoon grated of ginger

1/4 cup of organic soy sauce

1/4 cup of water

2 tablespoons of Mirin

2 tablespoons of brown sugar

1/4 teaspoon of freshly grated black pepper

1/4 teaspoon of sesame oil

2 cups of sunflower or organic canola oil

1/2 cup of cornstarch

Black sesame seeds, optional

Cilantro and red pepper slices for serving, optional

1. If using frozen wings, place them in the refrigerator overnight to thaw.

img_5426
2. Place the chicken wings in a colander and drain any excess water. Place the colander over a large bowl. Sprinkle with 1 teaspoon of Kosher salt. Toss for even salt distribution.

img_5427

3. Loosely cover with plastic wrap and place in the refrigerator for 1 hour. This is the dry brining process.
4. Meanwhile, make the soy-garlic glaze. Heat a small sauté pan to medium-low heat. Add the teaspoon of oil, then the garlic. Sauté for 30 seconds.

img_5430
5. Add the rest of the ingredients. Whisk and cook for about 5 minutes until mixture thickens a bit. Set aside.

img_5431
6. After one hour, rinse the chicken wings in cold water. Pat dry with paper towels.

img_5429img_5433

7. Bring 2 cups of oil to 350°, either in the deep fryer or a wok.

img_5435

8. Dredge the chicken wings in the cornstarch.  Shake off excess cornstarch before placing  them in the fryer.

img_5434
9. Once the oil is at the correct temperature, place 1/3 to 1/2 of the coated chicken wings in the oil. (Tip: fry the drumettes separately from the wingettes to ensure even cooking. The wingettes fry a couple minutes quicker.)

img_5438
10. Deep fry for about 15 minutes or until crispy and golden. Turn them around a couple times with tongs for even browning.

img_5440

11. Transfer the fried chicken to a colander lined with paper towels. Return oil to 350° and repeat with another batch of chicken wings.

img_5451
12. Take the reserved soy-garlic glaze and brush each chicken wing with a barbecue brush until completely coated.

img_5452

13. Place on a serving plate and serve immediately.

img_5458

Turmeric Almond Milk

Most of us had our fair share of holiday indulgences these past few weeks – overeating, drinking, taking naps and staying indoors to stay warm. Now that the New Year here, it’s time start eating right again and get back into shape. One of the resolutions on my list is to alter my diet and reduce the inflammation in my body. According to my dad, there are many things, both in our diet and environment, that can cause inflammation. He is a raw food vegan and a former Chinese herbalist who treats minor health issues with natural supplements and herbal extracts. Considering that he’s in his mid-70s without any ailments or major pain and isn’t on any medication, I consider him a pretty good source for this type of information. He has given me advice on different food products that help reduce inflammation and he was touting the health benefits of turmeric before it was all the rage.

Many pressed juice companies currently offer an anti-inflammatory drink with turmeric as one of the main ingredients. One of my favorite drinks with turmeric is the “Golden Milk” at Erehwon Natural Foods Market make with almond milk, turmeric, and other spices. It’s creamy and has lovely sweet spices, but it is pricey. Being that I am the recipe sleuth, I created my own version with the same flavor profile at a fraction of the cost. I used to buy my turmeric roots either at the Indian or Asian market but now you can find it at Sprouts and Trader Joe’s. Note that this recipe does require you to soak the almonds overnight, or you can purchase pre-made almond milk at the grocery store – just make sure it’s organic. Here’s to the beginning of a happy and healthy 2017. Enjoy!

Turmeric Almond Milk

Serves 2

2 cups of homemade organic almond milk (recipe below) or unsweetened almond milk

1 tablespoon of freshly grated turmeric

1/2 teaspoon of black peppercorns, crushed

6 cardamom pods, crushed

1/4 teaspoon of ground cinnamon, extra for serving

2 teaspoons of raw honey, optional

Sea salt

Freshly grated black pepper


1. In a medium saucepan, add the almond milk, turmeric, peppercorns, cardamom pods and ground cinnamon.

img_5412

2. Stir and bring it to a boil over medium-high heat. Once it comes to a boil, turn off the heat. Let the spices steep for 5 minutes.

img_5414img_5415

3. Place a small sieve over a glass bowl with a spout. Pour the steeped almond milk through the strainer. Add the honey if you’re using it.

img_5416

4. Divide into 2 serving glasses or cups. Sprinkle some cinnamon, some grated black pepper and a pinch of sea salt. Serve immediately.

img_5417


Homemade Organic Almond Milk

Yield: 4 1/2 cups


1 cup of organic raw almonds

4 1/2 cups of fresh spring water or filtered water

1/2 teaspoon of sea salt

1. Place the raw almonds, salt, and 2 cups of water in a bowl. Let it sit overnight.

img_5400

2. The next day, drain the almonds in a colander and give them a good rinse.

img_5402

3. In a large blender, add the almonds and 4 1/2 cups of fresh spring water. Blend on high speed for about until smooth, about 2 minutes. (Make sure your blender can handle all the water and almonds, otherwise, blend in 2 batches.)

img_5403img_5404
4 . Once the almond milk is ready, pour into a chinois or a fine mesh sieve over a large bowl.

img_5405img_5406

5. Transfer the almond milk to a glass jug. You can add a little vanilla extract or almond extract for more flavoring. The almond milk keeps in the refrigerator for up to 3 days.

img_5410

Shanghai-Style Sautéed Rice Cakes

It’s the 1st day of 2017. It is tradition in the Korean culture to eat rice cake soup (tteokguk or ddukgook). Come New Year’s day, my mom always had a piping hot bowl of rice cake soup with dumplings waiting for us at the table. It was comforting and delicious. Now that I live in the San Gabriel Valley, Chinese food has influenced my cooking greatly. The same rice cake ovalettes my mom used in her tteokguk is sautéed in with pork and napa cabbage in many of the local Chinese restaurants. The dish is more commonly known as shanghai-style rice cakes. I’ve always wanted to make this dish and so with the rice cake ovalettes that My mom bought me from the Korean market, I decided to make my version of this dish without the pork. I was pleased with the results and now sharing my recipe with you. The rice cakes are nice and chewy and full umami flavor from the mushrooms and oyster sauce. This recipe cooks quickly so prep all your ingredients in advanced. If you want to make the dish completely vegetarian, they offer a vegetarian version of the oyster sauce at your local Chinese market. Enjoy. (Mom, I saved the other half of the bag for tteokguk later tonight.)
Happy New Year!

Shanghai-Style Sautéed Rice Cakes

Serving size: 4

1 1/2 Tablespoons of oyster sauce or vegetarian oyster sauce
1 Tablespoon of organic soy sauce
1 teaspoon of chili oil*
1 teaspoon of Mirin
Sunflower seed or organic canola oil
2 garlic cloves, minced
8 ounces of fresh cremini or shiitake mushrooms, stems removed and sliced
Kosher salt, pinch
2 cups of chopped yu choy* or heirloom spinach
12 ounces of rice cake ovalettes*
Freshly grated black pepper
2 scallions, thinly sliced on a bias
1 red jalapeño pepper, thinly sliced (optional)

1. In a small bowl, add the oyster sauce, oyster sauce, chili oil, and Mirin. Stir well with a fork and set aside.

2. In a large pot add 2 quarts of water and bring it to boil. Meanwhile, heat a large sauté pan or wok to high heat.
Add 1 Tablespoon of oil. Add the chopped garlic and sauté for 15 seconds

3. Add the mushrooms and pinch of salt and sauté until most of the moisture evaporates, about 3 minutes. The mushrooms will be golden brown. Transfer the cooked mushrooms in a bowl and set aside.

img_5374img_5375

4. In the same pan, on high heat add 1 more Tablespoon of oil. Add the chopped choy. And sauté for 1 minute. Add the mushrooms back to the pan.

img_5376img_5377
5. Meanwhile, to the boiling water, add the rice cakes. Boil for one minute.

img_5378

6. Using a spider strainer, remove the boiled rice cakes and transfer them to the pan with mushrooms and yu chow.

img_5379

7. Add the oyster sauce mixture and some freshly grated black pepper.

img_5380

8. Sauté for one minute until all the rice cakes are coated with the sauce.

img_5382

9. Add the chopped scallions. Give the rice cakes a quick stir.

10. Transfer to a serving plate and top with sliced red peppers, if using. Serve immediately.

img_5389

* You can find most of these ingredients at your local Chinese markets.

img_5372img_5370img_5373

Pork and Potato Hand Pies

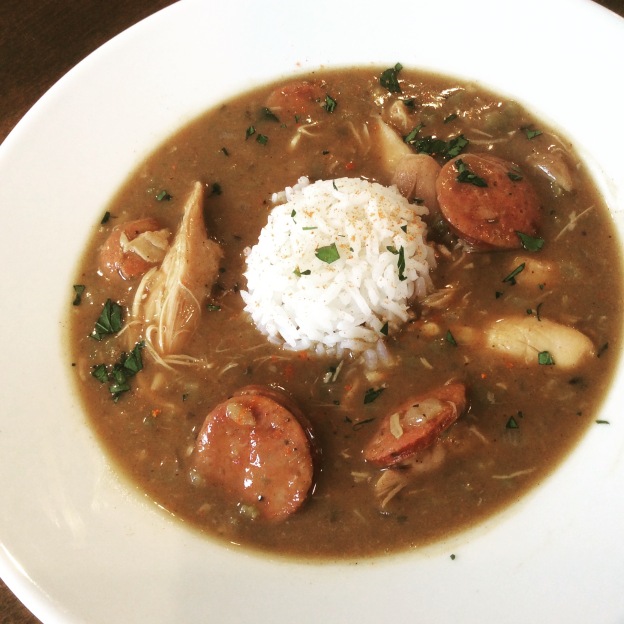
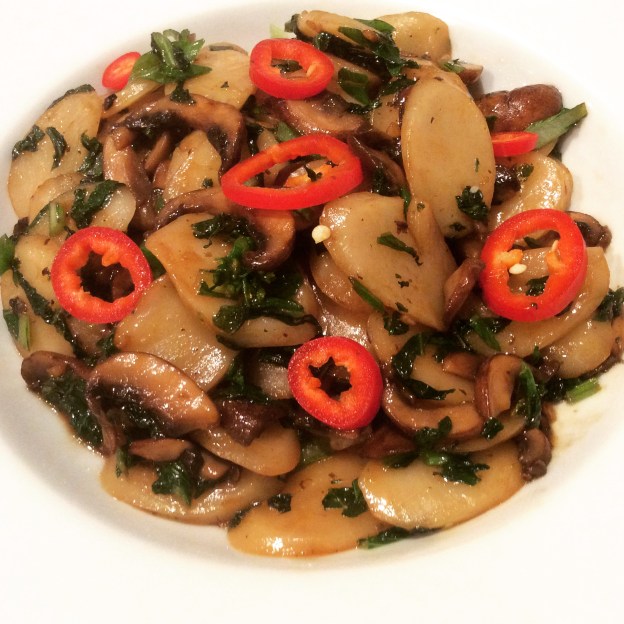
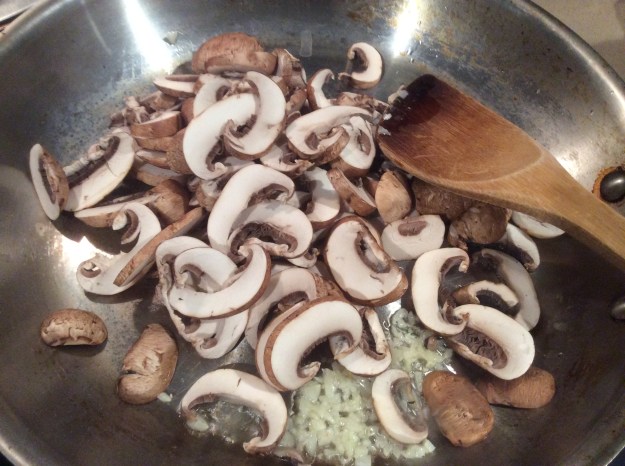
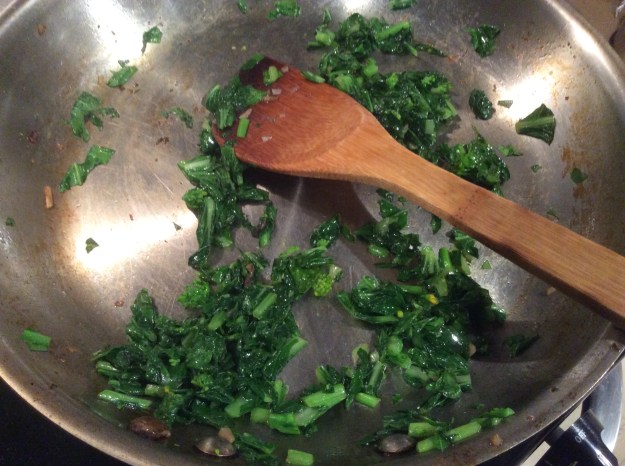
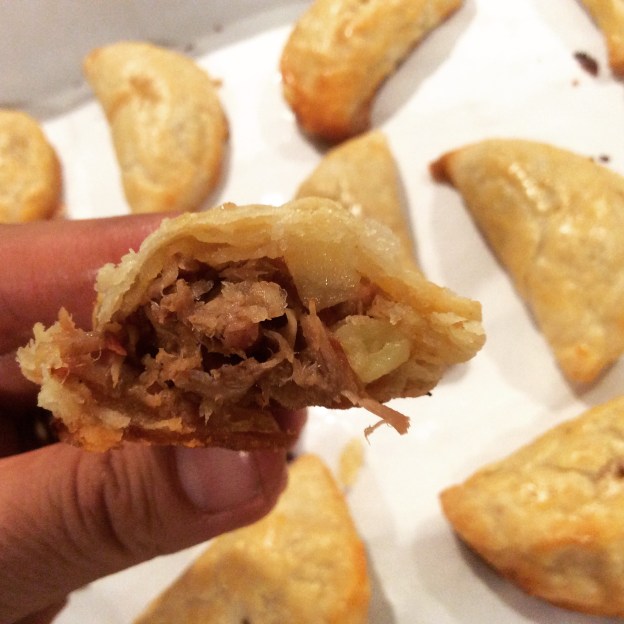
When I think of hand pies, my mind always goes to ones with a sweet filling – the apple pies at McDonald’s, the Hostess cherry pies, even Pop-Tarts – but every so often I crave a good savory meat pie. Many cultures have their own version of this dish: baked pierogis from Poland, salteñas from Bolivia, pasties from the UK, or pâté chaud from Vietnam, to name a few. I tend to make mine in the style of Argentenian empanadas, and my meat of choice when it comes to savory pies is almost always pork.

My hand pie recipe is made with a traditional pie crust, braised pork and potato filling. The pork is slowly braised in beer and chicken stock with lots of fragrant spices. This produces a tender and moist filling full of flavor. The addition of potato to the filling helps absorb some of the juice from the pork during the baking process. The creamy potatoes also add a layer of richness to the pies. If you are pressed for time, I encourage you to use store-bought pie dough as it produces good results as well. This hand pie recipe is perfect to make with family members and friends during the holidays or for your next potluck. Enjoy and Happy Holidays!


Pork and Potato Hand Pies

Yield: About 4 dozen


Flaky pie dough (recipe below) or 2 packages of pre-made refrigerated pie dough

1 recipe of beer-braised pork shoulder, shredded and cut into smaller pieces (recipe below, make 1 day in advance)

1 recipe for chopped potatoes with cream (recipe below)

1 large egg

2 tablespoons of cream

Pinch of sea salt


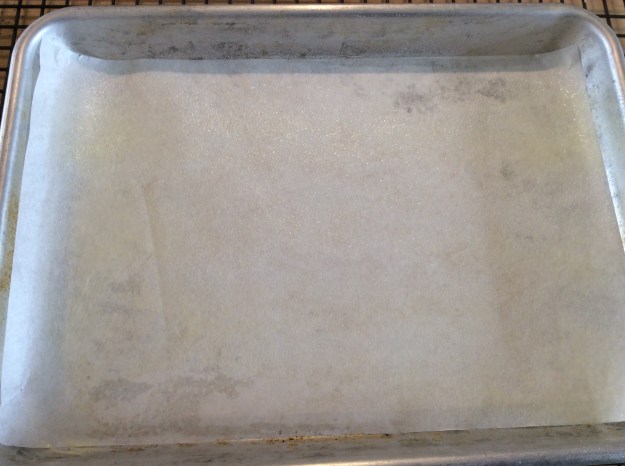
1. Line 3 large baking sheets with parchment paper. Set aside.

2. Lightly dust a work station. Roll out the pie dough to 1/8″ thickness. Cut the dough into circles using a 3 1/2″ circular cookie cutter. Cover with plastic wrap to prevent the cut dough from drying out.

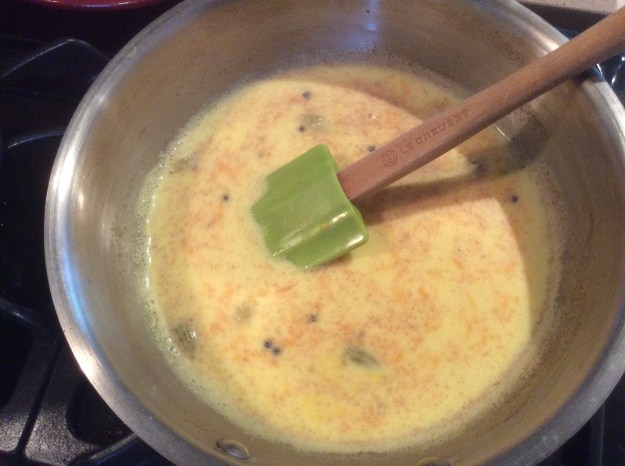
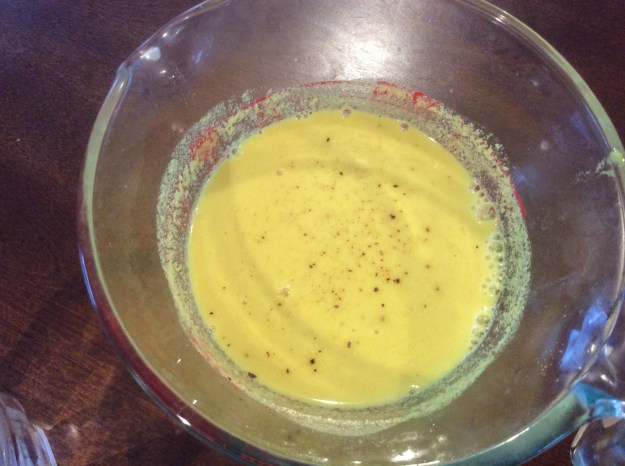
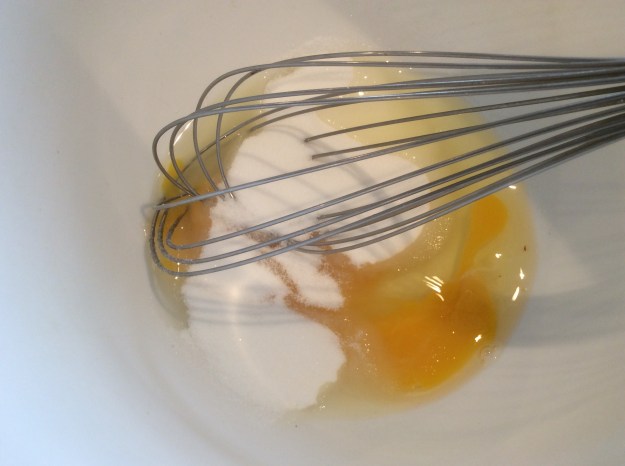
3. Whisk together the egg, cream and a pinch of salt. Set aside.

img_5182

4. Create an assembly line of the braised pork, potatoes, and egg wash.

img_5180

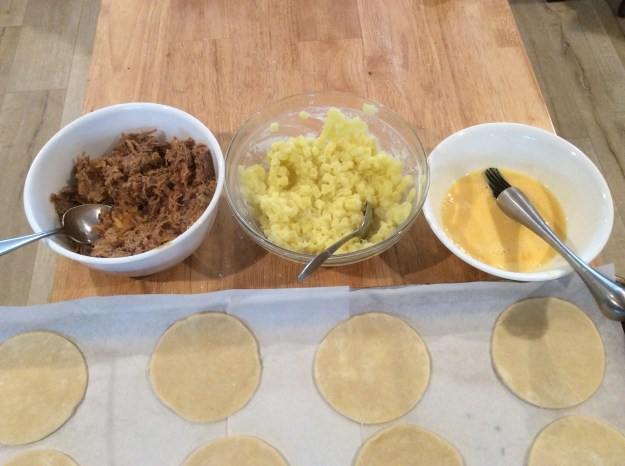
5. Place about 1 heaping tablespoon of pork and 1 heaping teaspoon of potatoes in the center of the pre-cut dough.

img_5183img_5184

6. Brush half of the edges with egg wash. Fold and press to seal. Repeat the process until you have 1 tray ready, which will be about 12-16 hand pies.

7. Preheat the oven to 350°.

8. Using the tines of a fork, pierce once in the center of each assembled pie.

img_5186

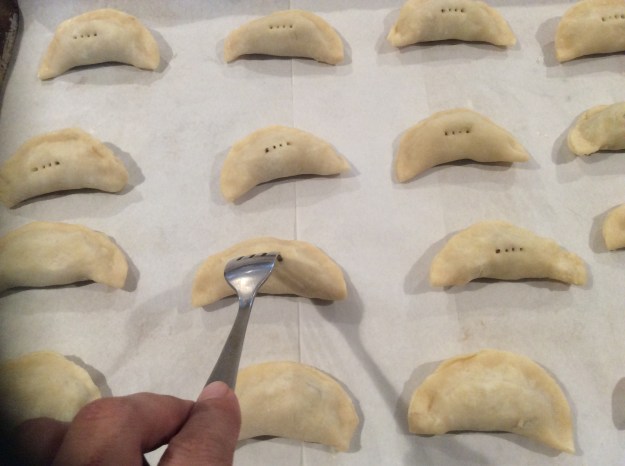
9. Brush with egg wash.

img_5188img_5171

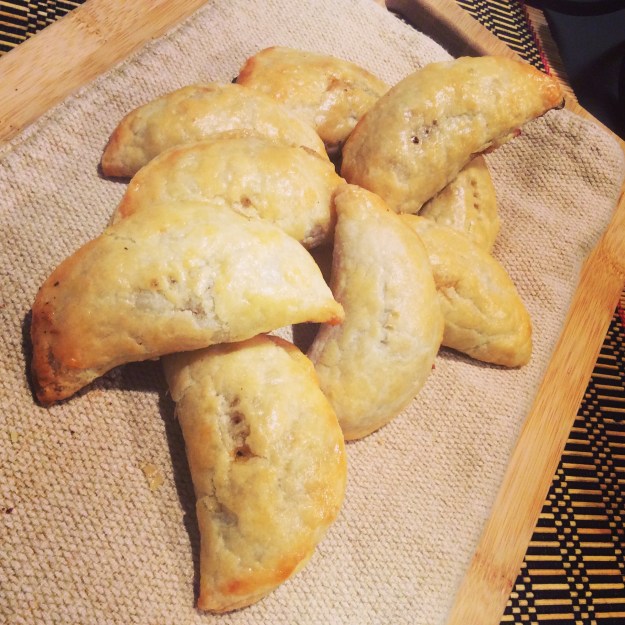
10. Bake in the oven for approximately 20-25 minute until they are a nice golden brown.

img_5173

11. Cool on a rack for 10 minutes. Serve warm or at room temperature.

img_5191img_5195
Braised Pork Shoulder Filling

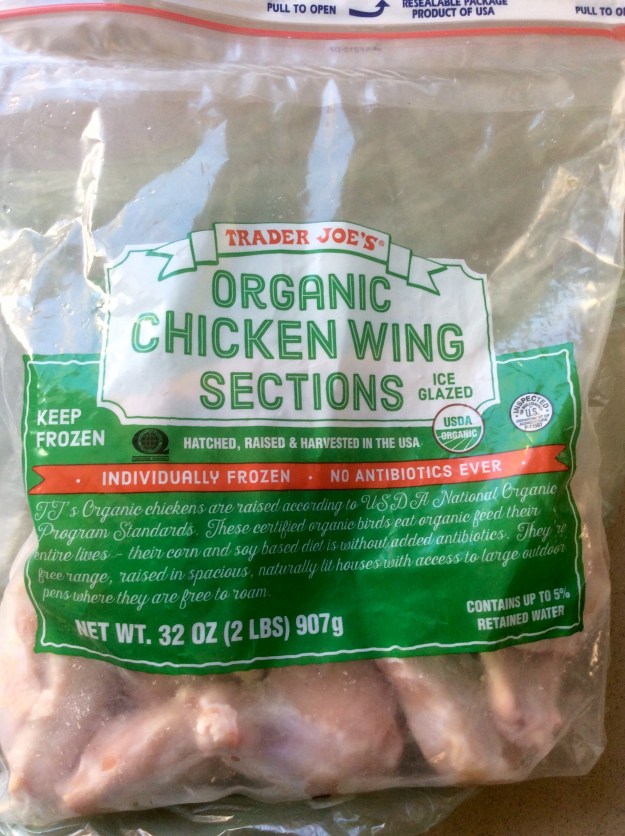
3 lbs. of pork shoulder

Olive oil or other vegetable oil

1 tablespoon of Kosher salt

1 teaspoon of brown sugar

1 teaspoon of sweet paprika

1 teaspoon of ground coriander

1 teaspoon of ground cumin

1/2 teaspoon of ground cardamom

1/2 teaspoon of freshly ground pepper

2 sweet yellow onions, 1/2″ slices

5 cloves of garlic

2 fresh or dried bay leaves

1 bottle of light beer (like a Stella Artois or Corona)

2 cups or more of chicken stock

1/2 packet of gelatin

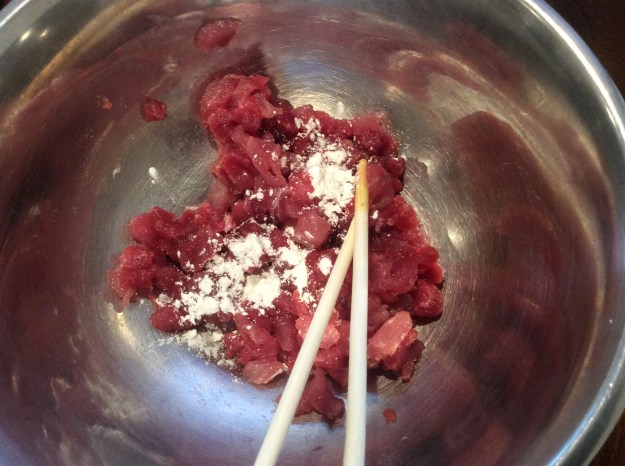
1. In a small bowl, combine the salt, paprika, coriander, cumin, cardamom, and black pepper. Rub mixture on the pork, then let sit at room temperature for 30 minutes.

img_1189

2. Preheat the oven to 450°.

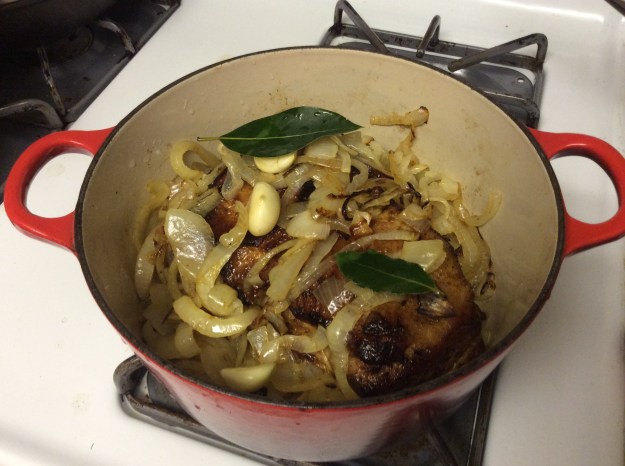
3. Toss the onion and garlic cloves in olive oil and place on a baking sheet. Roast for 20-25 minutes and remove from the oven. You want them slightly charred.


4. Reduce the heat of the oven to 300°.

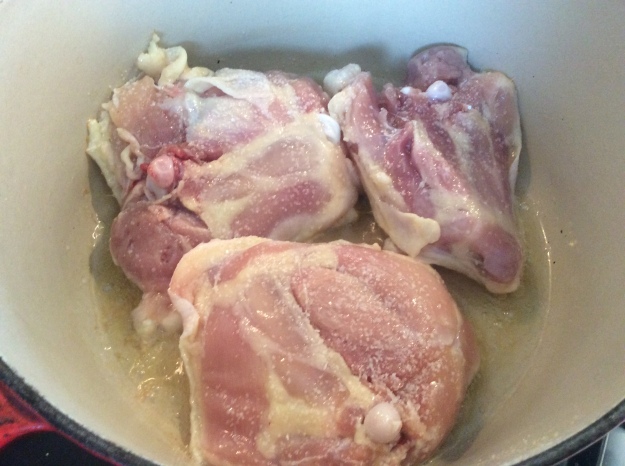
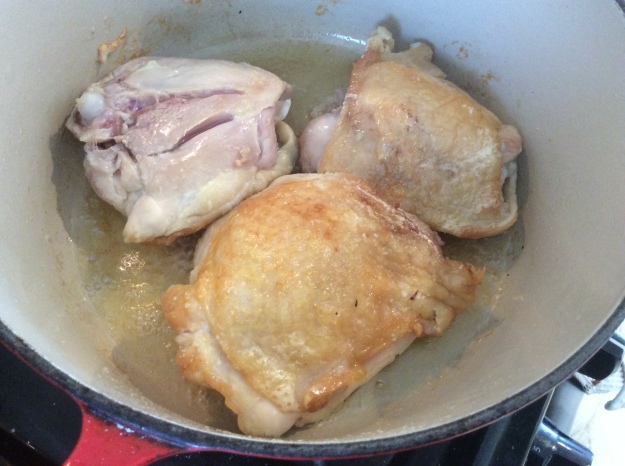
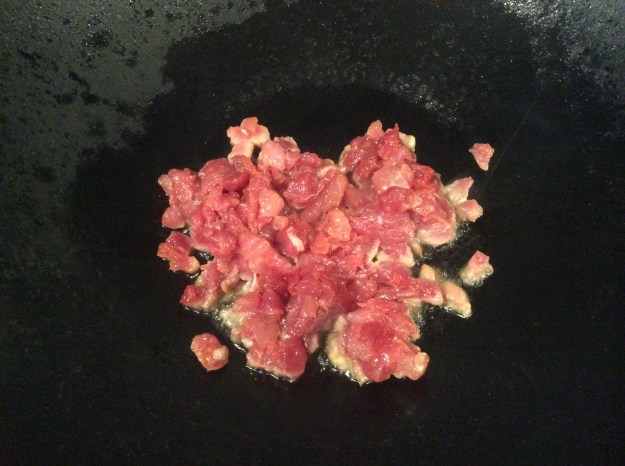
5. Meanwhile, heat a Dutch oven to high heat over a stovetop. Add about 1 tablespoon of oil. Get a good sear on the pork on all sides.

img_1190

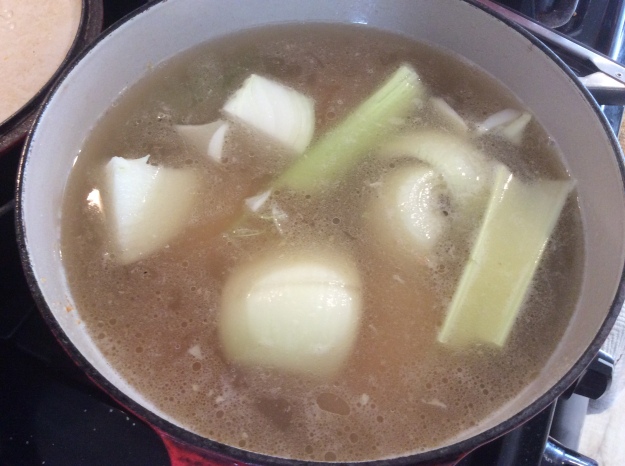
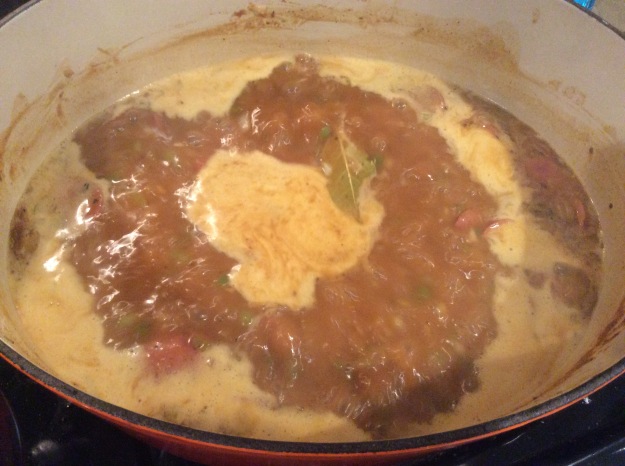
6. Add the roasted onions and garlic to the pot, along with 2 bay leaves. Pour the beer over the pork and onion mixture. Top off with chicken stock to cover the pork. Cover with lid.

img_1191img_1192

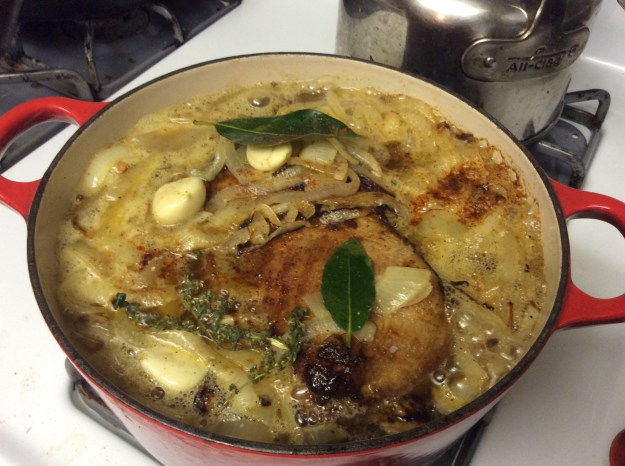
7. Braise in the oven for approximately 5-6 hours. Check progress at the 4 hour mark. The filling is done when the meat falls apart.

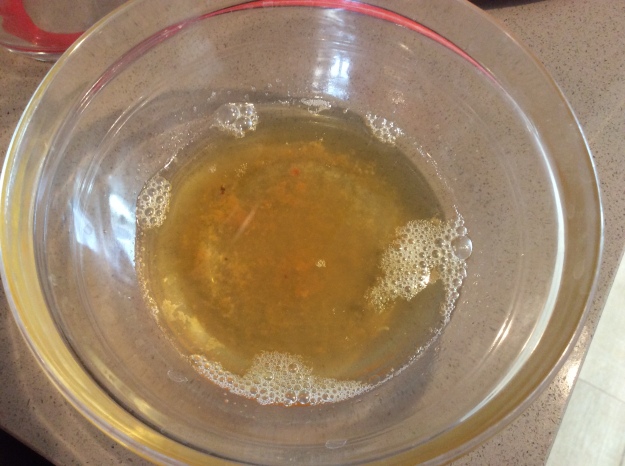
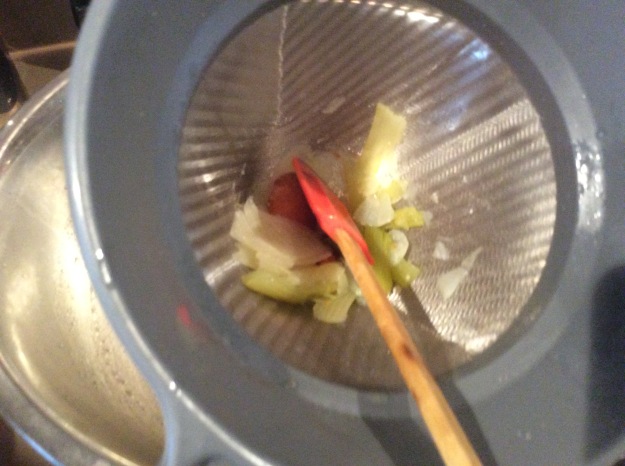
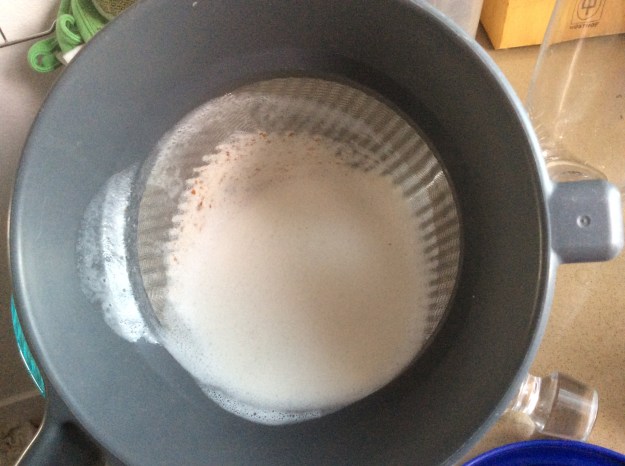
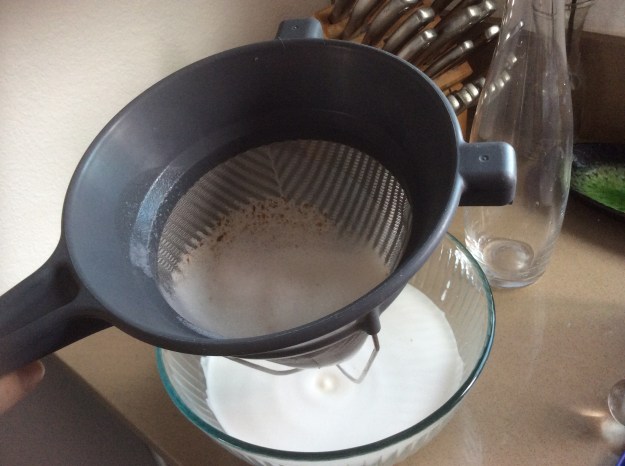
8. Remove the bay leaves and discard. Remove the pork and set aside. Strain the broth through a chinois, pushing down the solids with a wooden spoon to extract as much of the liquid as possible. Place the pork back into the pot and refrigerate overnight.

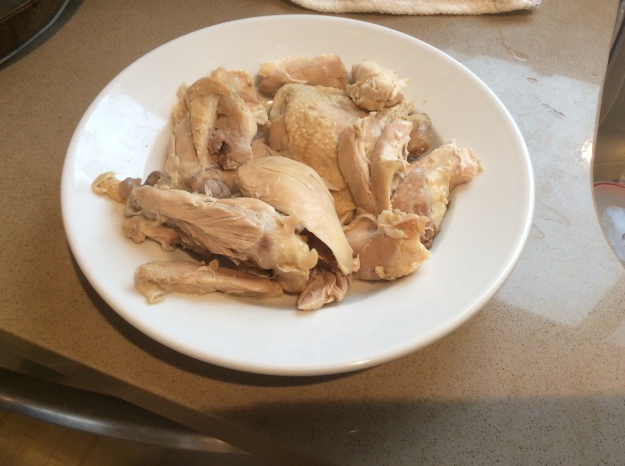
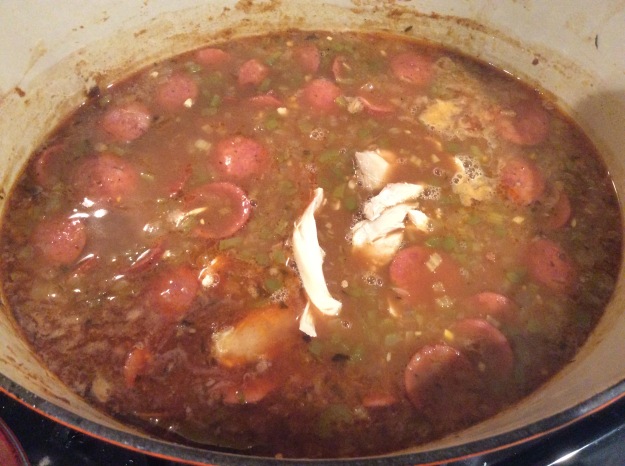
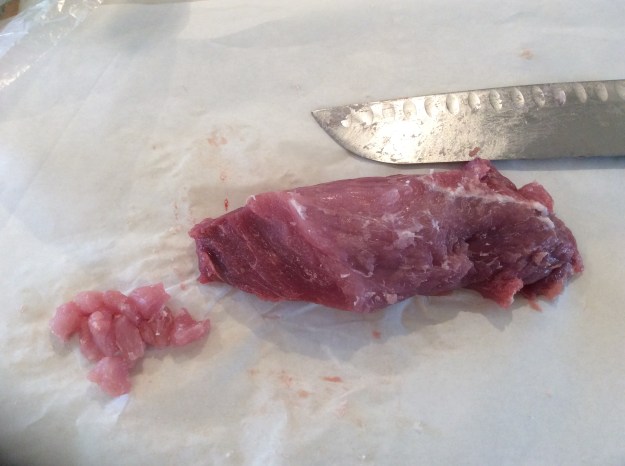
9. The next day, remove the harden fat layer on top of the broth with a spoon and discard. Remove the pork and shred and cut any long pieces with kitchen shears. Set aside.

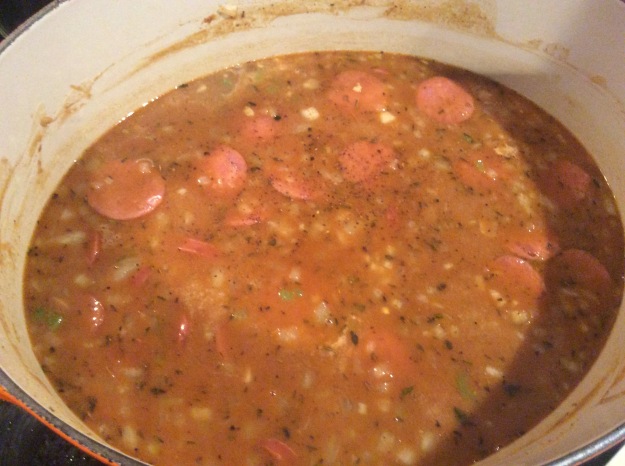
10. Place the broth pot back on the stove and boil over high heat until it is reduced by half. Stir the gelatin into 2 tablespoons of cold water and then stir into the broth. Place the pork back into the pot. Taste for seasoning and add salt and pepper as needed.

11. Cool at room temperature for 30 minutes and then refrigerate until completely cooled before using.


Potatoes and Cream Filling

3 cups of Yukon gold potatoes, chopped into 1/4″ dice (about 2 small potatoes)

Kosher salt

3 tablespoons of heavy cream

Freshly ground pepper to taste

1. Put 1 1/2 quarts of water in a medium pot. Bring to boil.

2. Add Kosher salt until it tastes like the ocean, about a small handful.

3. Add the chopped potatoes and boil for approximately 5 minutes. Drain and transfer to a medium bowl.

4. Stir in cream and taste and add salt if needed. Add a couple turns of the pepper mill. Stir again and cover with plastic wrap and refrigerate until ready to use.
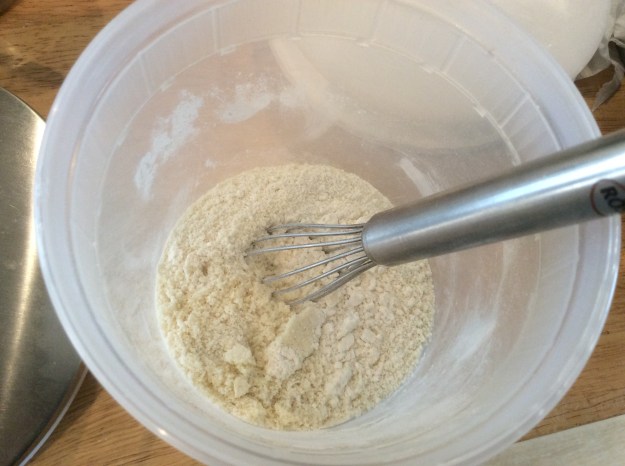
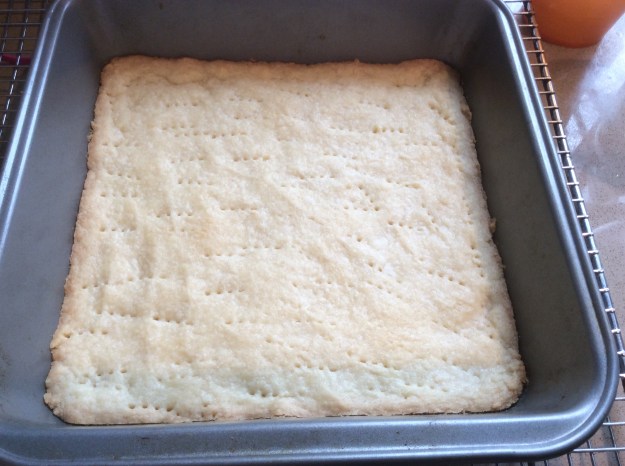
img_5178


Pie Crust

4 cups of unbleached all-purpose flour

1/4 cup of sugar

1 1/2 teaspoon of Kosher salt

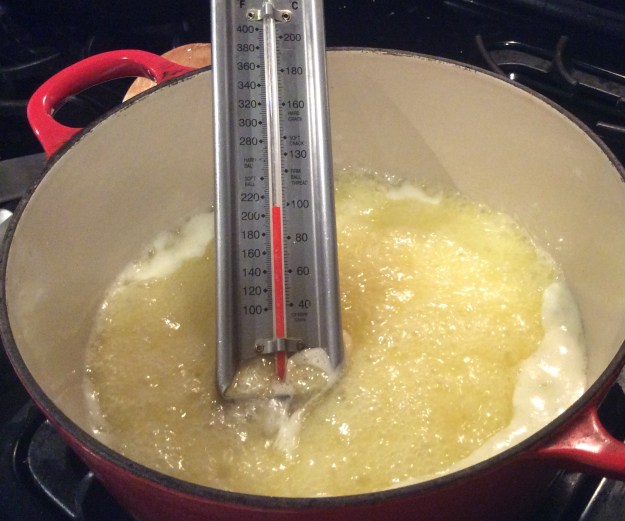
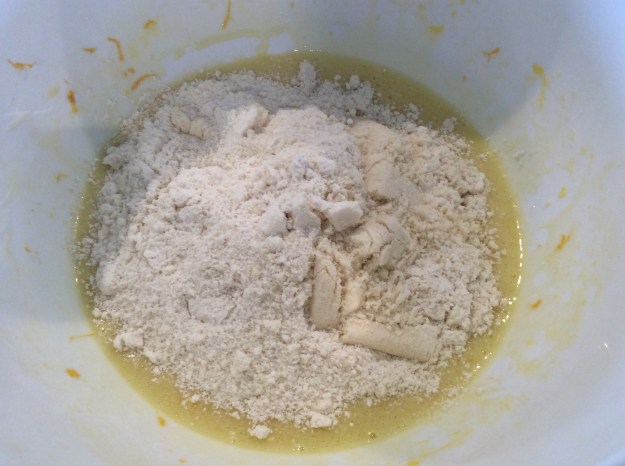
1 pound of cold unsalted butter, cut into cubes

2/3 – 3/4 cup of cold ice water


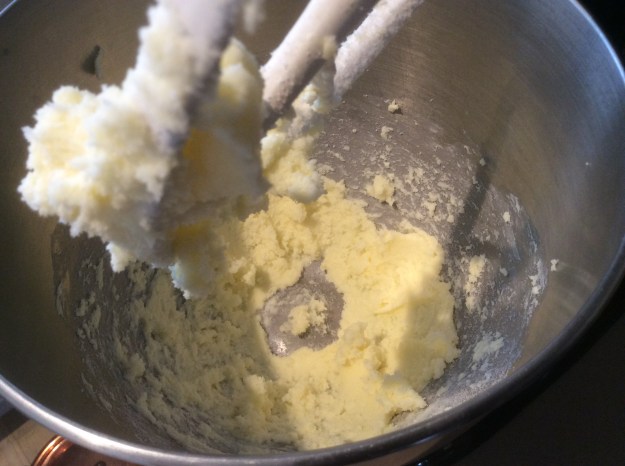
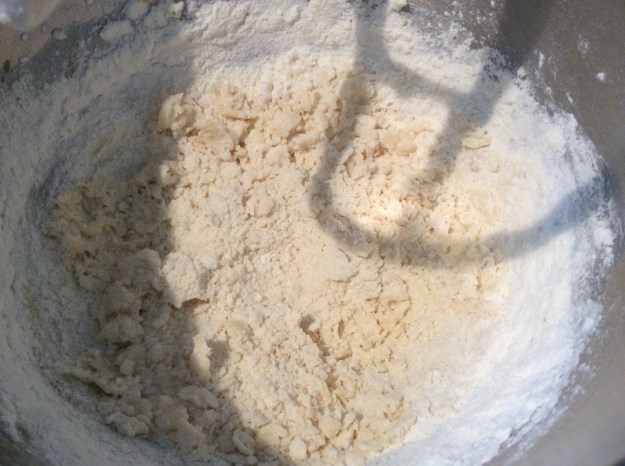
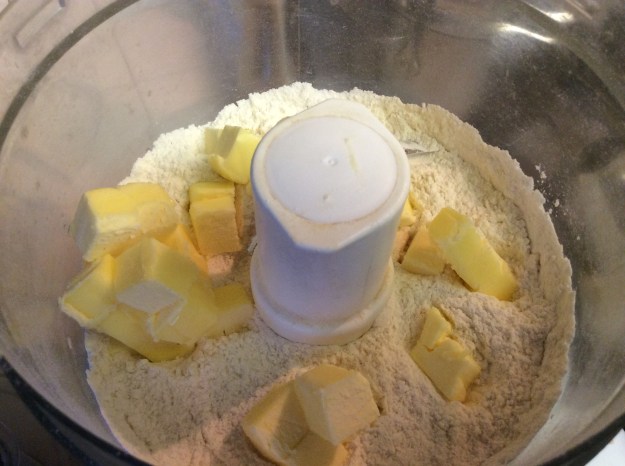
1. Add the flour, sugar, and salt in the food processor. Pulse a few times.


2. Add the butter pieces. Pulse a few more times until the butter pieces are incorporated, but still visible.

image

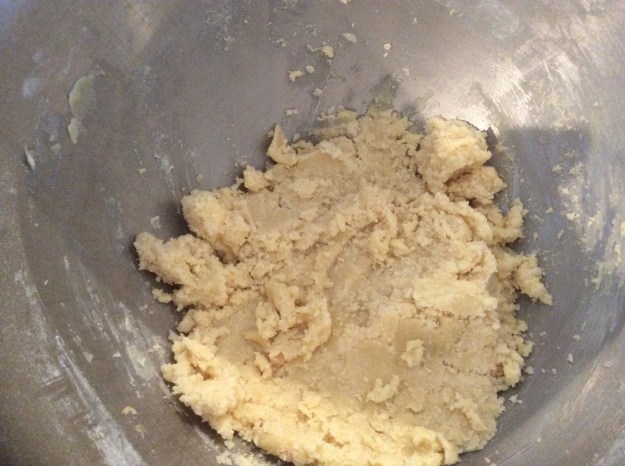
3. Slowly add the cold water while pulsing.

image

4. Stop once the dough comes together.

5. Transfer to a lightly-dusted workstation. Knead until the flour comes tougher.

image

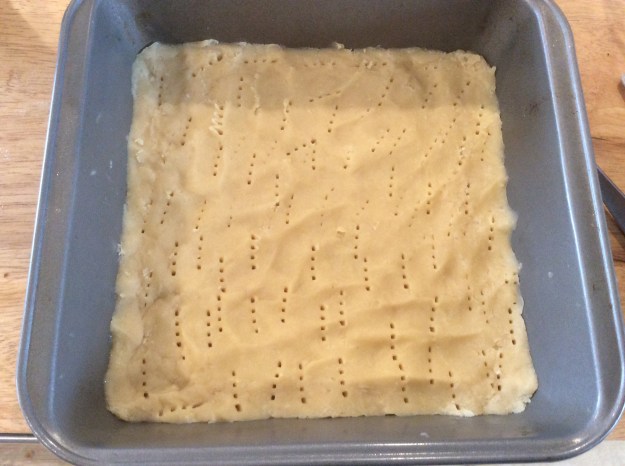
6. Divide the dough into 2 equal parts and roll the dough into disks.

7. Double wrap in plastic and place in the refrigerator for up to 2 days.

Raspberry Almond Cake Bars

I love the flavor of almond in baked goods. Frangipane, marzipan, almond paste, shaved almonds – however the almond flavor gets in there is fine with me – so it should come as no surprise that my favorite flour to bake with is almond flour. I love the richness that it adds to baked goods, and because of the natural oils from the almonds, you use less fat in your recipes. A few years ago, I tried a Bakewell tart with frangipane, raspberry jam and icing. The tart, which originated in England, was delicious, but little too sweet and rich for my taste. I loved the combination of flavors but wanted a lighter version, so I decided to create my own. The bottom layer is a crispy shortbread crust, the filling is a raspberry jam, and the top is a moist almond cake made with olive oil and Meyer lemon zest. These bars are perfect for breakfast, afternoon tea, or a late-night snack. Enjoy!

Raspberry Almond Cake Bars

Yield: 9 large bars or 16 small bars

Non-stick baking spray


Shortbread Cookie Crust

1 stick of unsalted cold butter, cut into 16 cubes

1/4 cup of sugar

1/4 teaspoon of Kosher salt

1 teaspoon of vanilla extract

1 cups of unbleached all-purpose flour


Almond Cake Layer

1/2 cup of unbleached all-purpose flour

3 ounces of almond flour

1 teaspoon of baking powder

1/4 teaspoon of Kosher salt

2 large eggs

1/2 cup of sugar

1 teaspoon of almond extract

1/2 teaspoon of vanilla extract

3 tablespoons of whole sour cream

1/3 cup of extra virgin olive oil

1 teaspoon of Meyer lemon zest


Filling

1/2 cup of raspberry jam (Bonne Maman is my preferred brand)

1/2 teaspoon of organic cornstarch


Topping

1/8 cup of toasted sliced almonds

Organic confectioners sugar for dusting, optional


1. Preheat the oven to 325°. Grease an 8″ x 8″ baking pan with non-stick spray.

2. To make the shortbread, add the butter pieces into a stand mixer with paddle attachment. Beat on medium-low speed for 1 minute.

img_5256

3. Add the sugar and beat for about 2 minutes until creamy. Using a rubber spatula, scrape the sides of the bowl. Add 1 teaspoon of vanilla extract and 1/4 teaspoon of the salt. Beat until just combined.

4. Reduce the speed of the mixer to low and slowly add 1 cup of the flour. Mix until most of flour has been absorbed by the butter-sugar mixture.

img_5257

5. Using your hands, press down on the shortbread so the mixture comes together.

img_5258

6. Transfer to the greased pan and press down evenly to create the shortbread crust. Using the tines of the fork, create holes throughout the crust.

img_5260

7. Bake in the oven for about 20 minutes

8. While the shortbread is baking, add 1/2 cup of flour to a medium bowl. Whisk in 3 ounces of almond flour, 1 teaspoon of baking powder, 1/4 teaspoon of salt. Set aside.

img_5263

9. In a large bowl, whisk the 2 eggs and the sugar until combined. Add the almond extract and 1/2 teaspoon of vanilla extract. Whisk again.

img_5261

10. Add the sour cream and olive oil and whisk until smooth.

img_5265

11. Add the flour mixture and fold in with a rubber spatula until no lumps are present. Set aside.

IMG_5268.JPG

12. Remove the par-baked shortbread from the oven. Let cool for 5 minutes.

img_5267

13. Increase the temperature of the oven to 350°.

14. Add the cornstarch to the raspberry jam and whisk well.

img_5269

15. Spread the jam evenly over the shortbread, leaving 1/4″ border.

img_5270img_5271

16. Carefully spoon the cake mixture over the jam and smooth out with a rubber spatula.

img_5272

17. Sprinkle with toasted sliced almonds.

img_5274

18. Bake in the oven for 35-40 minutes until golden brown. Use a toothpick to test the center for doneness.

img_5275

19. Cool on a wired rack for about 1 hour before cutting. Dust with confectioners sugar.

img_5282

20. Serve with coffee or tea. Leftovers keep well in an air-tight container for up to 3 days.

Cauliflower, Arugula, and Pomegranate Salad

My first job out of culinary school was working as a Garde Manger, a fancy French name for the chef of cold foods such as appetizers, salads, sandwiches, etc. It is an entry-level position that is offered to most recent culinary graduates. During my short stint working as a Garde Manger, I became an expert at making salads. Making salads is all about balance and creating layers of textures. I loved adding fresh seasonal produce in the salads: artichokes in the spring, peaches in the summer, roasted butternut squash during the fall, and persimmons in the winter. It was a fun challenge to incorporate seasonal ingredients and come up with new salad ideas.

In the spirit of the holidays, I offer you a lovely seasonal salad highlighting cauliflowers and pomegranate seeds. This vegetarian salad is crunchy, sweet, tart, and nutty. It’s also very pretty with Christmas colors of white, red and green. It’s a perfect salad to serve at your holiday meal or to take to a holiday potluck, as it will offset some of the greasy and heavy food at the table. Make sure you keep the toasted almonds, pomegranate seeds and dressing separate if taking to a party and assemble it on site. Enjoy!

Cauliflower, Arugula, and Pomegranate Salad

Serving Size: 6-8

12 ounces of organic cauliflower (about 1/2 head)

2 ounces of arugula leaves

1/2 cup of golden raisins

2/3 cup of pomegranate seeds*

1/3 cup of Parmigiano-Reggiano cheese shavings

1/3 cup of sliced almonds, toasted**

Vinaigrette (recipe below)

1. Slice the cauliflower into 1/4 inch pieces. You can use a mandolin, if you have one, to create uniform slices. Place them in a large salad bowl.

img_5213img_5216img_5217

2. Add the arugula, golden raisins, pomegranate seeds, Parmigiano-reggiano cheese, and the almonds.

img_5220img_5222

3. Dress the salad with the vinaigrette and toss lightly, making sure you don’t bruise the arugula. You may not need to use all of the dressing.

img_5235

4. Serve immediately.

*You can find pomegranate seeds at Trader Joe’s. They did all the  hard work for us.

img_5236


** Toast raw almond slices in the oven at 350° for 5-8  minutes


Vinaigrette Recipe

1/4 cup of red wine vinegar

1 teaspoon of finely chopped shallots

2 teaspoons of Dijon Mustard*

2 teaspoons of honey

2 tablespoons of extra virgin olive oil

1 teaspoon of sea salt

Freshly grated black pepper


1. Add all the ingredients in a mason jar or a dressing jar.

img_5225

2. Top with lid and shake until the dressing is emulsified and not separated. (Alternatively, whisk all the ingredients in a bowl until emulsified.)

3. If not using right away, you can store it in the refrigerator for up to 3 days.

*Trois Petits Cochon’s Dijon mustard not too spicy, so it is wonderful to add to dressings.

img_5227