Monthly Archives: February 2016

Apple Ricotta Fritters

Making donuts at home can be a major undertaking. There are so many steps involved: wake up early to make the dough, let it rise, roll it out, cut out circles, let them rise again, fry them (in lots of oil), and finally glaze them. I get tired just thinking about the whole process! Unless you have a large family, it’s a lot of work, especially when there are cheap donut shops everywhere. With that said, I’ve developed a shortcut for making donuts at home. Rather than make traditional donuts, I make yeast-free donut holes. There is no rise time with this dough and you don’t need to roll it out either. They are delicious and some of the easiest donuts you’ll ever make.

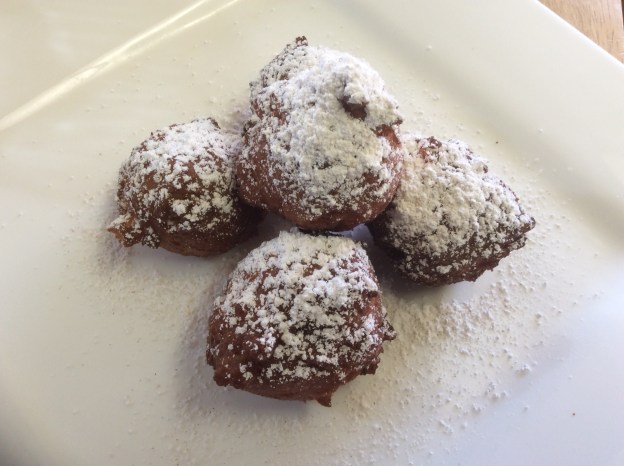
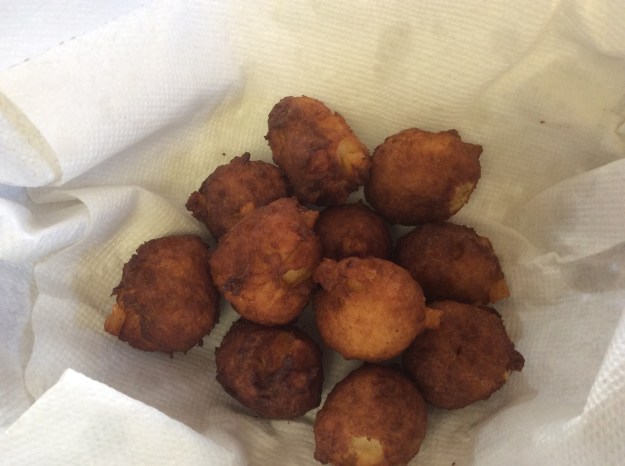
Here’s my recipe made into mini apple fritters. It is a baking powder-based dough, and the addition of ricotta gives these fritters a light and moist texture. All you need to do is scoop the dough right into the fryer, like hush puppies. I learned about ricotta fritters from Nancy Silverton (co-founder of Mozza and formerly owner of La Brea Bakery) when she visited my culinary school years ago. Unlike the cloyingly sweet and greasy apple fritters at your local donut shop, these are light, mildly sweet, and not oily. My son said they remind him of beignets.

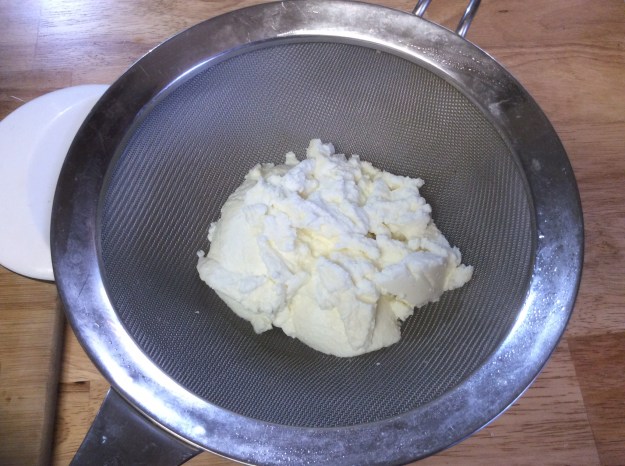
The recipe is pretty easy to follow, but please make sure you prep the ricotta the night before. And as with all my recipes, please read the entire recipe before you start. Happy frying!

Apple Ricotta Fritters

Yield: about 2 dozen

1 tablespoon of butter
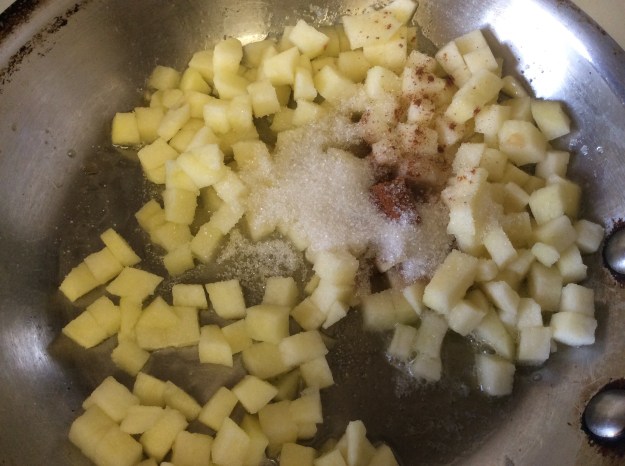
1 tart apple (pink lady, honey crisp or Granny Smith), medium-sized, cut into 1/4 inch cubes
21/2 tablespoons of sugar (divided)
1/2 teaspoon cinnamon
1 teaspoon Calvados* (optional)
3/8 teaspoon of Kosher salt
1 1/2 cups of sunflower oil
8 ounces of ricotta cheese (drained over a fine sieve or cheese cloth overnight)
1 cup of Sonora wheat flour or unbleached all-purpose flour
1 1/2 teaspoon of baking powder
2 large eggs
2 teaspoon of vanilla extract
1/2 teaspoon of organic corn syrup*
Coating
1/2 cup of organic confectioners sugar*
1 teaspoon of cinnamon

 
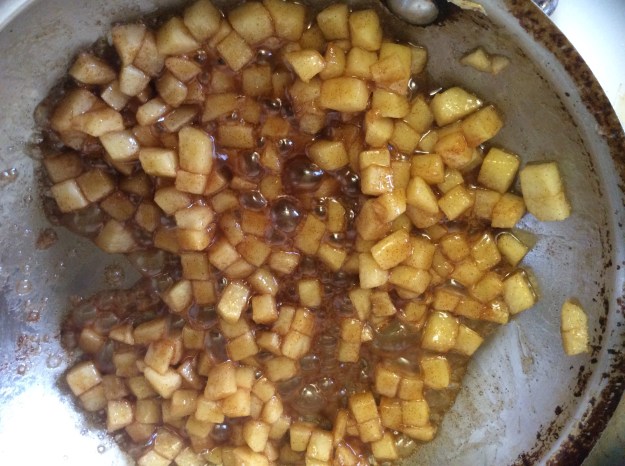
1. Heat a small sauté pan over medium heat. Add the butter until melted. Add the apple, 1 1/2 tablespoon of sugar, cinnamon, pinch of salt, and Calvados. Cook for 5 minutes, stirring occasionally. You want the apples to be soft and the sauce to be thick, syrupy in consistency. Transfer the apple mixture to a bowl to cool.

imageimage

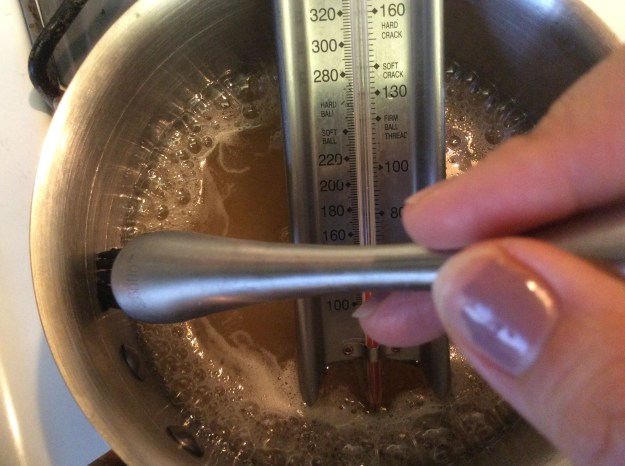
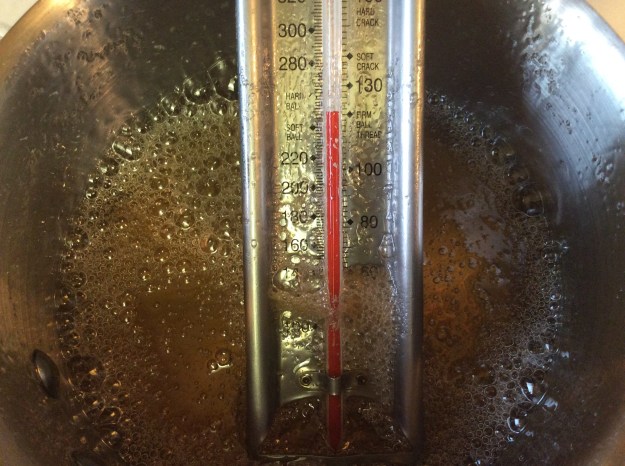
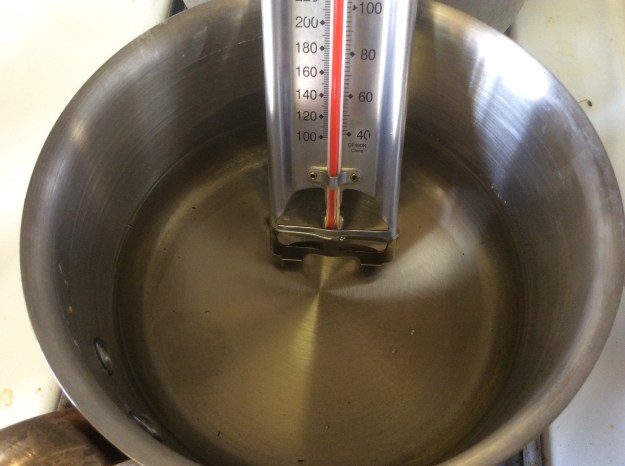
2. While the mixture is cooling, place the oil in a 1 quart heavy bottomed pan (copper or stainless steel ). Place a candy thermometer in the pan and bring the oil to 360°.

image

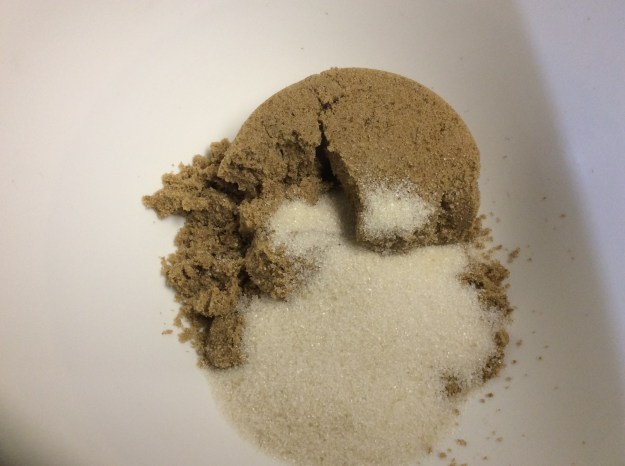
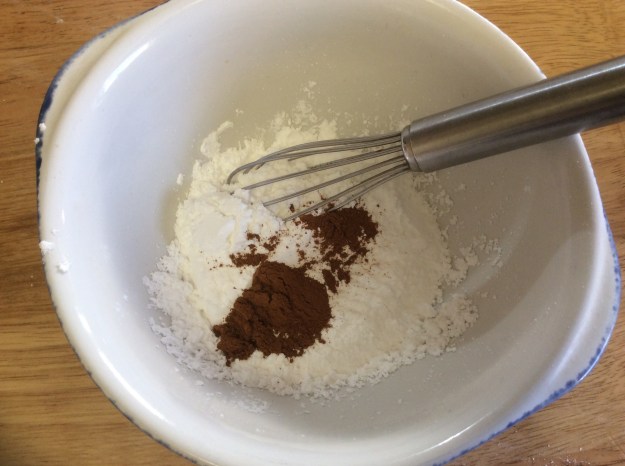
3. Meanwhile, in a large bowl, combine the flour, baking powder, 1 tablespoon of sugar and 1/4 teaspoon of salt. Whisk well.

image

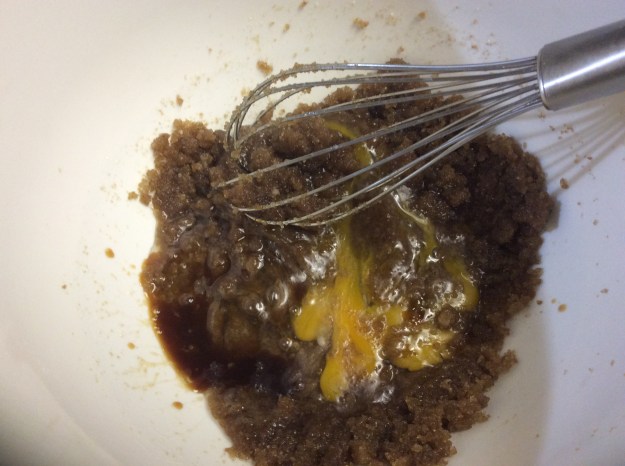
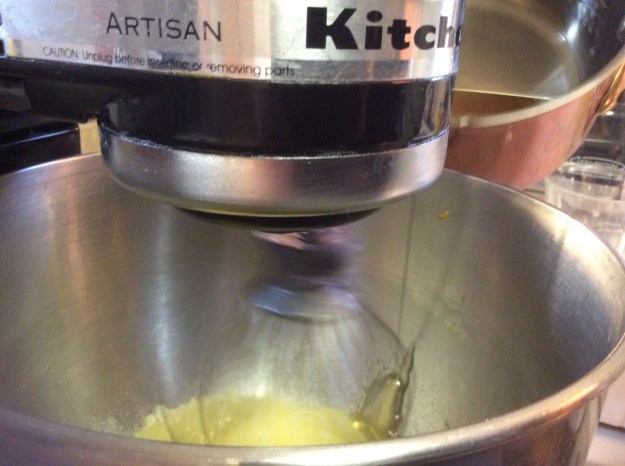
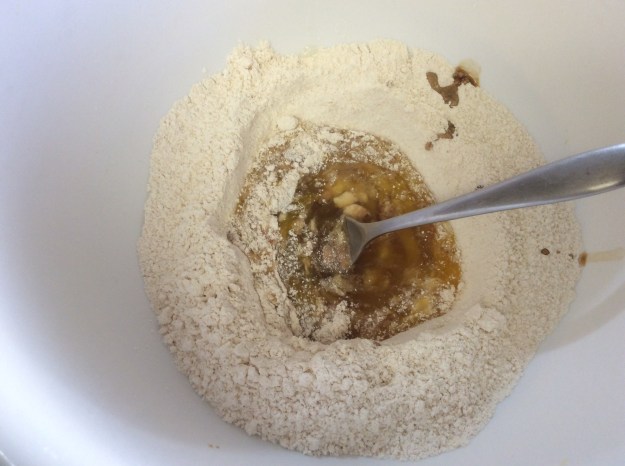
4.  Make a well in the center of the flour mixture. At the eggs, vanilla extract, and corn syrup. Using a fork, whisk the flour into the wet ingredients until just combined. Don’t over mix.

image

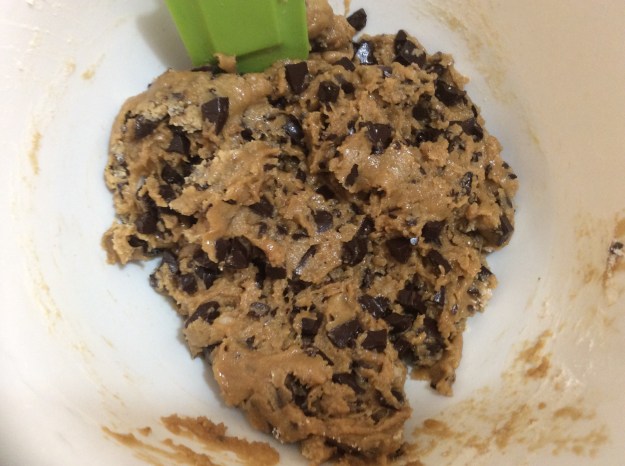
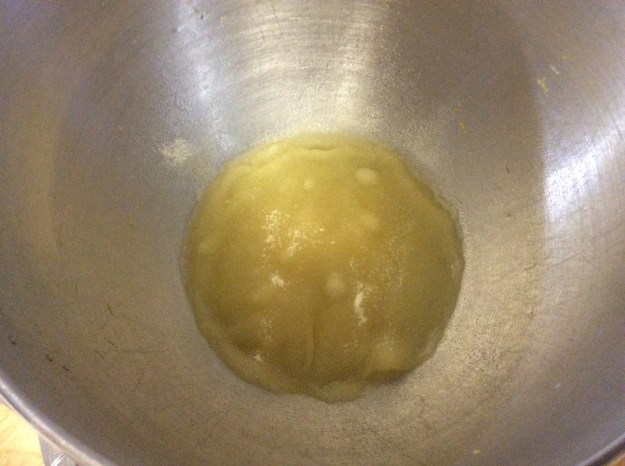
5. Add the ricotta, breaking it up into pieces with your hands. Using a rubber spatula, fold it gently into the flour mixture. You will see chunks of ricotta pieces. Don’t over mix.

imageimage

6. Next, fold in the cooked apples until just combined.

image


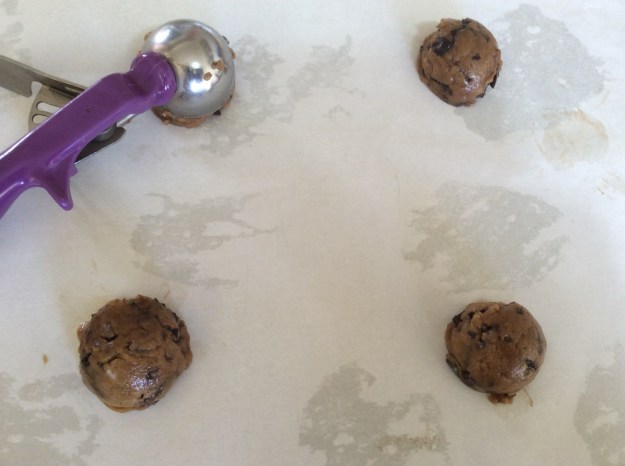
7. Using a 1 tablespoon-sized ice cream scoop, scoop 6 round balls into the hot oil. Do not get tempted to add more fritters or the oil temperature will drop and create an oily and soggy texture.

image

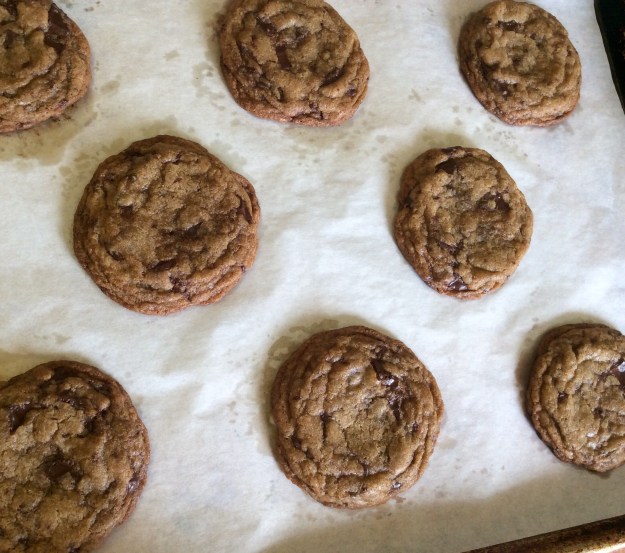
8. Fry them for about 1 minute and 30 seconds on one side and the turn them over and fry them for 1 more minute. You’re looking for a deep golden color.

image

9. Transfer fritters to a paper towel-lined colander and blot any excess oil.

image

10. Return the oil to 360° and fry 6 more fritters. Repeat this process until all the fritters are done.

11. In a small bowl whisk together the confectioners sugar and cinnamon.

image

12. Using a small sieve, dust the apple fritters with the powdered sugar mixture. Shake to coat evenly.

image

13. As with most fried food, they are best eaten when warm, but surprisingly these apple fritters still taste great hours after they’ve been fried. Enjoy them with a hot cup of coffee.

image

*Calvados is an apple brandy. You can find it in most large grocery stores.

*If at all possible, try to use organic corn-based products. Most of the corn syrup and cornstarch sold in the stores are GMO.

Advertisement

Dark Chocolate Chunk Cookies

The chocolate chip cookie is the quintessential American cookie. You can find chocolate chip cookies in most bakeries and every pastry chef has his or her own version. As simple as the chocolate chip cookie may seem, you’ll notice how every cookie is different. Some chocolate chip cookies are soft and cakey, while others are crispy and chewy. They also vary in size as well: thick or thin or big or small. Like many bakers, I have been in the search for what I consider to be the perfect chocolate cookie recipe. I’ve tested several dozen in my lifetime. After tweaking a couple of my favorites, I came up with this one.

This recipe will produce a soft and chewy cookie with a crispy edge. The secret to the chewy texture is the sugar ratio and the addition of cornstarch to the dough. The baking soda gives the cookie a nice crispy edge. Also, I use chocolate chunks instead of chocolate chips, so you get oozy chocolate with every bite. You won’t find any butter in this recipe, but trust me, you won’t notice the difference. And the best part about this recipe — you don’t need a mixer. Make a batch of these cookies and I guarantee you’ll make somebody happy. Enjoy!
Dark Chocolate Chunk Cookies

Yield: about 20 cookies

Ingredients

7 ounces of good quality dark chocolate or dark chocolate chips
1 1/3 cups of Sonora wheat flour or unbleached all-purpose flour
1/8 cup of organic cornstarch*
1/2 teaspoon baking soda
1/2 teaspoon of kosher salt
1/4 cup of sugar
2/3 cup of packed dark brown sugar
1/2 cup of coconut oil
1 large egg
1 teaspoon of vanilla extract


1. Chop the chocolate on parchment paper into 1/4 inch pieces. Place a sieve over a bowl. Using the parchment, transfer the chopped chocolate into the sieve. Set the chopped chocolate aside and save the collected chocolate powder for another use (like hot chocolate).

imageimage

2. Place the flour, cornstarch, baking soda and kosher salt into a small bowl. Whisk and set aside.

image

3. In a large bowl, add the sugar and brown sugar. Whisk together to break up any lumps. Add the coconut oil and whisk until incorporated.

imageimage

4. Add the egg and vanilla extract and whisk until just combined.

image

5. Add the flour mixture and chopped chocolate into the wet mixture. Using a rubber spatula, fold in the flour mixture until dough forms. Don’t over mix. Let it sit for 10 minutes at room temp.

imageimage

6. While the dough is resting, set oven to 350 degrees. Line 2 baking sheets with parchment paper.

7. Using an ice cream scoop (2 tablespoon size), form cookie dough and place the scoops 2 inches apart on the baking sheets.

imageimage

8. Bake for 9-11 minutes or until the edges are slightly golden brown, but don’t over bake them.

image.jpg

9. Cool on a wired rack for 15 minutes. They are best eaten when slightly warm with a tall glass of milk or a cup of coffee.

image.jpg

10. Store any leftover cookies in an airtight container for up to 3 days.

image.jpg

* If at all possible, try to use organic corn-based products. Most of the corn syrup and cornstarch sold in the stores are GMO.


Meyer Lemon Marshmallows

I was never a fan of marshmallows growing up. The only way I would eat them was toasted over an open fire or in s’mores with chocolate and graham crackers. But that all changed the moment I had my first homemade marshmallow from Little Flower Candy Company. Unlike the store-bought marshmallows that are dry on the outside and chewy on the inside, Little Flower’s marshmallows were soft with specks of real vanilla beans. They tasted incredible and melted in my mouth, and that’s when I fell in love with their marshmallows.

After that experience, I decided to make my own marshmallows and put together some s’mores kits as Christmas gifts for my neighbors. The kits were a hit, and since then I’ve experimented with different flavors. My latest version is a Meyer lemon marshmallow, and has quickly become one of my favorites. The Meyer lemon flavor is assertive but not overwhelming. They taste like mini Meyer lemon meringue pies.

Making marshmallows isn’t difficult but there is some technique involved. When making the syrup, make sure you don’t disturb the sugar when it is cooking or it can crystallize. Also, if you have a copper saucepan, I would highly recommend using it for this recipe. Copper pans are great heat conductors and are ideal for candy-making, but if you don’t have one, a stainless pan will be just fine. The most important thing is to make sure that the pan is clean, dry and doesn’t have an oily residue, as this can effect the outcome of the syrup.

As always, please read the entire recipe before you start. Once you have homemade marshmallows, you will never want the store-bought ones again! Enjoy!

 
Meyer Lemon Marshmallows

Yields: 3 dozen large or 12 dozen mini marshmallows

Ingredients:

2/3 cup of water
1/3 cup of Meyer lemon juice
Nonstick baking spray or sunflower oil
1 tablespoon of Meyer lemon zest, finely grated
1 3/4 cups of sugar
3/4 cup of organic light corn syrup*
1/4 cup of honey
1/4 cup of water
2 tablespoons of powdered gelatin
1/2 tablespoon of vanilla extract
1/2 teaspoon of Kosher salt
2/3 cup of organic confectioner’s sugar
1/4 cup organic cornstarch*

Special Equipment:

Candy thermometer
Stand mixer
Pizza wheel
Plastic wrap

Directions

1. Stir the 2/3 cup of water, lemon juice and zest in a bowl and set aside.

image

2. Spray the bottom of 9″ x 13″ pan with nonstick baking spray (or lightly brush with oil). Cover the bottom and sides of pan with plastic wrap, making sure it is smooth and adhering tightly to the surface. Spray on top of the plastic wrap to coat. Set aside.

image

2. In a medium saucepan add the sugar, corn syrup, honey and water. Stir just enough to combine. Get a cup of water and a pastry brush ready and set aside.

3. Place the saucepan over high heat and insert a candy thermometer. Dip the pastry brush in the water and brush the sides of the pan to prevent sugar crystals from forming. Cook until the sugar reaches firm ball stage on the candy thermometer. Do not stir. This will take about 8-10 minutes. Start checking at the 5 minute mark.

image

4. While the sugar syrup is cooking, add the lemon juice, water, and zest mixture to bowl in stand mixer. Sprinkle in the powdered gelatin. Let sit.

image

5. Check up on the sugar syrup. Once it hits the firm ball stage, immediately take the pan off the stove and let it cool. Keep the thermometer in the syrup and wait for it to drop in temperature to 220°. This will take roughly 7 minutes.

imageimage

6. Add a whisk attachment to the stand mixer with the gelatin mixture and set on the lowest setting. Slowly add the sugar syrup into the bowl. It’s important that you add the sugar syrup in a very slow stream. This will take about two minutes.

image

7. Once all the sugar syrup has been added, increase the speed to medium high. After about 10 minutes, turn off the mixer and add the salt and vanilla extract. Turn the mixer back on to medium high and beat or about another 10-12 minutes until the mixture becomes a thick and fluffy, like a meringue. Turn off the mixer.

imageimage

8. Using a rubber spatula, take the marshmallow mixture and spread it in the plastic wrap-lined pan. Spread evenly to ensure same thickness of marshmallow. Let stand at room temperature for about 3 hours.

image

9. Stir confectioner’s sugar and cornstarch and a small bowl. Sift 1/3 of the mixture over a large wooden board or a clean workstation. Take the pan with the marshmallow and flip upside down onto the cornstarch and sugar covered board. The marshmallow should easily fall out of the pan.

imageimage

10. Sift another 1/3 of the cornstarch mixture over the top of the marshmallow.

image

11. Spray the pizza wheel with baking spray on both sides. Cut into 36 large squares (or for smaller marshmallows, cut each of the 36 squares into 4 smaller squares). Dip the cut sides into the remaining cornstarch mixture to prevent it from sticking to the other marshmallows.

imageimage

12. To store, line an airtight container with parchment paper and dust the bottom with the cornstarch mixture. Place marshmallows in a single layer. Add another layer of parchment paper and repeat.

13. The marshmallow will keep for 1 week in the container.
Alternative flavor option: If you want a traditional vanilla-flavored marshmallow, substitute the 1/3 cup of Meyer lemon juice with 1/3 cup of water. Omit the lemon zest and add the seeds of 1 vanilla bean. Increase the vanilla extract from 1/2 tablespoon to 1 tablespoon.

* If at all possible, try to use organic corn-based products. Most of the corn syrup and cornstarch sold in the stores are GMO.

image


Tteokbokki: Spicy Korean Rice Cakes

Seollal, or the Lunar Korean New Year, is a very important holiday to Koreans. The celebration typically lasts for three days, with traditional games being played with family and young children bowing to their parents, grandparents and other elders, receiving “good luck” money as a reward. There is also a lot of eating, and one traditional food served this time of the year is Tteokguk: Korean Rice Cake Soup. As my mother explained it to me, since the rice cake is sticky, good luck is supposed to stick to you. She makes it every year and I usually have a bowl, but I am actually more of a Tteokbokki fan: Spicy Korean Rice Cakes. I decided I would make this dish as a part of my Lunar New Year celebration.

Tteokbokki is more of a Korean street food or snack, but the dish has become so popular, it’s being served at many restaurants and food courts all over Koreatown LA. Traditionally it is made with tubular Korean rice cakes (which look similar to string cheese), gochujang (spicy fermented, Korean bean paste), and fish cakes. Sometimes you can find hard-boiled eggs and ramen noodles in this dish, and my mom always added flank steak to her Tteokbokki. I took her version of the dish and elevated it by using fresh rice cakes, braised short ribs, and caramelized onions, while keeping the traditional flavors intact. When I tested this dish on a non-Korean friend, she called it a “spicy Korean gnocchi.” Though the texture of tteokbokki is definitely different than gnocchi, it’s an interesting comparison nonetheless.

Note that here is some oven time involved in making this dish, so make sure you read the entire recipe before starting. If you prefer, you can make the braised short ribs a day in advance. Enjoy!

Tteokbokki: Spicy Korean Rice Cakes with Braised Short Ribs

Serving Size: 4

Braised Short Ribs

12 ounces of bone-in short ribs (about 3 slices)*
1 tablespoon of sunflower oil or any neutral oil
Kosher salt
Freshly cracked pepper
1 carrot (roughly chopped)
1/2 red onion (roughly chopped)
2 garlic cloves crushed
1/3 cup of sake*
2 tablespoons of mirin*
3 tablespoons of organic soy sauce
1 1/2 cups of water
2 teaspoons of sugar
1/2 teaspoon of freshly cracked pepper

Preheat oven to 325°

1. Sprinkle the short ribs with salt and pepper.

image

2. Heat an enamel-coated cast iron pot or a Dutch oven to medium high heat. Add the oil. Sear the short ribs for about 2 minutes on each side. Cook them in 2 batches. Set aside.

image

3. In the same pot, add all the vegetables and sauté for 5 minutes.

image

4. Add the sake and mirin and deglaze the fond remaining from the short ribs, scraping the bottom of the pot. Reduce by half (about 2-3 minutes).

image


5. Add the soy sauce, water, sugar and pepper. Bring to a boil. Immediately skim off the excess fat layer and impurities. Turn off the heat.

image

6. Cover with a lid and transfer the pot to the oven. Braise for about 1 1/2 hours.

7. Remove from oven. Take the meat out and set aside, and then strain the broth and discard the solids. Set the broth aside.

image

image

8. Remove the bones. Cut the meat into small pieces, picking out the gristle. Set aside.

image
Tteokbokki

2 tablespoons of sunflower oil or any neutral oil (divided in half)
1/2 red onion (thinly sliced)
2 garlic cloves (thinly sliced)
Pinch of salt
1 jalapeño (sliced 1/4″ thick)
Broth from the braised short ribs
2/3 cup of water
2 tablespoons of Gochujang: Korean red bean paste*
1 teaspoon of sugar
2 teaspoon of sesame oil
1 pound of fresh Korean rice cake, cut in half*
2 green onion, thinly sliced
1 tablespoon of toasted sesame seeds, crushed*
Korean pepper flakes*
2 tablespoons of fried shallots, optional

1. While the short ribs are in the oven braising, heat a medium sauté pan to high and add 1 tablespoon of oil. Add the red onions and a pinch of salt and sauté for 2 minutes.

image

2. Add the garlic, and reduce the heat to low. Cook for 20-25 minutes, stirring every a couple of minutes. Remove from pan. Set aside.

3. Clean the bottom of the same pan with a paper towel, removing any excess onion bits. Heat it to high and add the remaining tablespoon of oil.

4. Add the jalapeño slices. Sauté for 1 minute and remove from heat. Set aside for garnish.

image

5. Place the broth from the braised short ribs, 2/3 of water, and 2 tablespoons of Korean red bean paste in large wok or sauté pan. Bring to a boil.

image

6. Add the fresh rice cakes and bring back to a boil and cook for one minute.

image

7. Add the caramelized onion mixture, the braised short ribs, sesame oil, and sugar. Reduce heat to medium. Cook until the sauce thickens and the rice cakes are soft and chewy (about 3-5 minutes).

image

image

8. To serve, divide the Tteokbokki into 4 bowls. Sprinkle with sliced green onions, fried jalapeño, sesame seeds, and fried shallots. Serve immediately.

image

*For the toasted sesame seeds, you can just add some sesame seeds to a dry pan. Toast over medium heat until golden brown. Transfer to a mortar and pound a few times with a pestle.

Mirin can be found in most Japanese Markets. You may omit the mirin and add one more teaspoon of sugar to the recipe. The rest of the ingredients can be found at any Korean Market. My favorite brands for the gochujang are Haitai or Wang.