Monthly Archives: July 2016

Cheddar and Bacon Grits

Many years ago, I worked at Square One Dining, a wonderful breakfast and lunch restaurant in Los Angeles. While I was working there, the restaurant was voted the Best Breakfast in LA by Los Angeles Magazine. One of the keys to the restaurant’s success was that the owner sourced and selected the best breakfast ingredients: Nueske bacon, Anson Mill grits, local produce, farm fresh eggs, etc. One of the most popular items on the menu was the stone grits. They excuted the grits (polenta) perfectly, and occasionally customers ordered it with cheddar and bacon. Lately, I have been craving these grits.

As luck would have it, last week I was in Milwaukie, OR and visited Bob’s Red Mill, where I purchased a bag of organic grits. This was the perfect opportunity to recreate the cheese and bacon grits from Square One! This recipe does not include milk, but you will still get the creaminess from the cheese and butter. A couple of tips: first, when making grits, it is important to not to overstir or they will become gummy. Stir just enough to keep the grits from sticking to the pot. Second, once the grits are done, it is important to serve right away, again so it doesn’t harden or get lumpy. You want the grits to ooze in your bowl. Finally, adding a poached egg makes this recipe a complete breakfast dish in one bowl. Enjoy!

Cheese and Bacon Grits

Yield: 4 Servings

3 cups of water
1/4 teaspoon of Kosher salt
1/2 cup of organic grits (Bob’s Red Mill or Anson Mills)
3 thick cut bacon slices, cut into 1/2″ pieces
1/2 cup of shredded good quality cheddar
1 tablespoon of grated Parmigiano-reggiano, plus extra for topping
2 tablespoons of unsalted butter, at room temperature
Sea salt to taste
4 poached or sunny-side up eggs
Freshly ground pepper

1. Bring water and Kosher salt to a boil in a 2 quart pot.

image

2. Once the water comes to a boil, add the grits all at once and stir. Reduce the heat to a low simmer.

image

3. Cook for 30 minutes, stirring occasionally to prevent it from sticking.

image

4. Meanwhile, cook the bacon pieces in a sauté pan over medium heat until crispy. Remove with a slotted spoon and place them on a paper towel-lined plate.

image

5. Poach or fry 4 eggs. Make sure the yolk is still runny inside. Set aside.

6. Once the grits are done cooking, add the butter, cheddar, Parmesan, and a pinch of sea salt. Stir until combined.

image

7. With a large serving spoon, divide the grits among 4 serving bowls. Top each bowl of grits with bacon pieces and one cooked egg. Top with black pepper and grated Parmesan cheese. Serve immediately.


image


Advertisement

Peach Cobbler

Summer is my favorite time to visit the farmers market because of all the stone fruits that are in season. Nectarines, peaches, plums, pluots – all of them are plentiful everywhere you turn. They are ripe, sweet, juicy and tart; in other words, they’re perfect for making warm cobblers!

Cobblers are baked fruit desserts that have a shortcrust, crumble or biscuit topping. I have tried many different versions of cobbler and my favorite combination is peach cobbler with a biscuit-like topping. In this recipe, I sprinkle crystallized sugar on the biscuit topping, which makes the crust crispy on the top but still moist above the cooked fruit. Since this recipe uses less sugar than most other cobbler recipes, it is important use ripe and sweet peaches. Serve the cobbler with some good vanilla bean ice cream and you’ll have a wonderful summer treat! Enjoy!

Peach Cobbler

Serves 9-12

6 cups sliced ripe, yellow peaches (1/2 inch thick slices)
1/3 cup of sugar + 1/4 cup of  sugar
1 tablespoon of organic cornstarch
1 tablespoon of fresh lemon juice
1/2 teaspoon of ground cinnamon (divided in half)
3/4 cup of unbleached all-purpose flour
3/4 teaspoon of baking powder
1/2 scant teaspoon of Kosher salt
1/4 teaspoon of baking soda
4 tablespoons of unsalted butter, cold and cut into 12 cubes
1/2 cup of buttermilk
1/2 teaspoon of vanilla extract
2 tablespoon of heavy cream
Crystallized or turbinado sugar, for topping
Vanilla bean ice cream, for serving

1. Preheat the oven to 400°F.
2. In a large bowl, add the sliced peaches, 1/3 cup sugar, cornstarch, lemon juice and 1/4 teaspoon cinnamon. Stir to combine. Set aside.

imageimageimage
3. In a food processor, add the flour, 1/4 cup sugar, baking powder, baking soda, salt, and 1/4 teaspoon cinnamon. Pulse 3 to 4 times.

image
4. Add the cubes of butter. Pulse 5-6 more times or until the mixture is pea-sized chunks. Transfer the mixture to a medium bowl.

image
5. Add the buttermilk and the vanilla extract to the dry mixture. Using a rubber spatula, fold in carefully until just combined. Set aside.

image
6. Grease a 9 x 9 square baking pan with a non-stick spray. Give the peach mixture a quick stir. Pour filling into the pan.

image
7. Spoon the crust mixture in evenly-spaced dollops on top of the peaches.

image

8. Brush the crust with heavy cream. Generously sprinkle the crystallized sugar on top.

image
9. Bake in the oven for 35-40 minutes or until golden brown. (Check the cobbler at the 20 minute mark. If the cobbler browns too quickly, you can cover it with aluminum foil.) Cool for at least 20 minutes.

image
10. Spoon into a bowl and serve with a large scoop of your favorite vanilla bean ice cream.

imageimage

Bacon Kimchi Fried Rice

Kimchi fried rice is one of my favorite Korean comfort foods. Growing up, whenever the kimchi in our refrigerator got too sour, my mom used it to make kimchi jjigae (kimchi stew), kimchi bokkeum (sautéed kimchi), and kimchi bokkeum bap (kimchi fried rice). My mom’s kimchi fried rice was simple and delicious. She served it with dongchimi, a refreshing radish water kimchi without any pepper flakes, which tempered the spiciness of the kimchi fried rice. For this recipe, I took my mom’s kimchi fried rice and added bacon, soy sauce, and spicy bean paste for more umami flavor. Sometimes, I even add shiitake mushrooms and soybean sprouts for additional layers of texture, but I didn’t here.

When preparing to make kimchi fried rice, be sure to use sour kimchi, as using freshly-made kimchi will not produce the same deep, umami-packed flavor. To achieve this sourness, buy kimchi at you local Korean grocery store, open it up to break the seal, then close the cap and let it sit in your refrigerator until the kimchi starts to get a little soft, which should be in about 1 to 2 weeks. Essentially you are allowing the kimchi to become a little overfermented.

This recipe isn’t too spicy, but you can increase the heat with Korean pepper flakes or sliced red jalapeños if you like. If you’re a fan of kimchi, you’ll love this dish. Enjoy!

Bacon Kimchi Fried Rice

3 slices of thick bacon (preferably nitrate-free), cut into 1/2 inch pieces
1/2 cup of chopped onion
1 tablespoon of sunflower oil or other neutral oil
1 tablespoon of roasted sesame oil
1 cup of sour kimchi, roughly chopped
1/3 cup of kimchi juice
1/2 teaspoon of sugar
4 cups of short-grain rice, cooked but firm
1 tablespoon of soy sauce
1 tablespoon of spicy Korean bean paste, optional
Fresh ground black pepper
2 green onions, thinly sliced crosswise
1 tablespoon of toasted sesame seeds
4 eggs, cooked sunny side up (optional)

1. Cook the bacon on medium heat for 3 to 5 minutes in a wok or cast iron pan. You want the bacon to be brown but not crispy. Remove the bacon with a slotted spoon and set-aside.

imageimage

2. Add the chopped onions to the wok. Cook over medium heat, stirring constantly until translucent (about 3 minutes).

image

3. Add 1 tablespoon of sunflower oil and 1 tablespoon of sesame oil to the onions.

4. Add all the chopped kimchi and cook for about 8 minutes, stirring constantly.

imageimage

Add the reserved kimchi juice, sugar, rice, soy sauce, and spicy bean paste. Cook for 2 more minutes.

image

5. Fold the rice in to the kimchi mixture and mix well. Cook for about 2 minutes. Add the cooked bacon. Taste for seasoning. Add a few turns of black pepper.

image

6. Add the sliced green onion and toasted sesame seeds.

image

7. Divide the rice among 4 bowls. Top with sunny side up egg and serve.

image

Mini Berry Tarts

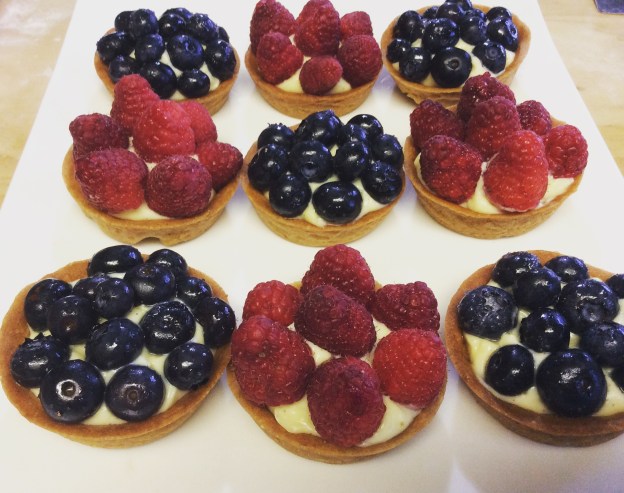
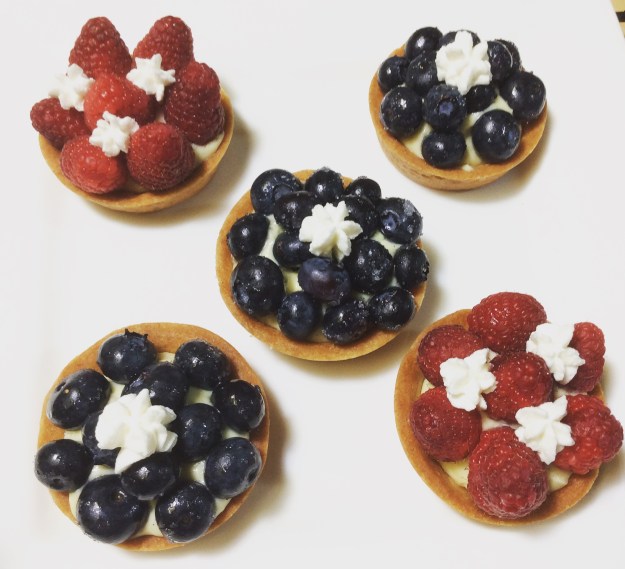
Fruit tarts are delightful summertime treats, with the combination of rich pastry cream, crispy tart shell, and seasonal berries, creating a wonderful taste and texture sensation in your mouth. The crust is crispy with hint of salt, the pastry cream is sweet, smooth and creamy, and the berries add a lovely tart flavor. Because making fruit tarts is such a production, I reserve making them for special occasions. With blue and red berries in season, what better time than the 4th of July to make these lovely treats!

A typical fruit tart shell is made with pâte sablée, a rich French crust that resembles a shortbread cookie in flavor and consistency. For my tarts, I use a graham cracker crust recipe, which is more crispy and golden in color. It holds up well to the pastry cream without getting soggy. It also has just enough salt to balance out the sweetness. The pastry cream recipe has Grand Mariner and orange zest to add a hint of orange flavor. Make the pastry cream and the tart shells a day in advance so you can just assemble the fruit tarts the day of serving. This recipe makes 12 mini fruit tarts, perfect for a family gathering. Enjoy!

Mini Berry Tarts

Yield: 12 mini tarts

1/3 cup of heavy cream
1 tablespoon of sugar
1/2 teaspoon of vanilla extract
1 1/2 cups Grand Marnier pastry cream (recipe follows)
12 mini graham cracker tart shells (recipe follows)
1 cup of fresh raspberries
1 cup of fresh blueberries
Superfine sugar for sprinkling, optional

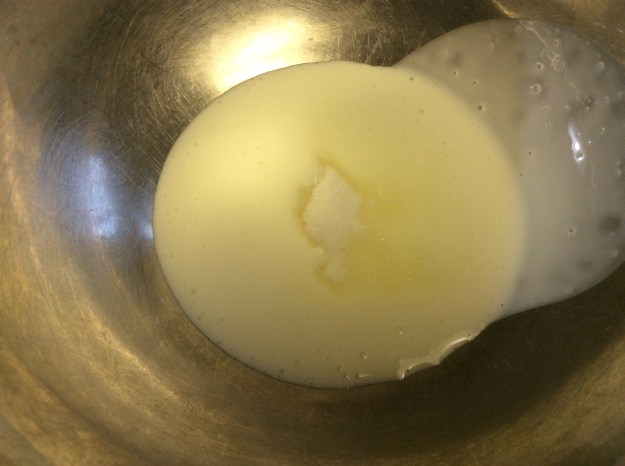
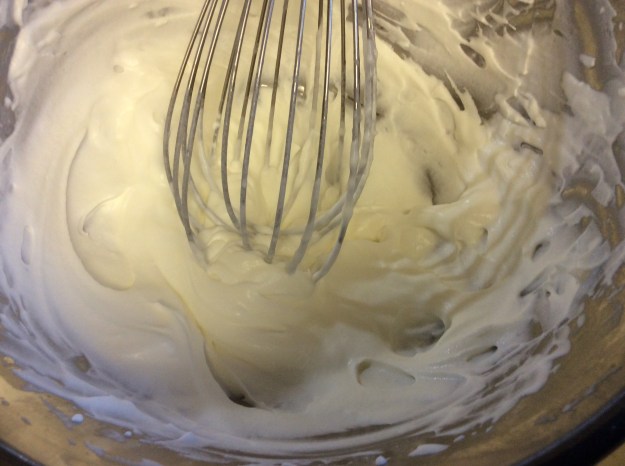
1) in a medium bowl, add the heavy cream, sugar, and vanilla extract. Whisk vigorously until your mixture gets to medium peaks.

imageimage


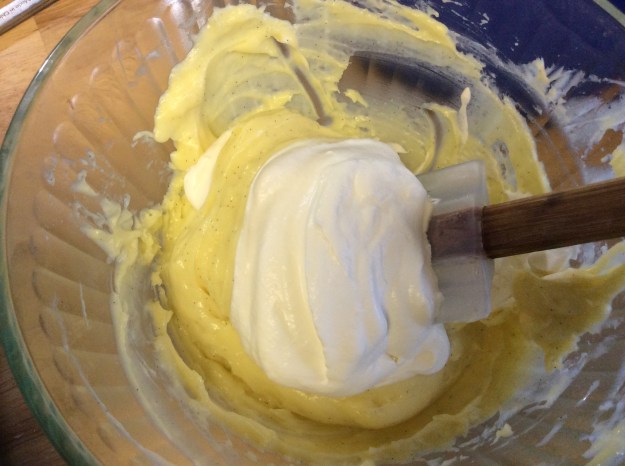
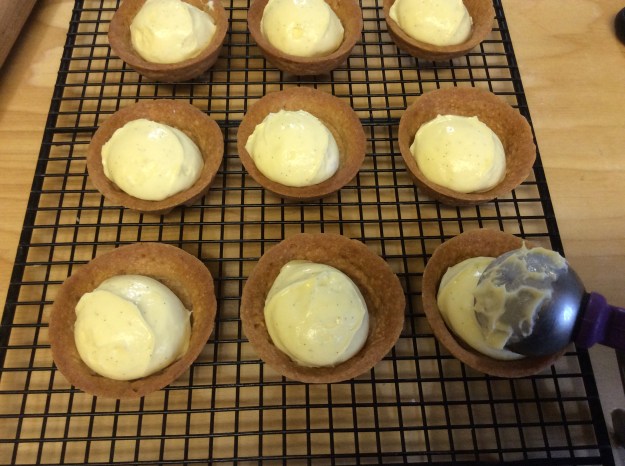
2) Fold 2/3 of the mixture into the pastry cream. Fold carefully so as not to deflate the whipped cream. Reserve the remaining portion in the refrigerator for decoration.

image

3) Using a small ice cream scoop (just shy of 1/8 cup), portion out the pastry cream to each of the tart shells.

image.jpeg

4) Arrange the berries on top of the pastry cream. Sprinkle a little sugar, if using.

image

5) Take the remaining whipped cream out of the refrigerator. Place a star tip on a pastry bag and add the whipped cream, decorating the fruit tarts with stars. Serve immediately or place in the refrigerator until ready to serve.

image


Graham Cracker Tart Shells
(Adapted from Claudia Fleming’s Recipe)

Yield: 12 mini tart shells

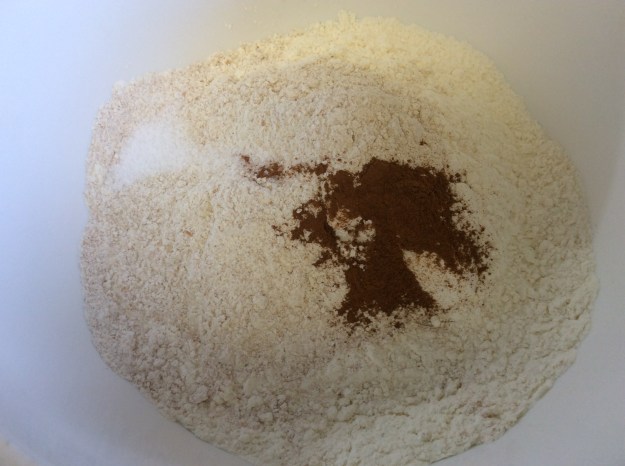
1 cup of unbleached all-purpose flour
1/4 cup of whole wheat flour
1/2 teaspoon of salt
1/4 teaspoon of ground cinnamon
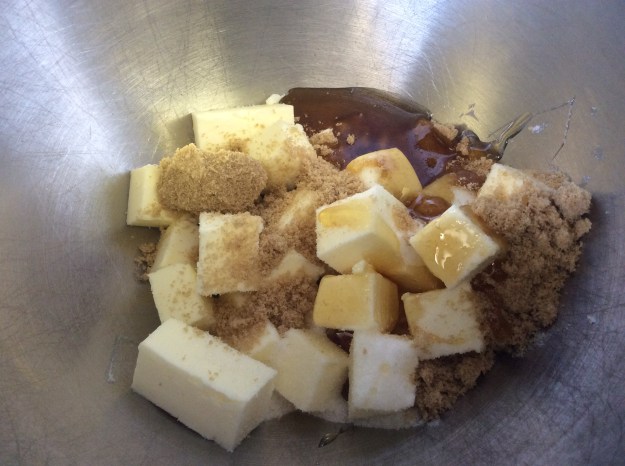
1/2 cup of unsalted butter, cut into cubes
1/8 cup of brown sugar
1/8 cup granulated sugar
2 tablespoons of honey

1) In a medium bowl, add both types of flour, salt and cinnamon.

image

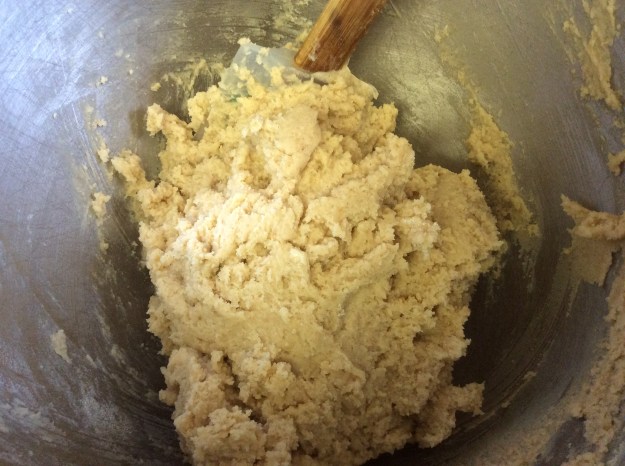
2) In a stand mixer using the paddle attachment, add the butter, both types of sugar, and the honey. Beat on medium speed for 2 minutes. Scrape the bottom with a rubber spatula.

image

3) Set the mixer on low speed. Slowly add the flour mixture. Beat well until there is no visible flour.

image

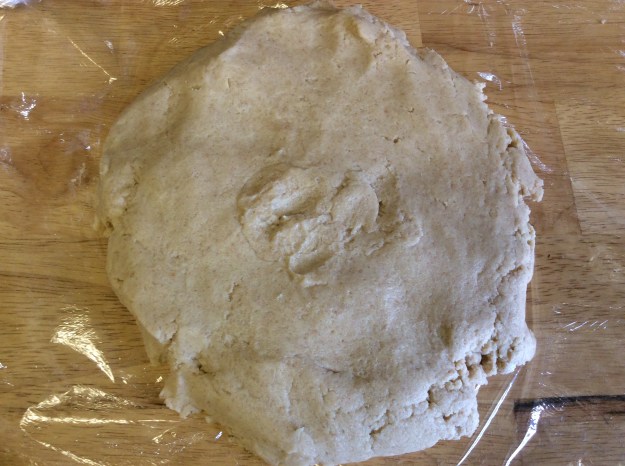
4) Scrape the dough and transfer onto a large sheet of plastic wrap. Flatten into a disk and double wrap. Place in the refrigerator for at least 2 hours.

imageimage

5) Once the dough has chilled, remove from the refrigerator.

6) Line a baking sheet with parchment paper. Set aside.

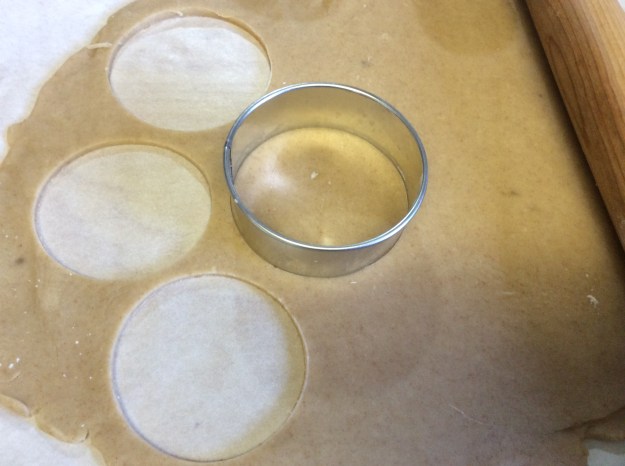
7) Dust a workstation lightly with flour. Roll the dough into 1/8″ thickness. Using a round 3 1/2 inch cookie cutter, cut out 12 circles. Carefully transfer each circle to the parchment-lined baking sheet. Place the entire baking sheet into the refrigerator for 10 minutes.

image

8) While the dough circles are being chilled, grease 12 mini tart pans* with cooking spray. Heat the oven to 325°.

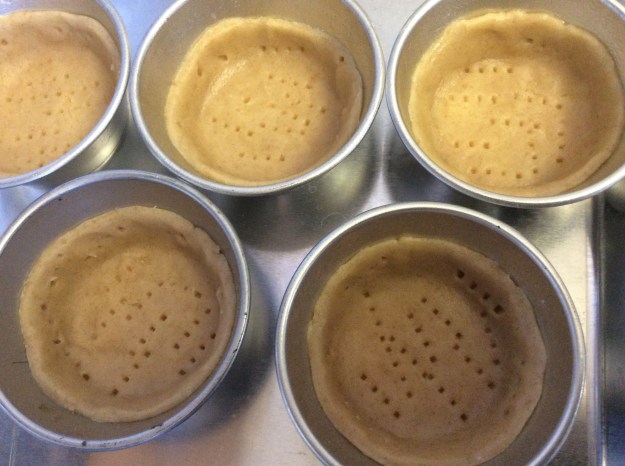
9) After 10 minutes, take out the cut dough from the refrigerator. Quickly press each of the circles into the tart shells. Using a fork, make several pricks in the dough, even on the sides.

image

10) Transfer the tart pans onto a baking sheet. Place the entire baking sheet into the freezer for 5 minutes.

11) Remove the tart shells from the freezer. Place them directly into the oven and bake for about 18 minutes or until golden brown.

image

12) Cool in the tart pans for 10 minutes. Tap the bottom of each tart pan to remove the tart shells. Cool completely on a wired rack. The tart shells can be made a day in advance and placed in an airtight container.

image

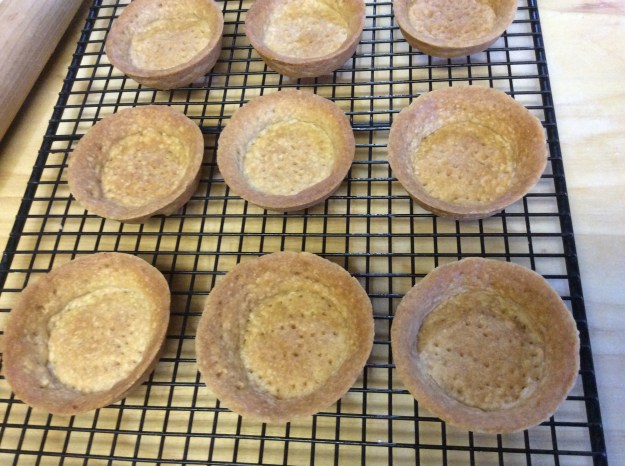
*Use mini tart pans with a 2″ base and the rim 3″. If you don’t have mini tart pans, you can use muffin tins. Just make sure you line the muffin tins with 2″ parchment paper circles.


Grand Marnier Pastry Cream

Yield: about 1 1/2 cups
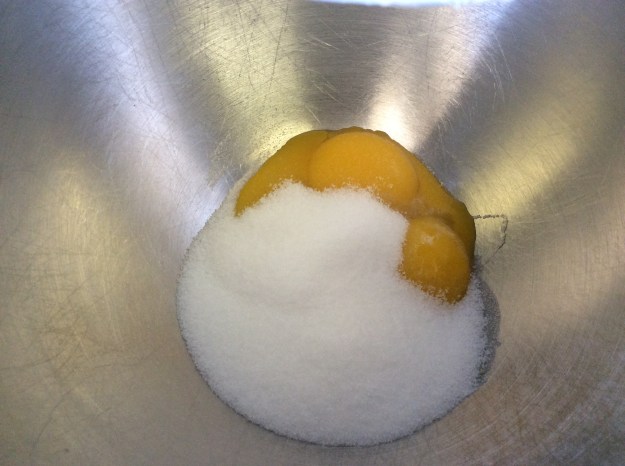
3 large egg yolks
1/3 cups of sugar
1 1/2 tablespoons of organic cornstarch
1 cup of whole milk
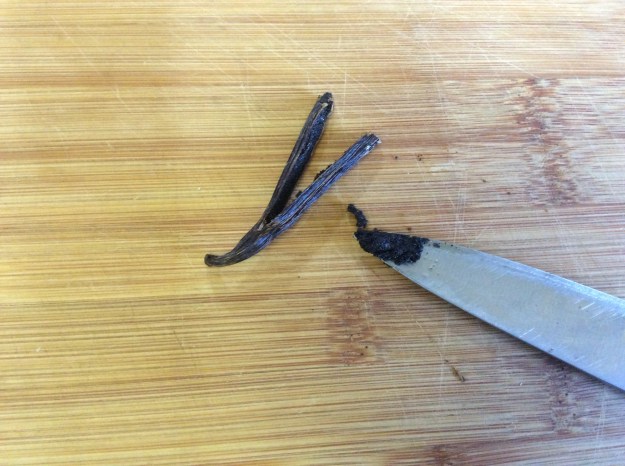
1/4 vanilla bean, seeds scraped
2 teaspoons of Grand Marnier
1/2 teaspoon of orange zest, optional
1 tablespoon of unsalted butter

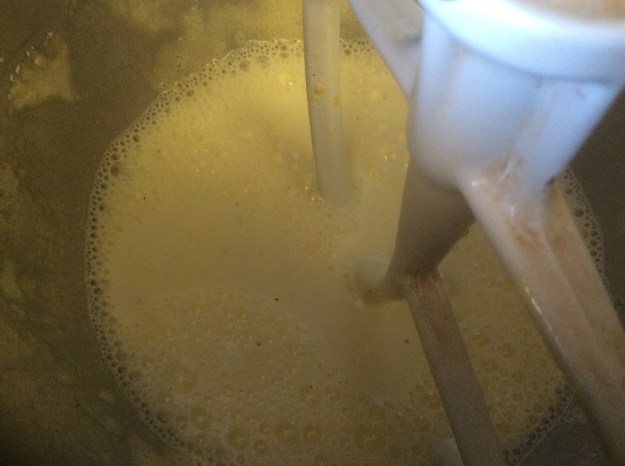
1) In a stand mixer with the paddle attachment, beat the egg yolks and sugar on medium speed for about five minutes. The consistency will be thick and the color will be light yellow.

image

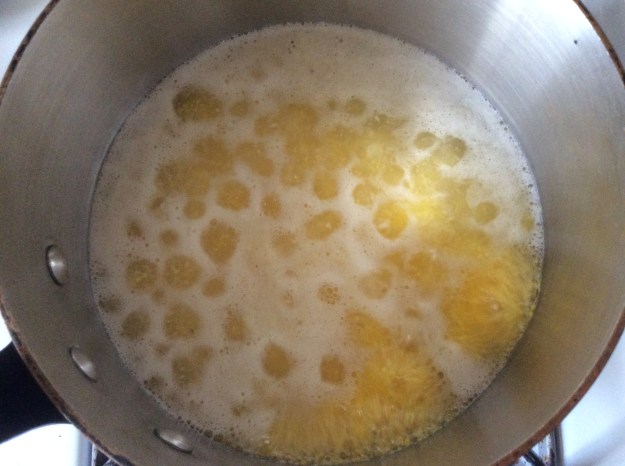
2) Meanwhile, in a medium sauce pan, add the milk and the vanilla bean with seeds. Bring to a boil. Turn off the heat.

image

3) After five minutes, reduce the mixer speed to low and add the cornstarch. Beat until the cornstarch is no longer visible.

image

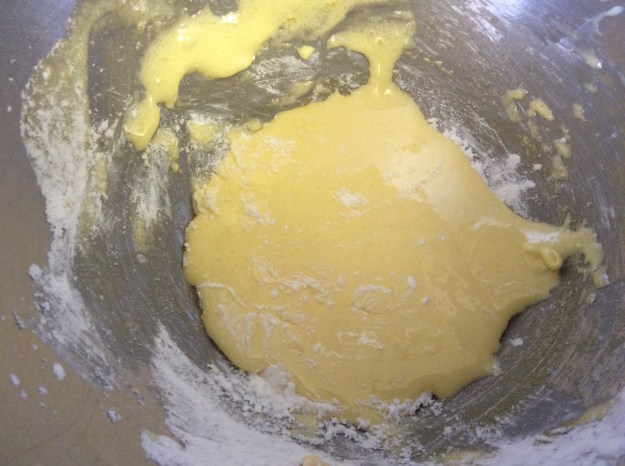
4) Keeping the mixer on low, add the boiled milk mixture in a slow stream. Make sure you don’t pour too quickly or the mixture will curdle.

image

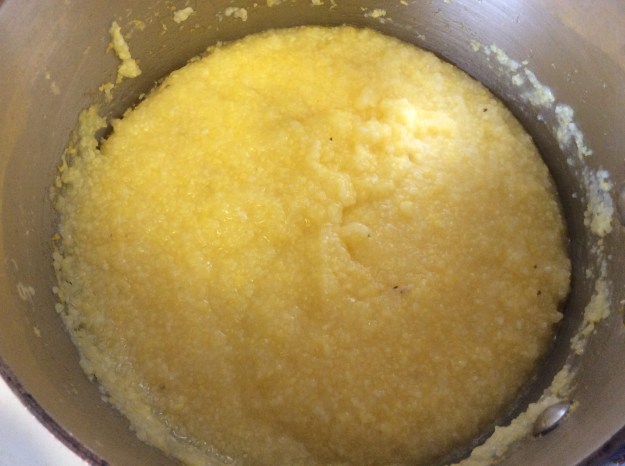
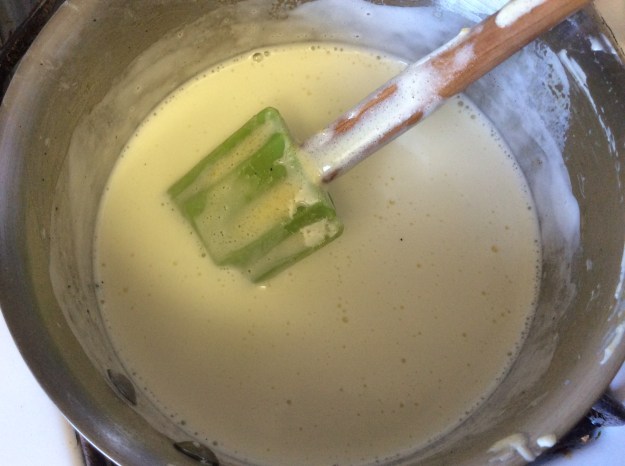
5) Transfer the entire mixture back to the medium sauce pan. Cook on low heat for 5 minutes, stirring constantly with a rubber spatula, scraping the bottom as you stir.

image

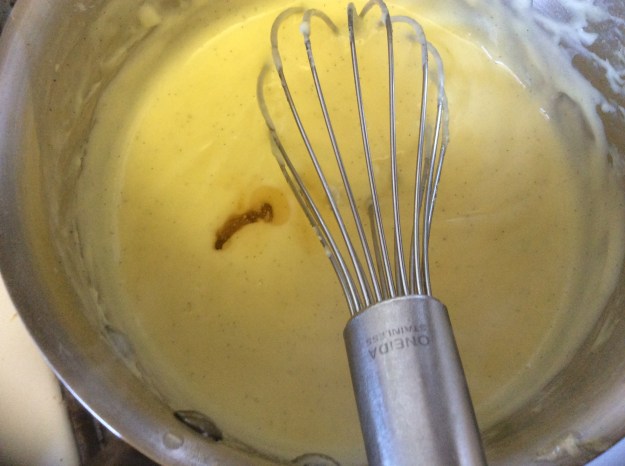
6) Add the Grand Marnier and orange zest and swap out the rubber spatula for a whisk. Cook for an additional 3 minutes, whisking constantly. Once the mixture boils in the center, cook for 1 more minute. The mixture should be thick like pudding.

imageimage


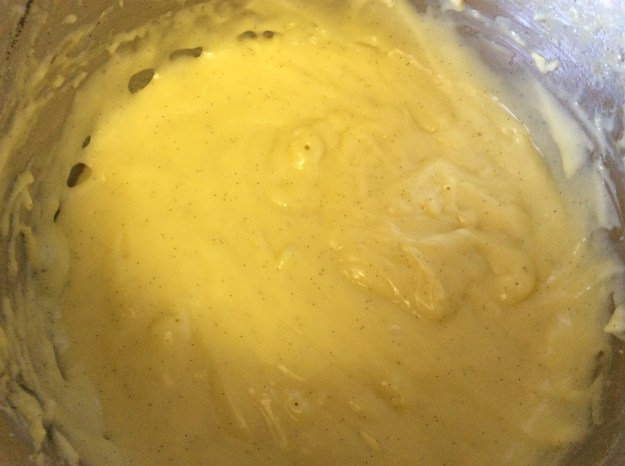
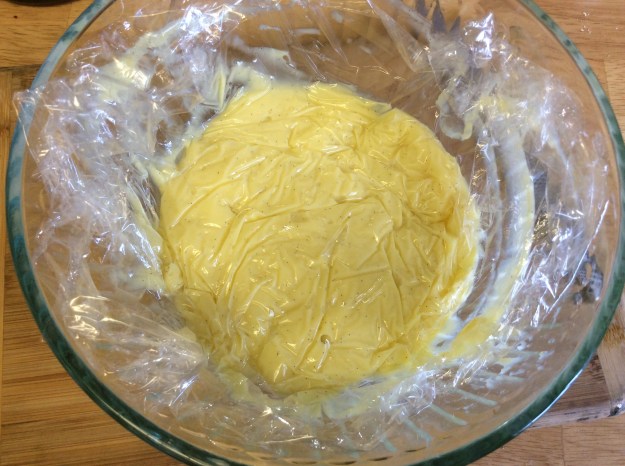
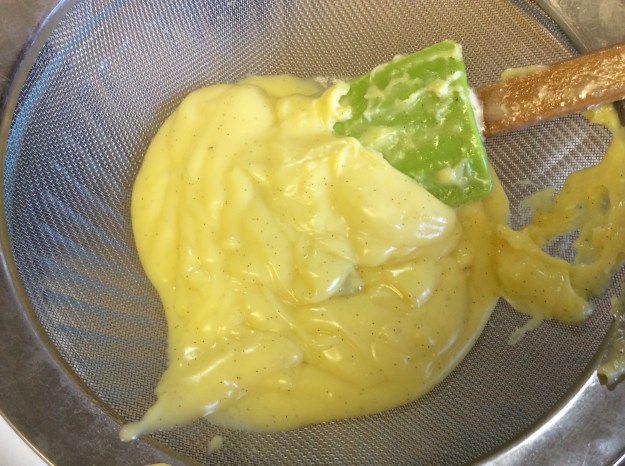
7) Pour the mixture into a fine mesh sieve and place over a medium glass bowl. Using a rubber spatula, press down the pastry cream mixture. You should get a smooth and shiny pastry cream in the bowl. Whisk in the butter.

imageimage


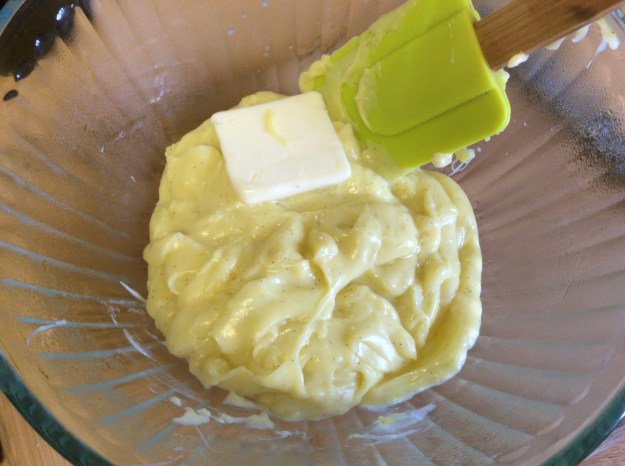
8) Place a plastic wrap directly on the pastry cream to avoid a skin from forming. Place in the refrigerator for 3 hours to cool. This mixture could be made a day in advance.

image