Category Archives: Vegetables

Kimchi-Jeon (Kimchi Pancakes)

Korean restaurants serve complimentary side dishes called banchan whenever you order a main dish. Occasionally, you will get a savory pancake served along side the assorted banchan. The most common style of pancake is pa-jeon (scallion pancake) but sometimes, if you get lucky, they will serve complimentary kimchi-jeon (kimchi pancake) instead. Kimchi-jeon is my favorite Korean pancake because of the heat level and intense flavor. I have fond memories of my mom making a huge tower of kimchi-jeon for lunch. My brothers and I would eat them until we were completely stuffed.

Here is an updated version of mom’s recipe. In my recipe, I sauté the onions prior to adding them to the batter to mellow out their sharp bite and to add natural sweetness to the kimchi-jeon. If you don’t like your kimchi-jeon too spicy, you can replace some of the kimchi juice with an equal amount of water. In that case, you should also add a pinch more salt. This recipe only makes two pancakes, unlike my mom’s recipe which can feed an army. I like to serve it as part of a larger Korean meal with other banchan. Enjoy!

Kimchi-Jeon (Kimchi Pancakes)

Yield: 2 large pancakes (4 servings as an appetizer)


Sunflower seed oil or organic canola oil

1/4 cup of chopped onions

1/2 cup of unbleached all-purpose flour

1/4 cup of kimchi juice

2 tablespoons of water

1 large egg

3/4 cup of chopped kimchi

2 scallions, sliced crosswise

1/2 teaspoon of salt

Freshly ground black pepper

1 teaspoon of sesame oil

Black sesame for garnish, optional

Organic soy sauce for serving


1. Heat a medium sauté pan to medium-low heat. Add 1 teaspoon of oil. Add the the chopped onions. Sauté for 3 minutes. Transfer to a plate.

IMG_5635
2. In a large bowl, add the flour, water, kimchi juice, and egg. Whisk well.

IMG_5637

3. Add the chopped kimchi, cooked onions, scallions, salt, black pepper, and sesame.

IMG_5638

IMG_5639

4. Heat a cast iron or heavy bottom frying pan to medium heat. Add a couple tablespoons of oil.

5. Add a ladle full of batter and spread to flatten and evenly distribute the kimchi.
Fry for 2 minutes or until golden brown.

IMG_5641

6. Flip over and fry the other side for 2 more minutes. Transfer to a plate.
Repeat to with the 2nd pancake.

IMG_5657.JPG

 
7. Using kitchen scissors, cut each pancake into bite-sized pieces. Sprinkle black sesame seeds on top. Serve with soy sauce. They are best eaten when warm.

Advertisement

Sautéed Corn with Dried Shrimp

With Thanksgiving around the corner, fresh corn is plentiful at your local supermarket and at the farmers market. When I find heirloom corn at the farmers market, I get excited about all the different things I might make with it – Johnny cakes with fresh corn, creamed corn with tarragon, cornbread with bacon – but every so often I want corn with Asian flavors. With that in mind, here is a unique corn recipe inspired by the Vietnamese street food Bap Xao Tom Bo. You can find this popular buttery shrimp and corn dish at mobile food stands in the streets of Saigon. In the traditional recipe, the corn is sautéed in butter, then small dried shrimp is added, followed by a little fish sauce, green onion, and finally a little hot sauce. Also, the dried shrimp is traditionally sautéed without soaking them first. In my version, I prefer to soak the dried shrimp in hot water to mellow out the shrimp flavor and to soften them a bit, otherwise I think the shrimp flavor can be a bit overpowering. I also add a little soy sauce and dark caramel sauce to balance out the fish sauce. Finally, I add fried shallots for a crispy texture. This corn dish is best eaten right away. Enjoy!

Sautéed Corn with Dried Shrimp

Serving Size: 4
3 tablespoons of unsalted butter
5 scallions, thinly sliced
1 lb of fresh cut or frozen organic corn*
10 small dried shrimp (soaked in hot water for 20 minutes and chopped)**
1 tablespoon of fish sauce
1 teaspoon of organic soy sauce
Freshly grated black pepper
1-2 teaspoon of Sambal Oelek (garlic chili sauce), more for serving***
1/2 tablespoon of Vietnamese caramel sauce (optional)
1/4 cups of fried shallots

1. Heat a large sauté pan over medium-low. Add the butter and half of the scallions. Sauté for about 2 minutes.

image

2. Add the dried shrimp (after it is soaked and chopped). Sauté for 1 minute.

image

imageimage

3. Add the corn and increase the heat to medium-high. Sauté for 2 more minutes (3-4 minutes for frozen corn).

image

4. Add the fish sauce, soy sauce, a couple of turns of the pepper mill, chili sauce, and caramel sauce. Sauté for 30 more seconds. Add the remaing scallions and sauté for 30 more seconds.

image

5. Divide among 4 bowls and top with fried shallots and serve with extra chili sauce.

image

*If using fresh corn try to find heirloom corn at your local farmers market. Most corn sold at the supermarket tend to be genetically modified.

**Dried shrimp can be found at most Asian supermarkets. Store the remaining shrimp in an airtight freezer bag.

image

***Sambal Oelek or garlic chili sauce are available at most Asian supermarkets.

image.jpeg

Pumpkin and Swiss Chard Lasagna

I was hesitant to post a recipe with pumpkin this season because of pumpkin spice overload. Come fall, most markets dedicate a whole section to products with pumpkin spice. Trader Joe’s started this trend a few of years ago and other supermarkets quickly followed suit. There is pumpkin spice in chips, crackers, BBQ marinade, and even in kombucha. It has gotten so out of control, Anthony Bourdain said “I would like to see the pumpkin spice craze drowned in its own blood. Quickly.” Even though this lasagna recipe doesn’t contain any pumpkin spice, pumpkin has gotten a bad rap, kind of an instance of guilt by association.

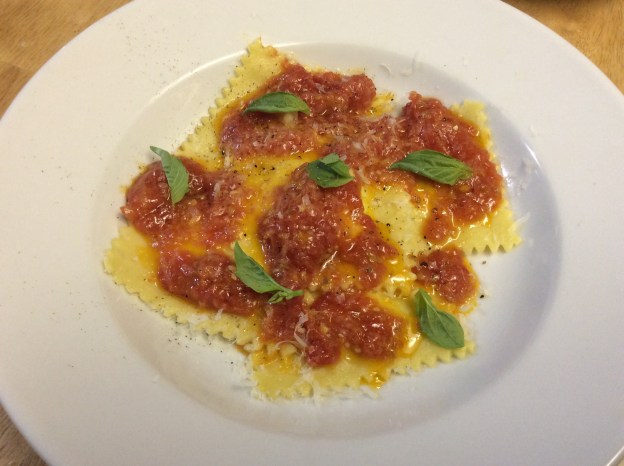
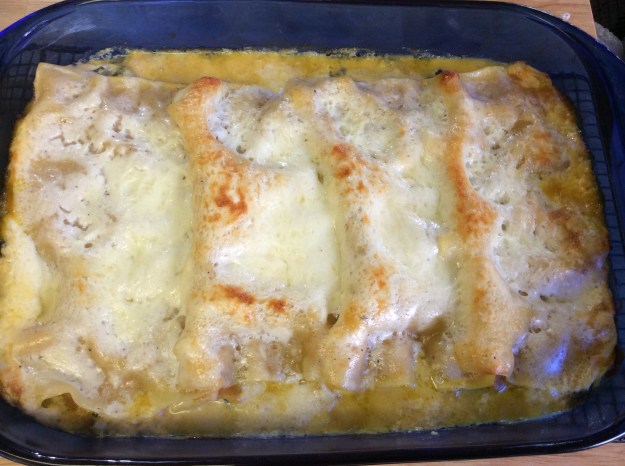
Despite Bourdain’s loathing of pumpkin spice, pumpkin is a wonderful autumnal ingredient perfect for savory dishes. This pumpkin lasagna recipe is a nice change from your traditional meat sauce lasagna. There are two layers of pumpkin purée and one layer of Swiss chard/ricotta, and the dish is topped with béchamel, mozzarella and Parmigiano-Reggiano. There is also sage brown butter in the pumpkin purée, which adds a layer of nutty and woody flavor. There is some advanced preparation involved before assembling the lasagna, so plan ahead. This a good dish for a crowd, or if you omit the chicken stock, a nice vegetarian option at a potluck. Serve it with a side salad for a complete meal. Enjoy!

Serving Size: about 12

Non-cooking spray, preferably olive oil-based
Béchamel sauce (see below)
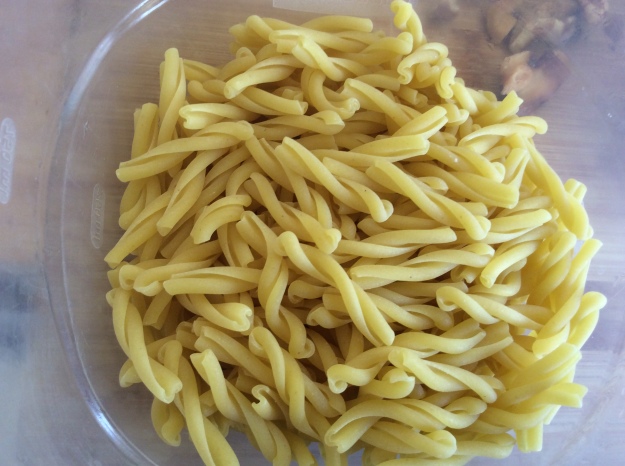
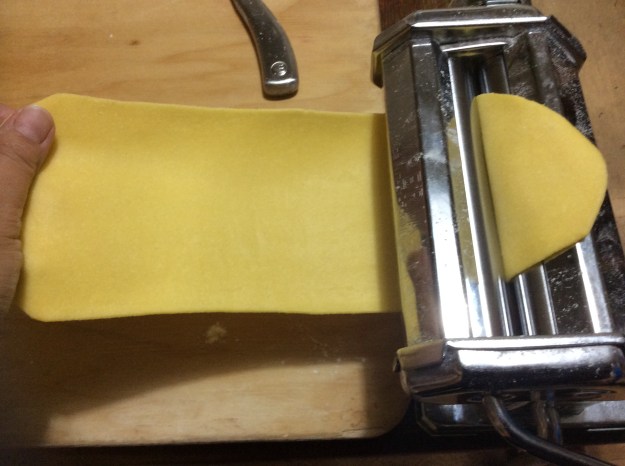
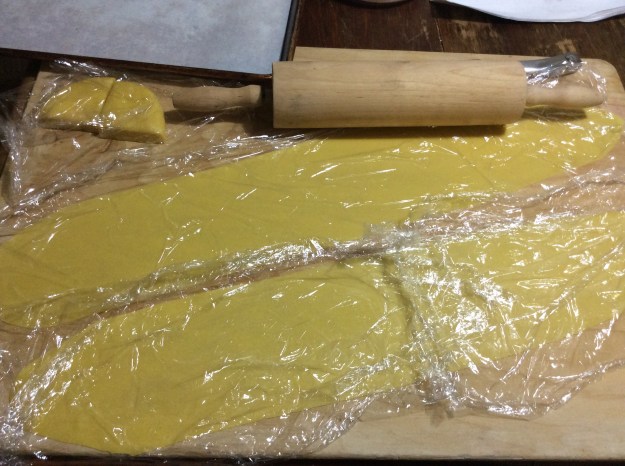
1 lb. of lasagna noodles, no-boil
Cooked Swiss chard (recipe below)
Pumpkin layer (recipe below)
Ricotta layer (recipe below)
1 cup of grated mozzarella
1/4 cup of grated Parmigiano-Reggiano
1/2 cup of chicken stock or low sodium chicken broth (optional)

1. Preheat oven to 375°

2. Spray the bottom of a 13″ x 9″ x 3″ baking pan with non-stick cooking spray. Ladle and spread half of the béchamel sauce on the bottom of the baking pan.

image

3. Place 4 lasagna sheets, overlapping, on top of the béchamel layer.

4. Spread 1/2 of the pumpkin mixture on top of the lasagna noodles.

image

5. Add another layer of lasagna sheets.

6. Spread the remaining ricotta mixture on top of the lasagna sheets.

image

7. Evenly spoon all of the Swiss chard mixture and top with 1/2 of the grated mozzarella.

imageimage

8. Add another layer of lasagna sheets.

9. Spread the remaining pumpkin mixture on top of the lasagna noodles.

image

10. Add another layer of lasagna noodles.

11. Ladle and spread the remaining béchamel, then the remaining mozzarella, and finally the grated Parmigiano-Reggiano. If using, pour the chicken stock along the sides. Cover the lasagna with aluminum foil. Bake for 45 minutes.

image

12.  Remove foil and increase the heat to 400° and bake for 10 additional minutes.

13. Place the lasagna on a cooling rack. Let cool for at least 20 minutes before slicing and serving.

image


Swiss Chard

2 tablespoons of olive oil
3 cloves of garlic, thinly sliced
1 1/2 cups of chopped onions
1 teaspoon of chopped thyme leaves
Pinch of red pepper flakes
8 cups of chopped Swiss chard
2 teaspoons of lemon juice
Salt and pepper to taste

1. Heat a large sauté pan over medium heat. Add the olive oil. Add the garlic and sauté of for 15 seconds. Add the onions and thyme leaves. Sauté for 3 minutes.

image

2. Add all of the Swiss chard and red pepper flakes. Sauté and cook until tender, about 5-6 minutes. Season to taste.

image

3. Add the lemon juice and transfer to a bowl until ready to use.
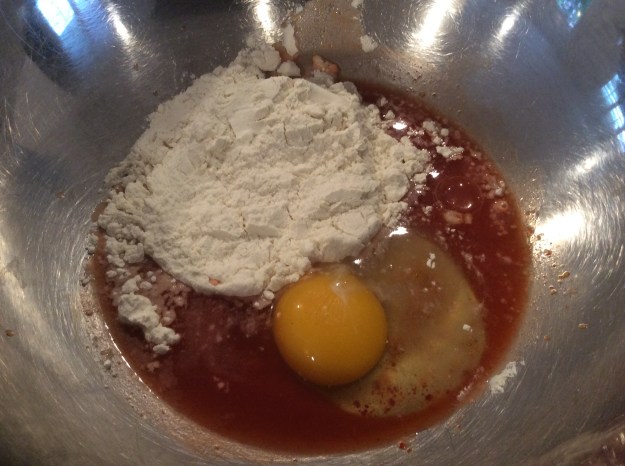
image

Béchamel sauce

2 tablespoons of unsalted butter
2 tablespoons of flour
2 cups of low-fat milk, heated
3/4 teaspoon of sea salt
1 pinch of ground nutmeg (half of 1/8 teaspoon)
Freshly ground pepper

1. Heat a medium sauce pan over medium heat. Add the butter and stir until melted.

2. Slowly rain in the flour while whisking to prevent clumping. Cook while whisking for about 1 minute.

image

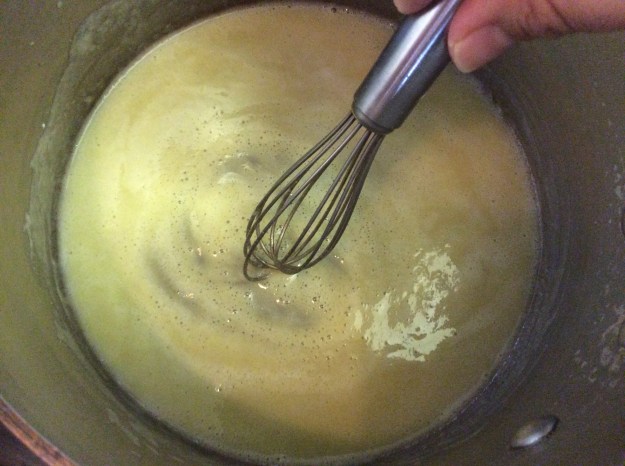
3. While whisking, slowly add the heated milk. Add the salt, nutmeg, and pepper. Continue to whisk and cook until the sauce thickens and the mixture bubbles on the sides. Turn off the heat. Set aside until ready to use.

image

Pumpkin layer

2 tablespoons of butter
8 fresh sage leaves
3 cups of cooked pumpkin (fresh or canned)
3/4 cup of grated Parmigiano-Reggiano
1/2 teaspoon of sea salt
Pinch of nutmeg
Freshly ground pepper

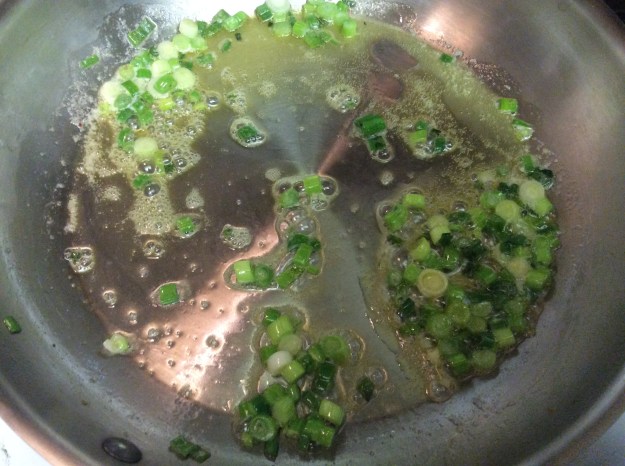
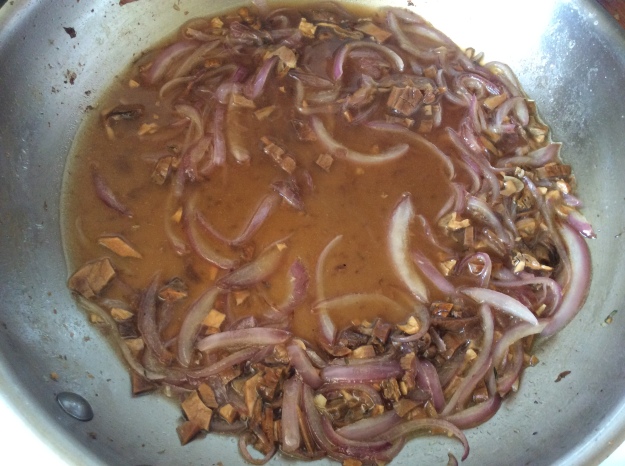
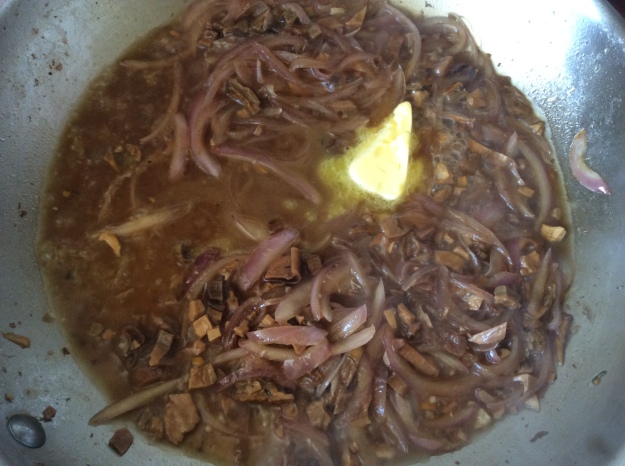
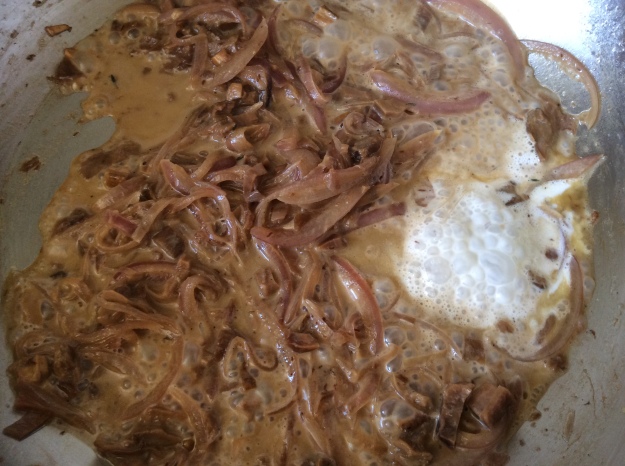
1. In a small sauté pan, melt the butter over medium heat. Add the sage leaves. Cook until the butter turns brown and toasty. Turn off the heat, remove the sage leaves and set aside.

image

2. In a large bowl, combine the pumpkin, Parmigiano-Reggiano, salt, nutmeg and few turns of the pepper mill. Stir to combine.

image

3. Add the brown butter. Stir well and set aside until ready to use.
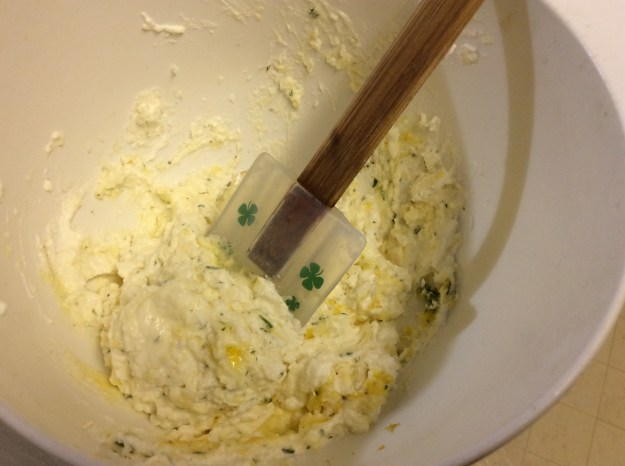
image

Ricotta layer

1 1/2 cup of ricotta
1/2 cup of grated Parmigiano-Reggiano
1/2 teaspoon of salt
Freshly ground pepper

Mix all the ingredients in a small bowl. Set aside until ready to use.

image

Gemelli Pasta with Assorted Mushrooms

We normally associate October with pumpkins, Halloween, and all things fall, but did you know we have dedicated the whole month of October to pasta? It’s not surprising since pasta is one of America’s favorite foods. So in honor of National Pasta Month, I am sharing an easy pasta recipe with some delicious fall mushrooms. If you love mushrooms, you will enjoy this pasta recipe. Unlike most of my previous pasta dishes, this recipe is made with store-bought pasta and easy to prepare on a weeknight. This pasta dish has layers of umami flavor, from the porcini water to the truffle salt. Also, the mushrooms aren’t masked in a thick creamy sauce; instead they are sautéed, so you can taste each type of mushroom in the dish. Gemelli or penne works well with a sauceless recipe. There is a method to the madness of the 60+ types of traditional pasta shapes in Italy. The type of sauce and ingredients will dictate the appropriate pasta to use.

In this recipe I have a couple of optional ingredients. I like adding chopped toasted walnuts to provide a contrast in texture, but I made it optional since my son and husband prefer the pasta without nuts. Also, the truffle salt adds a wonderful fragrance to the dish, but it is expensive and not essential. If you happen to have some truffle salt in your pantry, definitely sprinkle some on the pasta, but don’t go out of your way to buy some. Either way, the pasta will be tasty. Enjoy!

Gemelli Pasta with Assorted Mushrooms

Serving Size: 4-6

1 ounce of dried porcini mushrooms*
1/2 cup of hot water
Extra virgin olive oil
3 garlic cloves (chopped)
12 ounces of dried gemelli or penne pasta
12 ounces of assorted mushrooms (cremini, shiitake, chanterelles, oysters, maitake, etc.)
1 1/2 teaspoons of chopped thyme leaves
Sea salt
Freshly grated black pepper
1/2 red onion, thinly sliced
1 tablespoon of unsalted butter
2 tablespoons of heavy cream (optional)
1/4 cup of chopped Italian parsley, plus extra for serving
1/3 cup of grated Parmigiano-Reggiano, plus extra shavings for serving
1/2 cup of toasted walnuts, chopped (optional)
Black truffle salt (optional)

1. Place the dried porcini mushrooms in a small bowl. Pour in 1/2 cup of hot water. Set aside.

image


2. Prep the fresh mushrooms by cleaning with damp cloth to remove any dirt. Slice and/or quarter the mushrooms. Set aside.

image

3. Heat a large sauté pan on medium high heat. Add 2 tablespoons of olive oil. Add the chopped garlic and sauté for 15 seconds.


4. Add the all mushrooms, chopped thyme, a pinch of sea salt, and a few turns of the pepper mill.

image

5. Meanwhile, add 3 quarts of water and a handful of Kosher salt in a large stock pot. Bring to a boil.

6. Sauté the mushrooms for about 8 minutes until the mushrooms are full cooked. Transfer to a plate. Set aside.

image

7. In the same large sauté pan, add 1 tablespoon of olive oil. Then add the sliced red onions and a pinch of salt. Sauté for 5 minutes over medium heat.

image

8. Add the pasta to the boiling water. Cook until al dente (See instructions on package).

image

9. Drain the porcini mushrooms and reserve the liquid. Finely chop the porcini mushrooms. Add the chopped porcini, the reserved liquid, and a pinch of sea salt to the pan with the red onions. Turn the heat up to high. Cook for 2 minutes.

image

10. Whisk in the the butter and cook for 1 minute.

image

11. Add the cream and cook for 1 more minute, stirring constantly.

image

12. Drain the pasta and reserve 1/2 cup of pasta water. Add the cooked pasta, the reserved sautéed mushrooms, the chopped parsley, and the grated Parmigiano-reggiano. Stir to combine and cook for 1 more minute. Add the reserved pasta water as needed to loosen pasta.Add salt and pepper to taste. Drizzle extra olive oil.

image

13. Spoon some pasta in a serving bowl. Sprinkle truffle salt, chopped walnuts, chopped parsley, and a few shavings of Parmigiano-reggiano.

image.jpeg

*I buy my dried porcini mushrooms from a mushroom vendor at my local farmers market. Dried porcini mushroom can also be found online or at a specialty gourmet market.

Easy French Lentil Soup

I’ve had a few readers indicate that while my recipes look great, they personally don’t have time to execute many of the dishes I write about. Believe me, I know how that goes! During the weeknights, I make quick and healthy dinners that take less than 30 minutes to prepare, but I usually don’t convert them into actual recipes. When I am cooking, I add handful of this and a handful of that, a pinch of this and a pinch of that, and never really measure. So for those friends, I took careful notes during one of my weeknight recipes, and this week I’m sharing a simple and healthy meal that’s perfect for Meatless Monday: Easy French Lentil Soup.

This lentil soup is made with precooked, French green lentils that I purchased from Trader Joe’s. The lentils are steamed then vacuum-packed, retaining all their vitamins and nutrients. I prefer French green lentils over regular green lentils because they retain their shape in soup without getting mushy. Typically when I make lentil soup, I add roasted tomatoes, but doing so adds more cooking time. So in this recipe, I used tomato paste to add a rich, slow-cooked taste. The addition of the mushrooms and Parmigiano-reggiano give the dish an umami finish. The soup is even popular with the kids. Enjoy!

Easy Lentil Soup

Serving Size: 4

1 tablespoon of olive oil
1 small onion, chopped (about 1 cup)
2 cloves of garlic (minced)
1 bay leaf
1 carrot, small diced (about 1/2 cup)
4 ounces of cremini or button mushrooms, chopped into 1/4″ pieces (about 2/3 cups)
1/2 teaspoon of finely chopped fresh thyme
1/4 teaspoon of red pepper flakes
Sea salt
Freshly grated black pepper
1 tablespoon of tomato paste
2 1/2 cups of Trader Joe’s Steamed French Lentils* or cooked French lentils
3 cups of vegetable stock or low-sodium chicken stock
Freshly grated Parmigiano-reggiano, for serving
Chopped Italian parsley, for serving
1. Heat a 2-quart pot over medium-high heat. Add the olive oil, chopped onions, garlic, and bay leaf. Sauté for about 3 minutes until the onions have softened.

image

2. Add the carrots, mushrooms, thyme, red pepper flakes, pinch of salt, and a couple turns on the pepper mill. Sauté for 2 minutes or until the water has been drawn out of the mushrooms.

image

3. Add the tomato paste and stir for about 1 1/2 minute to caramelize the tomato paste.

image

4. Add the lentils and stir to combine. Add the chicken stock and cover the pot with a lid. Bring to a boil.

image

5. Once boiling, reduce the heat to simmer. Simmer with the lid on for 15-20 minutes.

6. The soup will be ready once the carrots are soft and broth has thickened. Add more salt and pepper to taste.

image

7. Remove the bay leaf. Ladle the soup in to 4 bowls. Grate some Parmigiano-reggiano and sprinkle with chopped parsley. Serve with a sliced and toasted sourdough bread.

image

*Here is the package of the pre-cooked lentils.

image

Ricotta Ravioli with Roasted Tomato Sauce

When my husband and I traveled to France and Italy for our honeymoon, we created a wine and food roadmap. It was an incredible trip with sublime food and wine in both countries, but I left longing for Italy. The warm and friendly people, the perfect cup of espresso on every corner, the breathtaking villas, and the amazing food all made me fall in love with country. The food in Italy was simple but so delicious, and every pasta dish we ordered was perfectly executed with local ingredients. After I got back from Italy, I spent countless hours trying to perfect fresh pasta. After testing quite a few recipes and techniques, I developed an easy handmade pasta recipe perfect for pappardelle, fettuccine, and filled pasta.

This pasta dough recipe is light and eggy and has great structure due to the addition of semolina flour. The dough is quick to make and easy to work with, and won’t dry up easily. In this ravioli recipe, I use a simple cheese filling. Most cheese-filled ravioli recipes use the whole egg, causing the filing to solidify when cooked. My recipe uses only the yolk, resulting in a creamy and oozy filling. Also, I add lemon zest and Italian parsley for a little zing. If possible, make the filling in advanced. Also, make sure you drain out the excess liquid from the fresh ricotta with cheesecloth-lined sieve or fine-mesh sieve in advanced. This will ensure a creamy filling without excess water. If you’ve never made homemade ravioli before, this is an easy one to tackle. Enjoy!
Ricotta Ravioli with Roasted Tomato Sauce

Serving Size: about 32 ravioli (2-inch squares)

8 ounces of fresh whole milk ricotta, drained
1 egg yolk
1/2 cup of grated Parmigiano-reggiano plus extra for serving
1 teaspoon of finely chopped Italian parsley
Sea salt and freshly grated black pepper to taste
12 ounces of homemade pasta dough (see recipe below)
Roasted tomato sauce or homemade walnut pesto
2 dozen small basil leaves for garnish

Special equipment: pasta roller or pasta attachment for the KitchenAid

1. In a medium bowl, combine the ricotta, egg yolk, Parmigiano-reggiano, parsley, 1/2 teaspoon of salt and few turns of pepper. Place in the refrigerator while you roll out the pasta dough.

image

2. Take out the pasta dough and cut it into four equal pieces. Cover three of the pieces with plastic while working with one piece on the pasta roller.

image

3. Using a rolling pin, roll out the pasta dough until it is thin enough to fit into the pasta roller. Start on the thickest setting and work your way to the second to the last setting (5 on manual and 6 on the KitchenAid attachment). Cover the pasta sheet with plastic and repeat the process three more times.

imageimage

4. Bring a large pot of water and hand full of Kosher salt to boil.

5. Remove the ricotta filling from the refrigerator. Unwrap one of the pasta sheets and place a heaping teaspoon of filling roughly 1 inch apart throughout the pasta sheet. You should have 16 ravioli.

image

6. Take another pasta sheet and, starting from one end, carefully place it over the pasta sheet with the filling and press down well around the filling to create a strong seal. Make sure you don’t create air bubbles.

image

7. Using a fluted pasta cutter, cut the pasta into 2″ ravioli pieces. Place on a parchment paper-lined cookie sheet. Repeat the process with the other two sheets.

imageimage

8. Heat up the roasted tomato sauce in a large sauté pan. Keep on low.

image.jpeg

9. Reduce the heat of the boiling water to a simmer. Add about half of the ravioli. Once it rises to the surface, simmer for 2 more minutes.

image

10. With a slotted spoon, transfer the ravioli to the roasted tomato sauce. Cook the remaining ravioli and transfer to the sauce.

11. Divide the ravioli into 4 bowls. Grate some Parmigiano-reggiano and garnish with a few basil leaves. Serve with a nice glass of red wine.

image.jpeg


Pasta Dough Recipe

Yield: about 12 ounces

1 cup of unbleached all-purpose flour
1/4 cup of semolina flour*
7 egg yolks
1 tablespoon of extra-virgin olive oil
1 tablespoon of milk or water

1. Whisk the all-purpose flour and semolina flour together. Transfer to a workstation. Create a well and add the egg yolks, olive oil, and milk.

image

2. Using a fork, whisk in the center and slowly bring in the flour. You want to take your time in the beginning so you don’t form flour clumps.

image

3. Once the mixture thickens and it becomes difficult to stir with a fork, start kneading the dough with your hands. Clean off the excess flour with a bench scraper and make sure the workstation is clean.

image

4. Knead the dough for about 10 minutes until the dough is nice and smooth.

image

5. Double wrap with plastic wrap and place in the refrigerator for at least one hour and up to one day until ready to use. You can also freeze the dough for up to one month.

image

*You can find semolina flour at most Italian market.

Hatch Chile Corn Pudding

New Mexico is one of the most beautiful and unique places I’ve visited in the US. When I visited back in the 90s, I fell in love with the adobe houses, turquoise jewelry, art, and Southwestern cuisine. One of the reasons I enjoyed the food in New Mexico is the presence of lots of roasted Hatch green chile peppers in their dishes. Hatch green chiles are grown in the Hatch Valley of Northwest New Mexico along the Rio Grande river. Unlike other Anaheim or pasilla peppers, Hatch green chiles have a more intense flavor when roasted. The roasted peppers are delicious in so many dishes: stewed pork, quesadillas, green chili, salsa, etc. Since it’s Hatch chili season and corn is readily available at the farmers market, I bring you this corn pudding recipe.

Corn pudding is easy to assemble and bake. Most of the time is taken up by roasting, peeling and chopping the peppers. You can roast the peppers a day in advance. Unlike most recipes, I purée half of the corn to make corn milk to add to the pudding. It helps naturally thicken the pudding and adds more corn flavor. The Hatch green chiles add a little heat and lovely roasted flavor. This corn pudding recipe is a great side dish to roasted pork or chicken. Make it before the Hatch green chile season is over. Enjoy!

Hatch Chile Corn Pudding

Serving Size – 6 as a side dish

4 cups of fresh or frozen corn kernels* (about 5-6 ears, preferably non-GMO or organic)
1/8 cup of water
2/3 cup of roasted Hatch chile with sautéed onions (recipe below)
1/2 cup of heavy cream
2 large eggs, beaten well
3/4 teaspoon of Kosher salt
Freshly ground black pepper
1 tablespoon of unbleached all-purpose flour
1/2 cup of grated mild white cheddar
Chopped Italian parsley for garnish

1. Preheat oven to 325°.

2. Take 2 cups of the corn kernels and 1/8 cup of water and purée in a blender until smooth.

image


3. Pour the puréed corn into a chinois or a fine mesh strainer over a medium bowl. Using a rubber spatula or wooden paddle, push down on the solids to push out as much of the liquid as possible. You should have about 2/3 cup of corn milk.

imageimage

4. Place the corn milk, the remaining 2 cups of corn, roasted Hatch chiles, heavy cream, beaten eggs, salt, pepper. Stir well with a rubber spatula.

image

5. Sift in the flour and gently stir to prevent it from clumping.

6. Using a baking spray or softened butter, grease the bottom and the sides of a 1 quart earthenware baking dish. Pour the corn pudding mixture into the dish.

image

7. Sprinkle the grated cheddar evenly over the top.

image

8. Place in the oven and bake 35 to 40 minutes, until golden brown on top.

image

9. Sprinkle chopped parsley on top and for 10 minutes. Serve with your favorite roasted pork or chicken recipe.

image

*If using frozen corn kernels, thaw them in advanced.

Roasted Hatch Chile Peppers

8 Hatch green chiles peppers, mild or medium
Olive oil
1 medium onion, chopped small diced
3 cloves of garlic minced
Kosher salt
Freshly grated black pepper

1. Place Hatch chilies on a aluminum-lined baking sheet.

image

2. Broil on the top rack for about 3 to 4 minutes or until the skin begins to blacken. Using tongs, turn over the peppers and broil the other side for an additional 3 minutes or until the skins begins to blacken.

image

3. Transfer the roasted peppers to a medium bowl. Cover with plastic wrap and let sit for 15 minutes.

image

4. Meanwhile, heat a large sauté pan on medium. Add a tablespoon of olive oil. At the onion, the garlic and pinch of salt. Sauté until soft and translucent (about 10 minutes). Turn off the heat.

image

5. Uncover the plastic wrap off of the bowl of peppers. Using disposable gloves, remove the skins of peppers. They should slip right off.

image


6. Using a knife slit open each of the peppers on the cutting board. Using the back of the knife, slide the seeds off.

image

7. Chopped the roasted peppers into 1/2 inch pieces.

image

8. Add the peppers into the pan with the cooked onions and garlic. Sauté on medium heat for two minutes. Add salt and pepper to taste.

image

9. The roasted peppers are ready to add in corn pudding, scrambled eggs, quesadillas, grilled cheese, cornbread, burgers, etc. The roasted Hatch chiles can be stored in the refrigerator for up to 3 days.

Japchae (Korean Vermicelli with Beef and Vegetables)

Japchae is a popular Korean beef and vegetable noodle dish, made with dang myun (sweet potato noodles). Commonly served at Korean barbecue restaurants as a side dish, japchae is as colorful as it is tasty, usually being combined with a variety of sautéed vegetables. Because it can be served at room temperature, it is also popular at Korean potlucks and wedding buffets. What makes japchae unique is the translucent and chewy texture of the sweet potato noodles. The noodles are also a great alternative to wheat noodles for people who are gluten intolerant.

In this recipe, I use brisket, but you use any other cuts of beef like ribeye, short rib or filet. My mom always used brisket but never marinated it, so it was always a little tough. I created a marinade for this recipe with a little soy and sake and a sprinkling of baking soda to tenderize the beef. It is important to add the baking soda 15 minutes before cooking the meat, so that it doesn’t overtenderize. You to can easily omit beef and add more mushrooms instead to make it vegetarian – either way it will be a crowd pleaser! Enjoy!


Japchae (Korean Vermicelli with Beef and Vegetables)


Serving Size: 6 as a side dish

2 large eggs
Sunflower or other neutral oil
8 ounces of sweet potato noodles*
1 yellow onion, sliced into 1/4″ strips
3 garlic cloves, minced
6 ounces of sliced fresh shiitake or button mushroom
1 cup of carrots (2 carrots), julienned into 1/4″ thin and 2″ long
6 ounces of marinated brisket (see below for marinade)
3 green onion (cut into 2″ pieces)
8 oz of organic spinach (not baby spinach) blanched for 30 seconds
3 tablespoons of soy sauce
1 tablespoon of sugar
1 1/2 tablespoon of toasted sesame oil
1 tablespoon of toasted sesame seeds*
Freshly ground black pepper
Sea salt to taste

*Note: Be sure to follow the marinated brisket instructions below prior to starting the recipe

1. Crack the 2 eggs in a medium bowl. Add a pinch of sea salt. Whisk well.

2. Heat a small, non-stick pan over medium. Add 1/2 tablespoon of oil. Pour about half the egg mixture into the pan, swirling to make a thin egg crepe. Cook for about 1 minute. Flip over and cook for 30 more seconds. Transfer to a cutting board and repeat with the remaining egg mixture.

imageimage

3. Once on the cutting board, fold into thirds like an omelette. Cut into half an inch strips. Place egg strips on a plate and cover with plastic wrap. Set aside until ready to use.

imageimage

4. Bring 5 quarts of water to boil. Add the sweet potato noodles. Cook for about 6 minutes (you can also follow the cooking instructions on the package.). Drain and rinse with cold water. Add 1/2 tablespoon of sesame oil. Set aside.

imageimage

5. Remove the marinated beef from the refrigerator. Sprinkle with baking soda and stir. Set aside.

image.jpeg

6. Heat large a cast iron pan or wok over high. Add 1/2 tablespoon of sunflower oil. Add the carrots and pinch of salt. Cook for about 2 minutes. Remove and set aside.

image

7. In the same pan, add 1/2 tablespoon oil. Add the mushrooms and a pinch of salt. Sauté until golden brown about 2-3 minutes. Remove and set aside.

8. In the same pan on high heat, cook the beef until just brown. Don’t overcook or the meat will get tough. Remove and set aside. Wipe the bottom of pan with a paper towel.

image.jpeg

9. In same pan, heat to medium-high. Add 1 tablespoon of sunflower oil. Sauté the onions and garlic for about for about 3 minutes or until the onions get translucent.

image

10. Add the cooked carrots, mushrooms and beef back into the pan. Add the spinach and green onions. Sauté everything for 30 seconds. Add the cooked noodles, soy sauce, sugar, 1 tablespoon of sesame oil, sesame seeds, and several turns of black pepper.

image

11. With tongs or large chopsticks, toss the noodles with all the ingredients over medium heat. Taste for seasoning and add salt and pepper to taste.

image

12. Finally, add the sliced egg crepe and gently toss gently to distribute evenly.

image.jpeg

image

13. Transfer to serving platter. Sprinkle additional sesame seed and serve.

image

Marinated Brisket

6 ounces of grass-fed brisket
2 teaspoons of organic soy sauce
1 teaspoon of rice wine (sake)
1 teaspoon of sugar
1 teaspoon of sunflower oil
1/8 teaspoon of fresh ground pepper
1/8 teaspoon of baking soda

1. Slice the brisket against the grain into thin strips. You want the strips to be about 2 inches long.

image.jpeg

2. Whisk the remainder of the ingredients except for the baking soda in small bowl. (Save the baking soda for 15 minutes before you cook.)

3. Placed the sliced beef in the bowl and stir until combined. Cover with plastic wrap. Marinate for at least 30 minutes, and up to 2 hours. Keep in the refrigerator until ready to use.

*You can find toasted sesame seeds and dang myun at your local Korean supermarket.

image.jpeg

image.jpeg

Long-Cooked Broccoli Frittata

I first tried long-cooked broccoli at Campanile restaurant, visiting the restaurant many Thursday nights to eat one of their delicious sandwich creations. Nancy Silverton, former owner of La Brea Bakery and co-owner of Campanile, is the genius behind the delicious long-cooked broccoli sandwich, and this broccoli was unlike any I had ever eaten. It was soft but not mushy, and slightly sweet with lovely caramel notes. The long cooking process helps draw out the natural sugars from the broccoli. Though she has since sold La Brea Bakery and Campanile has closed its doors, Silverton has written many cookbooks, and in one she shares her recipe for long-cooked broccoli. I’ve used the recipe many times and have adapted it slightly here, adding it to my frittata recipe.

This frittata is delicious, but he broccoli is the star in this recipe. While the broccoli does takes about 1 1/2 hours to cook, don’t let the long cooking time intimidate you. You only need to stir the dish occasionally during cooking, so you can go exercise, prep other food, or read a book – just stay nearby so you check up on it from time to time. This the perfect dish to make on a leisurely Sunday morning, and I recommend serving it with light salad dressed with balsamic vinaigrette. As an alternative, you could use this long-cooked broccoli in pasta or on pizza. Enjoy!

 
Long-Cooked Broccoli Frittata

Serves 6

12 ounces of broccoli head (sliced 1/4″ thin)
1/8 cup of Kosher salt
1/4 cup of extra-virgin olive oil
3 cloves of garlic (thinly sliced)
1/2 small onion (thinly sliced)
3/4 teaspoon of sea salt
1/8 teaspoon of red pepper flakes
8 large eggs
2 tablespoons of heavy cream (optional)
1/4 cup of grated Parmigiano-Reggiano, plus extra for topping
1/4 teaspoon of freshly-grated black pepper

1. Bring 2 quarts of water and 1/8 cup salt to boil. Add the broccoli and boil for 2 minutes.

2. While the broccoli is boiling, get an ice water bath ready.

3. When the broccoli is ready, using a spider strainer, transfer broccoli to a ice water bath. Remove the broccoli and pat with paper towels until dry.

image

4. In a 12″ stainless steel sauté pan, add the olive oil, blanched broccoli, onion, garlic, sea salt, and red pepper flakes.

image

5. Cook over low heat for about 1 1/2 hours, stirring occasionally.

It should look like this at the halfway point.

image

6. Once the broccoli is done, preheat the oven to 375°.

image

7. In a large bowl, crack the 8 eggs. Add the the heavy cream and whisk.

image

8. Add the Parmigiano-Reggiano and the black pepper. Give it another good whisk.

image

9. Turn up heat to high on the broccoli. Wait 1 minute. Add the eggs over the broccoli. Cook over the burner for 1 minute. Transfer to the the oven.

image

10. Bake for about 10 minutes. Make sure the center is set and not jiggly. Broil for 1 minute until the top is golden brown.

image

11. Remove from the oven. Loosen the frittata using a fish spatula. Transfer to a clean cutting board. Grate additional Parmigiano-Reggiano. Slice into 6 triangles.

image

12. Serve warm with a side salad. I like to serve it bottom side up, since it has a nice golden color.

image

Fried Brussels Sprouts and Shallots with Asian Dressing

Thanksgiving is one of my favorite holidays of the year. It’s the one meal I get really excited about cooking. I usually spend a day planning the menu, a couple of days prepping the ingredients, and several hours cooking in the kitchen. Aside from the turkey or ham that is central to the meal, there are side dishes that my family looks forward to every year: roasted Brussels sprouts, savory pain de mie stuffing, cauliflower gratin, among others. My family raves about how yummy everything tastes and it puts a smile on my face. Cooking is a true labor of love.

But cooking a Thanksgiving meal wasn’t always easy or fun for me. I remember my humble beginnings, cooking my first Thanksgiving meal back when I was in junior high. My immediate family and my Korean neighbors (there were a total of 20 guests) were excited about their first traditional Thanksgiving dinner…only to learn the centerpiece of the meal was missing from dinner table. I completely miscalculated the cooking time of a 22 lb. turkey and it still had a couple more hours left to cook in the oven when everyone arrived. Since my guests were hungry, they ate the stuffing, candied yams, and mashed potatoes while the turkey was still roasting. A couple of guests even ran back to their places and brought over some rice, kimchee and several ban chan for the table. When the turkey finally came out of the oven, it ended up being dry and pretty bland, a major disappointment after such a long wait. I felt awful and vowed to never make the same mistake again. Next year, the turkey was ready early!

As we ramp up for Thanksgiving this year, I will be posting a couple of my favorite side dishes. Here is a great Brussels sprouts dish with an Asian twist. It is flavorful, has a hint of heat and different layers of texture. This will be a great addition to any Thanksgiving table.

Fried Brussels Sprouts and Shallots with Asian Dressing

Serving Size: 6-8 as a side dish

2 tablespoons of organic soy sauce
1 tablespoon of fish sauce (Three Crabs brand)
2 tablespoons of organic sugar
1 teaspoon of Asian chili paste (Sambal Oelek)
1 large clove of garlic, minced
1 tablespoon of lemon juice
3 shallots, thinly sliced
2 cups of vegetable oil (sunflower oil)
Sea salt
1 pound of Brussels sprouts, quartered
¼ cup of toasted sliced almonds

1. In a small saucepan, combine the soy sauce, fish sauce, sugar, chili paste, and garlic. Cook over medium heat until the sugar is dissolved and the sauce thickens a bit (about 5 minutes).
2. Remove the sauce from heat, add the lemon juice and set aside to cool.
3. Place 2 cups of oil in a wok or a deep fryer. Bring the temperature to 275°.

image
4. Add all the shallots at once and fry for about 8-10 minutes or until the shallots are golden brown.
5. Remove from the oil with a slotted spoon or spider strainer and place in a colander lined with paper towels. Sprinkle with sea salt and set aside.

image
6. Increase the heat of the oil to 350°.
7. Add ¼ of the Brussels sprouts to the oil and fry for about 3 minutes or until golden brown. Transfer to a colander lined with paper towels. Repeat this process 3 more times. (Make sure you bring the oil temperature back to 350° each time before adding the Brussels sprouts.)

image
8. Transfer all the fried Brussels sprouts to a large bowl. Add the toasted almonds.
9. Add 2 tablespoons of the sauce and toss to coat. Taste to see if it needs more sauce. If so, add one more tablespoon of the sauce and toss to coat.

image
10. Transfer to a serving bowl. Top with shallots and serve.