Category Archives: Italian

Cauliflower, Arugula, and Pomegranate Salad

My first job out of culinary school was working as a Garde Manger, a fancy French name for the chef of cold foods such as appetizers, salads, sandwiches, etc. It is an entry-level position that is offered to most recent culinary graduates. During my short stint working as a Garde Manger, I became an expert at making salads. Making salads is all about balance and creating layers of textures. I loved adding fresh seasonal produce in the salads: artichokes in the spring, peaches in the summer, roasted butternut squash during the fall, and persimmons in the winter. It was a fun challenge to incorporate seasonal ingredients and come up with new salad ideas.

In the spirit of the holidays, I offer you a lovely seasonal salad highlighting cauliflowers and pomegranate seeds. This vegetarian salad is crunchy, sweet, tart, and nutty. It’s also very pretty with Christmas colors of white, red and green. It’s a perfect salad to serve at your holiday meal or to take to a holiday potluck, as it will offset some of the greasy and heavy food at the table. Make sure you keep the toasted almonds, pomegranate seeds and dressing separate if taking to a party and assemble it on site. Enjoy!

Cauliflower, Arugula, and Pomegranate Salad

Serving Size: 6-8

12 ounces of organic cauliflower (about 1/2 head)

2 ounces of arugula leaves

1/2 cup of golden raisins

2/3 cup of pomegranate seeds*

1/3 cup of Parmigiano-Reggiano cheese shavings

1/3 cup of sliced almonds, toasted**

Vinaigrette (recipe below)

1. Slice the cauliflower into 1/4 inch pieces. You can use a mandolin, if you have one, to create uniform slices. Place them in a large salad bowl.

img_5213img_5216img_5217

2. Add the arugula, golden raisins, pomegranate seeds, Parmigiano-reggiano cheese, and the almonds.

img_5220img_5222

3. Dress the salad with the vinaigrette and toss lightly, making sure you don’t bruise the arugula. You may not need to use all of the dressing.

img_5235

4. Serve immediately.

*You can find pomegranate seeds at Trader Joe’s. They did all the  hard work for us.

img_5236


** Toast raw almond slices in the oven at 350° for 5-8  minutes


Vinaigrette Recipe

1/4 cup of red wine vinegar

1 teaspoon of finely chopped shallots

2 teaspoons of Dijon Mustard*

2 teaspoons of honey

2 tablespoons of extra virgin olive oil

1 teaspoon of sea salt

Freshly grated black pepper


1. Add all the ingredients in a mason jar or a dressing jar.

img_5225

2. Top with lid and shake until the dressing is emulsified and not separated. (Alternatively, whisk all the ingredients in a bowl until emulsified.)

3. If not using right away, you can store it in the refrigerator for up to 3 days.

*Trois Petits Cochon’s Dijon mustard not too spicy, so it is wonderful to add to dressings.

img_5227


Advertisement

Pumpkin and Swiss Chard Lasagna

I was hesitant to post a recipe with pumpkin this season because of pumpkin spice overload. Come fall, most markets dedicate a whole section to products with pumpkin spice. Trader Joe’s started this trend a few of years ago and other supermarkets quickly followed suit. There is pumpkin spice in chips, crackers, BBQ marinade, and even in kombucha. It has gotten so out of control, Anthony Bourdain said “I would like to see the pumpkin spice craze drowned in its own blood. Quickly.” Even though this lasagna recipe doesn’t contain any pumpkin spice, pumpkin has gotten a bad rap, kind of an instance of guilt by association.

Despite Bourdain’s loathing of pumpkin spice, pumpkin is a wonderful autumnal ingredient perfect for savory dishes. This pumpkin lasagna recipe is a nice change from your traditional meat sauce lasagna. There are two layers of pumpkin purée and one layer of Swiss chard/ricotta, and the dish is topped with béchamel, mozzarella and Parmigiano-Reggiano. There is also sage brown butter in the pumpkin purée, which adds a layer of nutty and woody flavor. There is some advanced preparation involved before assembling the lasagna, so plan ahead. This a good dish for a crowd, or if you omit the chicken stock, a nice vegetarian option at a potluck. Serve it with a side salad for a complete meal. Enjoy!

Serving Size: about 12

Non-cooking spray, preferably olive oil-based
Béchamel sauce (see below)
1 lb. of lasagna noodles, no-boil
Cooked Swiss chard (recipe below)
Pumpkin layer (recipe below)
Ricotta layer (recipe below)
1 cup of grated mozzarella
1/4 cup of grated Parmigiano-Reggiano
1/2 cup of chicken stock or low sodium chicken broth (optional)

1. Preheat oven to 375°

2. Spray the bottom of a 13″ x 9″ x 3″ baking pan with non-stick cooking spray. Ladle and spread half of the béchamel sauce on the bottom of the baking pan.

image

3. Place 4 lasagna sheets, overlapping, on top of the béchamel layer.

4. Spread 1/2 of the pumpkin mixture on top of the lasagna noodles.

image

5. Add another layer of lasagna sheets.

6. Spread the remaining ricotta mixture on top of the lasagna sheets.

image

7. Evenly spoon all of the Swiss chard mixture and top with 1/2 of the grated mozzarella.

imageimage

8. Add another layer of lasagna sheets.

9. Spread the remaining pumpkin mixture on top of the lasagna noodles.

image

10. Add another layer of lasagna noodles.

11. Ladle and spread the remaining béchamel, then the remaining mozzarella, and finally the grated Parmigiano-Reggiano. If using, pour the chicken stock along the sides. Cover the lasagna with aluminum foil. Bake for 45 minutes.

image

12.  Remove foil and increase the heat to 400° and bake for 10 additional minutes.

13. Place the lasagna on a cooling rack. Let cool for at least 20 minutes before slicing and serving.

image


Swiss Chard

2 tablespoons of olive oil
3 cloves of garlic, thinly sliced
1 1/2 cups of chopped onions
1 teaspoon of chopped thyme leaves
Pinch of red pepper flakes
8 cups of chopped Swiss chard
2 teaspoons of lemon juice
Salt and pepper to taste

1. Heat a large sauté pan over medium heat. Add the olive oil. Add the garlic and sauté of for 15 seconds. Add the onions and thyme leaves. Sauté for 3 minutes.

image

2. Add all of the Swiss chard and red pepper flakes. Sauté and cook until tender, about 5-6 minutes. Season to taste.

image

3. Add the lemon juice and transfer to a bowl until ready to use.

image

Béchamel sauce

2 tablespoons of unsalted butter
2 tablespoons of flour
2 cups of low-fat milk, heated
3/4 teaspoon of sea salt
1 pinch of ground nutmeg (half of 1/8 teaspoon)
Freshly ground pepper

1. Heat a medium sauce pan over medium heat. Add the butter and stir until melted.

2. Slowly rain in the flour while whisking to prevent clumping. Cook while whisking for about 1 minute.

image

3. While whisking, slowly add the heated milk. Add the salt, nutmeg, and pepper. Continue to whisk and cook until the sauce thickens and the mixture bubbles on the sides. Turn off the heat. Set aside until ready to use.

image

Pumpkin layer

2 tablespoons of butter
8 fresh sage leaves
3 cups of cooked pumpkin (fresh or canned)
3/4 cup of grated Parmigiano-Reggiano
1/2 teaspoon of sea salt
Pinch of nutmeg
Freshly ground pepper

1. In a small sauté pan, melt the butter over medium heat. Add the sage leaves. Cook until the butter turns brown and toasty. Turn off the heat, remove the sage leaves and set aside.

image

2. In a large bowl, combine the pumpkin, Parmigiano-Reggiano, salt, nutmeg and few turns of the pepper mill. Stir to combine.

image

3. Add the brown butter. Stir well and set aside until ready to use.

image

Ricotta layer

1 1/2 cup of ricotta
1/2 cup of grated Parmigiano-Reggiano
1/2 teaspoon of salt
Freshly ground pepper

Mix all the ingredients in a small bowl. Set aside until ready to use.

image

Gemelli Pasta with Assorted Mushrooms

We normally associate October with pumpkins, Halloween, and all things fall, but did you know we have dedicated the whole month of October to pasta? It’s not surprising since pasta is one of America’s favorite foods. So in honor of National Pasta Month, I am sharing an easy pasta recipe with some delicious fall mushrooms. If you love mushrooms, you will enjoy this pasta recipe. Unlike most of my previous pasta dishes, this recipe is made with store-bought pasta and easy to prepare on a weeknight. This pasta dish has layers of umami flavor, from the porcini water to the truffle salt. Also, the mushrooms aren’t masked in a thick creamy sauce; instead they are sautéed, so you can taste each type of mushroom in the dish. Gemelli or penne works well with a sauceless recipe. There is a method to the madness of the 60+ types of traditional pasta shapes in Italy. The type of sauce and ingredients will dictate the appropriate pasta to use.

In this recipe I have a couple of optional ingredients. I like adding chopped toasted walnuts to provide a contrast in texture, but I made it optional since my son and husband prefer the pasta without nuts. Also, the truffle salt adds a wonderful fragrance to the dish, but it is expensive and not essential. If you happen to have some truffle salt in your pantry, definitely sprinkle some on the pasta, but don’t go out of your way to buy some. Either way, the pasta will be tasty. Enjoy!

Gemelli Pasta with Assorted Mushrooms

Serving Size: 4-6

1 ounce of dried porcini mushrooms*
1/2 cup of hot water
Extra virgin olive oil
3 garlic cloves (chopped)
12 ounces of dried gemelli or penne pasta
12 ounces of assorted mushrooms (cremini, shiitake, chanterelles, oysters, maitake, etc.)
1 1/2 teaspoons of chopped thyme leaves
Sea salt
Freshly grated black pepper
1/2 red onion, thinly sliced
1 tablespoon of unsalted butter
2 tablespoons of heavy cream (optional)
1/4 cup of chopped Italian parsley, plus extra for serving
1/3 cup of grated Parmigiano-Reggiano, plus extra shavings for serving
1/2 cup of toasted walnuts, chopped (optional)
Black truffle salt (optional)

1. Place the dried porcini mushrooms in a small bowl. Pour in 1/2 cup of hot water. Set aside.

image


2. Prep the fresh mushrooms by cleaning with damp cloth to remove any dirt. Slice and/or quarter the mushrooms. Set aside.

image

3. Heat a large sauté pan on medium high heat. Add 2 tablespoons of olive oil. Add the chopped garlic and sauté for 15 seconds.


4. Add the all mushrooms, chopped thyme, a pinch of sea salt, and a few turns of the pepper mill.

image

5. Meanwhile, add 3 quarts of water and a handful of Kosher salt in a large stock pot. Bring to a boil.

6. Sauté the mushrooms for about 8 minutes until the mushrooms are full cooked. Transfer to a plate. Set aside.

image

7. In the same large sauté pan, add 1 tablespoon of olive oil. Then add the sliced red onions and a pinch of salt. Sauté for 5 minutes over medium heat.

image

8. Add the pasta to the boiling water. Cook until al dente (See instructions on package).

image

9. Drain the porcini mushrooms and reserve the liquid. Finely chop the porcini mushrooms. Add the chopped porcini, the reserved liquid, and a pinch of sea salt to the pan with the red onions. Turn the heat up to high. Cook for 2 minutes.

image

10. Whisk in the the butter and cook for 1 minute.

image

11. Add the cream and cook for 1 more minute, stirring constantly.

image

12. Drain the pasta and reserve 1/2 cup of pasta water. Add the cooked pasta, the reserved sautéed mushrooms, the chopped parsley, and the grated Parmigiano-reggiano. Stir to combine and cook for 1 more minute. Add the reserved pasta water as needed to loosen pasta.Add salt and pepper to taste. Drizzle extra olive oil.

image

13. Spoon some pasta in a serving bowl. Sprinkle truffle salt, chopped walnuts, chopped parsley, and a few shavings of Parmigiano-reggiano.

image.jpeg

*I buy my dried porcini mushrooms from a mushroom vendor at my local farmers market. Dried porcini mushroom can also be found online or at a specialty gourmet market.

Ricotta Ravioli with Roasted Tomato Sauce

When my husband and I traveled to France and Italy for our honeymoon, we created a wine and food roadmap. It was an incredible trip with sublime food and wine in both countries, but I left longing for Italy. The warm and friendly people, the perfect cup of espresso on every corner, the breathtaking villas, and the amazing food all made me fall in love with country. The food in Italy was simple but so delicious, and every pasta dish we ordered was perfectly executed with local ingredients. After I got back from Italy, I spent countless hours trying to perfect fresh pasta. After testing quite a few recipes and techniques, I developed an easy handmade pasta recipe perfect for pappardelle, fettuccine, and filled pasta.

This pasta dough recipe is light and eggy and has great structure due to the addition of semolina flour. The dough is quick to make and easy to work with, and won’t dry up easily. In this ravioli recipe, I use a simple cheese filling. Most cheese-filled ravioli recipes use the whole egg, causing the filing to solidify when cooked. My recipe uses only the yolk, resulting in a creamy and oozy filling. Also, I add lemon zest and Italian parsley for a little zing. If possible, make the filling in advanced. Also, make sure you drain out the excess liquid from the fresh ricotta with cheesecloth-lined sieve or fine-mesh sieve in advanced. This will ensure a creamy filling without excess water. If you’ve never made homemade ravioli before, this is an easy one to tackle. Enjoy!
Ricotta Ravioli with Roasted Tomato Sauce

Serving Size: about 32 ravioli (2-inch squares)

8 ounces of fresh whole milk ricotta, drained
1 egg yolk
1/2 cup of grated Parmigiano-reggiano plus extra for serving
1 teaspoon of finely chopped Italian parsley
Sea salt and freshly grated black pepper to taste
12 ounces of homemade pasta dough (see recipe below)
Roasted tomato sauce or homemade walnut pesto
2 dozen small basil leaves for garnish

Special equipment: pasta roller or pasta attachment for the KitchenAid

1. In a medium bowl, combine the ricotta, egg yolk, Parmigiano-reggiano, parsley, 1/2 teaspoon of salt and few turns of pepper. Place in the refrigerator while you roll out the pasta dough.

image

2. Take out the pasta dough and cut it into four equal pieces. Cover three of the pieces with plastic while working with one piece on the pasta roller.

image

3. Using a rolling pin, roll out the pasta dough until it is thin enough to fit into the pasta roller. Start on the thickest setting and work your way to the second to the last setting (5 on manual and 6 on the KitchenAid attachment). Cover the pasta sheet with plastic and repeat the process three more times.

imageimage

4. Bring a large pot of water and hand full of Kosher salt to boil.

5. Remove the ricotta filling from the refrigerator. Unwrap one of the pasta sheets and place a heaping teaspoon of filling roughly 1 inch apart throughout the pasta sheet. You should have 16 ravioli.

image

6. Take another pasta sheet and, starting from one end, carefully place it over the pasta sheet with the filling and press down well around the filling to create a strong seal. Make sure you don’t create air bubbles.

image

7. Using a fluted pasta cutter, cut the pasta into 2″ ravioli pieces. Place on a parchment paper-lined cookie sheet. Repeat the process with the other two sheets.

imageimage

8. Heat up the roasted tomato sauce in a large sauté pan. Keep on low.

image.jpeg

9. Reduce the heat of the boiling water to a simmer. Add about half of the ravioli. Once it rises to the surface, simmer for 2 more minutes.

image

10. With a slotted spoon, transfer the ravioli to the roasted tomato sauce. Cook the remaining ravioli and transfer to the sauce.

11. Divide the ravioli into 4 bowls. Grate some Parmigiano-reggiano and garnish with a few basil leaves. Serve with a nice glass of red wine.

image.jpeg


Pasta Dough Recipe

Yield: about 12 ounces

1 cup of unbleached all-purpose flour
1/4 cup of semolina flour*
7 egg yolks
1 tablespoon of extra-virgin olive oil
1 tablespoon of milk or water

1. Whisk the all-purpose flour and semolina flour together. Transfer to a workstation. Create a well and add the egg yolks, olive oil, and milk.

image

2. Using a fork, whisk in the center and slowly bring in the flour. You want to take your time in the beginning so you don’t form flour clumps.

image

3. Once the mixture thickens and it becomes difficult to stir with a fork, start kneading the dough with your hands. Clean off the excess flour with a bench scraper and make sure the workstation is clean.

image

4. Knead the dough for about 10 minutes until the dough is nice and smooth.

image

5. Double wrap with plastic wrap and place in the refrigerator for at least one hour and up to one day until ready to use. You can also freeze the dough for up to one month.

image

*You can find semolina flour at most Italian market.

Long-Cooked Broccoli Frittata

I first tried long-cooked broccoli at Campanile restaurant, visiting the restaurant many Thursday nights to eat one of their delicious sandwich creations. Nancy Silverton, former owner of La Brea Bakery and co-owner of Campanile, is the genius behind the delicious long-cooked broccoli sandwich, and this broccoli was unlike any I had ever eaten. It was soft but not mushy, and slightly sweet with lovely caramel notes. The long cooking process helps draw out the natural sugars from the broccoli. Though she has since sold La Brea Bakery and Campanile has closed its doors, Silverton has written many cookbooks, and in one she shares her recipe for long-cooked broccoli. I’ve used the recipe many times and have adapted it slightly here, adding it to my frittata recipe.

This frittata is delicious, but he broccoli is the star in this recipe. While the broccoli does takes about 1 1/2 hours to cook, don’t let the long cooking time intimidate you. You only need to stir the dish occasionally during cooking, so you can go exercise, prep other food, or read a book – just stay nearby so you check up on it from time to time. This the perfect dish to make on a leisurely Sunday morning, and I recommend serving it with light salad dressed with balsamic vinaigrette. As an alternative, you could use this long-cooked broccoli in pasta or on pizza. Enjoy!

 
Long-Cooked Broccoli Frittata

Serves 6

12 ounces of broccoli head (sliced 1/4″ thin)
1/8 cup of Kosher salt
1/4 cup of extra-virgin olive oil
3 cloves of garlic (thinly sliced)
1/2 small onion (thinly sliced)
3/4 teaspoon of sea salt
1/8 teaspoon of red pepper flakes
8 large eggs
2 tablespoons of heavy cream (optional)
1/4 cup of grated Parmigiano-Reggiano, plus extra for topping
1/4 teaspoon of freshly-grated black pepper

1. Bring 2 quarts of water and 1/8 cup salt to boil. Add the broccoli and boil for 2 minutes.

2. While the broccoli is boiling, get an ice water bath ready.

3. When the broccoli is ready, using a spider strainer, transfer broccoli to a ice water bath. Remove the broccoli and pat with paper towels until dry.

image

4. In a 12″ stainless steel sauté pan, add the olive oil, blanched broccoli, onion, garlic, sea salt, and red pepper flakes.

image

5. Cook over low heat for about 1 1/2 hours, stirring occasionally.

It should look like this at the halfway point.

image

6. Once the broccoli is done, preheat the oven to 375°.

image

7. In a large bowl, crack the 8 eggs. Add the the heavy cream and whisk.

image

8. Add the Parmigiano-Reggiano and the black pepper. Give it another good whisk.

image

9. Turn up heat to high on the broccoli. Wait 1 minute. Add the eggs over the broccoli. Cook over the burner for 1 minute. Transfer to the the oven.

image

10. Bake for about 10 minutes. Make sure the center is set and not jiggly. Broil for 1 minute until the top is golden brown.

image

11. Remove from the oven. Loosen the frittata using a fish spatula. Transfer to a clean cutting board. Grate additional Parmigiano-Reggiano. Slice into 6 triangles.

image

12. Serve warm with a side salad. I like to serve it bottom side up, since it has a nice golden color.

image

Agnolotti dal Plin

In April of 2003, Los Angeles Times featured an article in their Food section about Il Ristorante di Guido da Costigliole, a restaurant in the Piedmont region of Italy. The article focused on a regional, filled pasta called agnolotti dal plin. Lidia Alciati, the owner and chef of the restaurant, cranked out thousands of agnolotti every week for 40 years. I was was intrigued and I saved the article for my honeymoon trip to Italy that June.

When my husband and I arrived in Asti, we learned that Lidia had retired and that her sons had taken over the family business and found their restaurant a new home. We were directed to a beautiful 5-star hotel in a restored 1619 monastery, atop a hill overlooking a picturesque valley of vineyards. The restaurant was located under the hotel in a converted wine cellar. Once we were seated at our table, I was overcome with excitement. When the agnolotti arrived, the little, yellow pillows of pasta were glistening in light butter sauce. When I took a bite, I thought I had died and gone to heaven. The delicious pasta packets were filled with rabbit, pork, veal, spinach, Parmesan cheese and hint of nutmeg.

Today I bring you my version of Guido’s agnolotti. Instead of adding rabbit and veal, I used all pork for my recipe, and I also replaced the spinach with Swiss chard. Make sure you roast the pork a day in advance. For the pasta, I really like Thomas Keller’s pasta recipe for the agnolotti. It’s easy to work with and the perfect texture for this dish. You can also make the pasta a day ahead if you prefer. Making this dish requires a lot time, but it’s worth the effort. This recipe makes enough to feed an army so it’s perfect for the holidays or any other special occasion. Enjoy!

Agnolotti dal Plin

Serving size: 12

Olive oil
1 garlic clove, finely chopped
2 teaspoons of finely chopped rosemary
2 pounds of roasted pork shoulder (recipe below)
3 cups of Swiss chard, chopped
1 cup freshly grated Parmigiano-Reggiano
1/2 teaspoon of nutmeg
Salt
Freshly grated pepper
2 large eggs
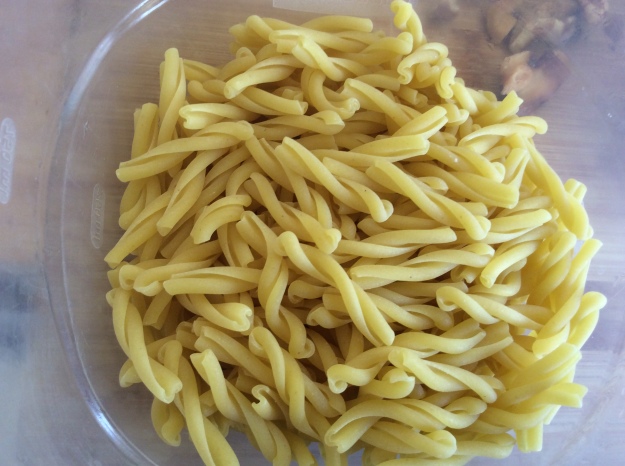
28 ounces of fresh pasta dough – Thomas Keller’s Pasta Recipe
1/2 cup of unsalted butter
1/2 cup of reduced pork or veal stock
6 sage leaves
Parmigiano-Reggiano for serving

 
1. Take the pasta out of the refrigerator and bring to room temperature.

2. While waiting for the pasta to come to room temperature, take the roasted pork out of the refrigerator and remove most of the fat using a knife. Cut into large chunks and then pulse a few times in the food processor until it resembles ground beef. Transfer to a large bowl.

3. Remove the reserved pork drippings from the refrigerator. Scrape off the fat cap and you should be left with a gelatinous pork stock. Set aside.

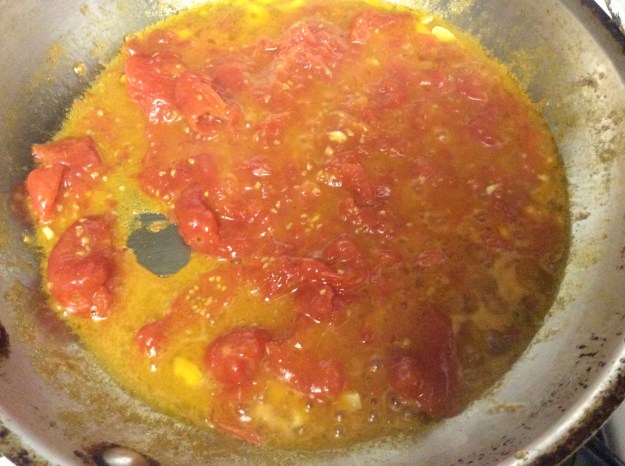
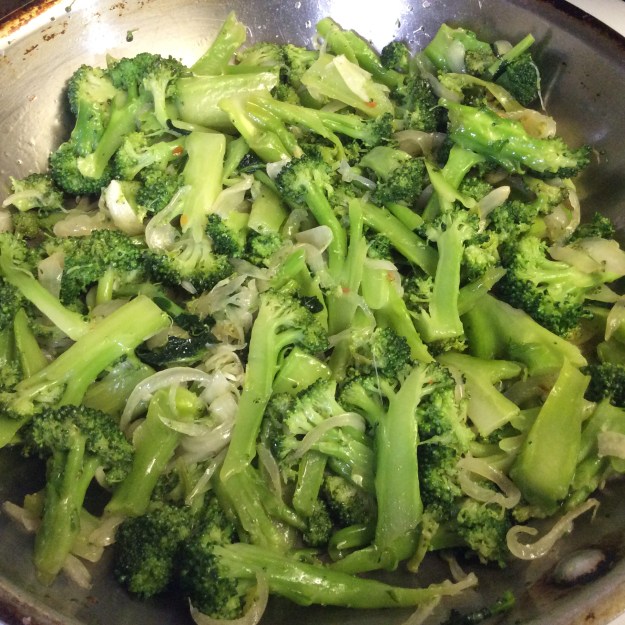
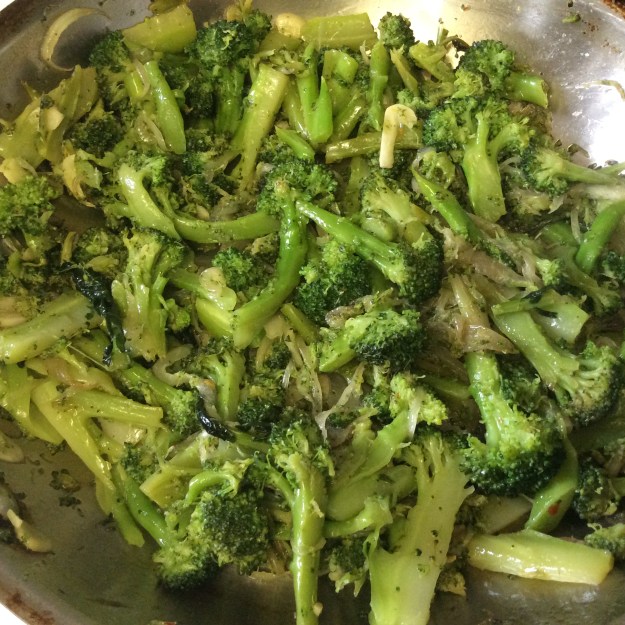
4. Heat a large sauté pan over medium heat. Add 1 tablespoon of olive oil and sauté the Swiss chard for about five minutes. Add a 1/4 cup of water and cover with a lid until most of the water is absorbed. Transfer to a food processor and process until smooth. You may need to add a little water. Set aside.

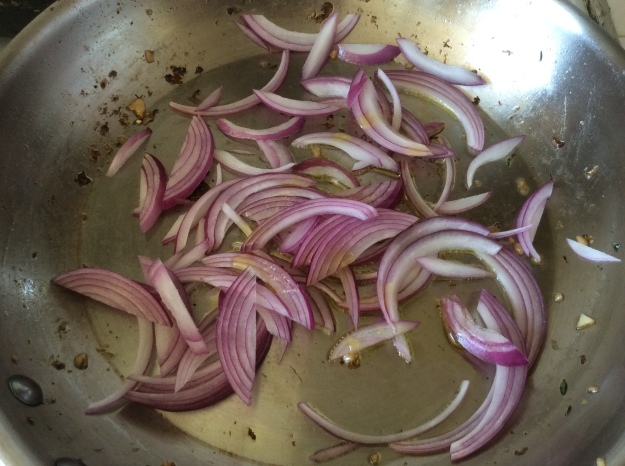
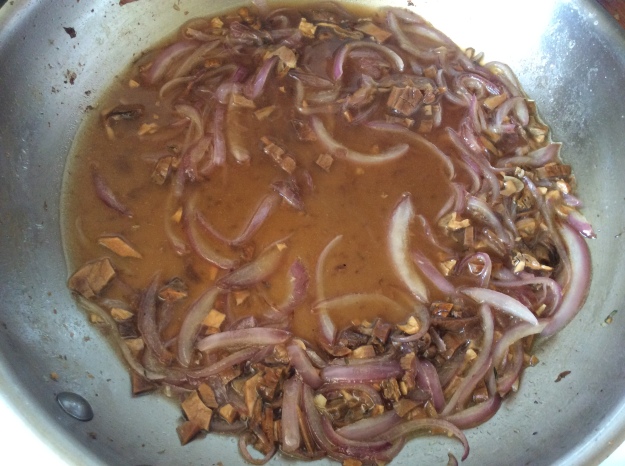
5. Heat the same sauté pan over medium-high heat. Add 1 tablespoon of olive oil and add the garlic and rosemary. Sauté for one minute. Add the ground pork meat and cook for about 5 minutes. Season with salt and pepper to taste. Transfer back to the large bowl and cool at room temperature.

image

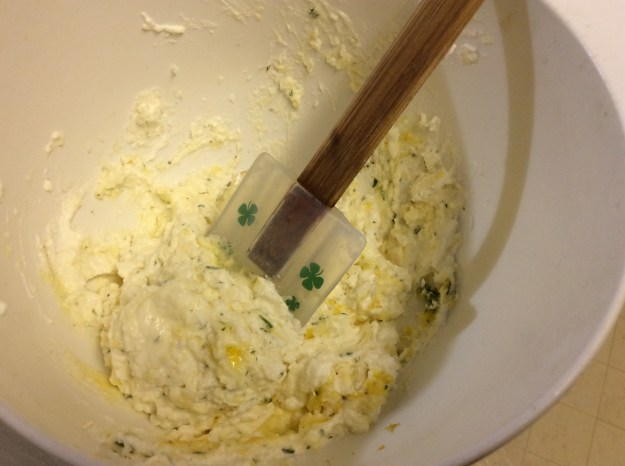
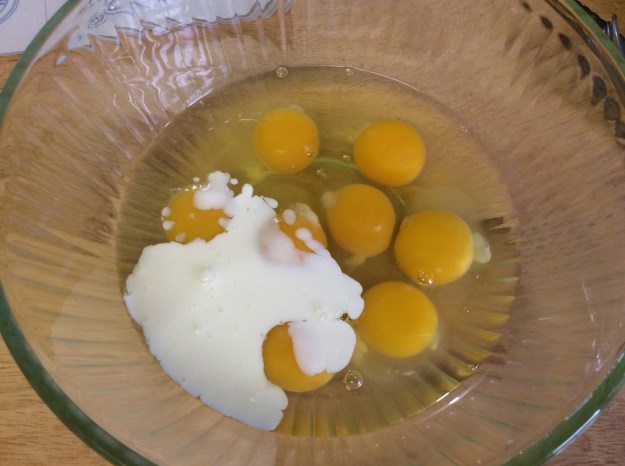
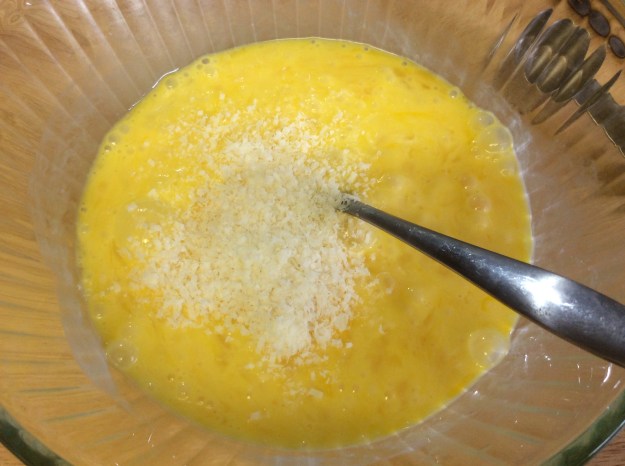
6. Once the meat has cooled, stir in the Parmigiano, 2 eggs (slightly beaten), Swiss chard, reserved pork stock, nutmeg, and salt and pepper to taste. This is the agnolotti filling. Cover with plastic wrap, and place in the refrigerator while you roll out the pasta.

image

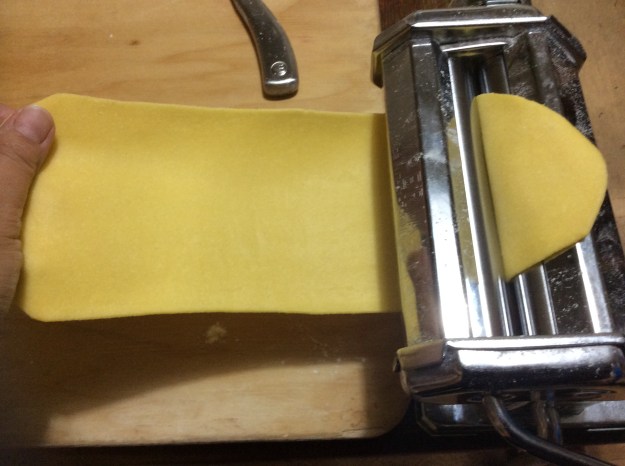
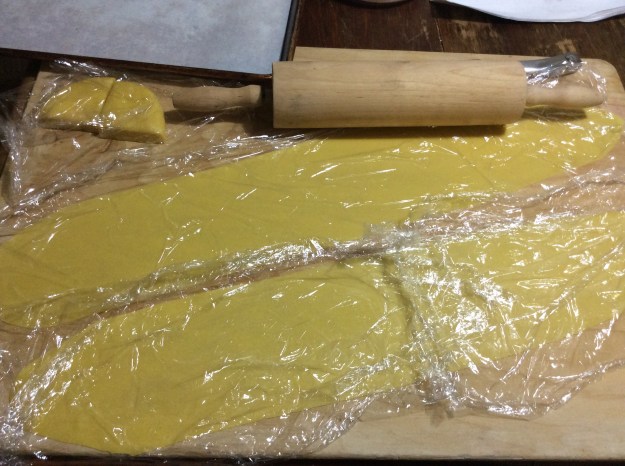
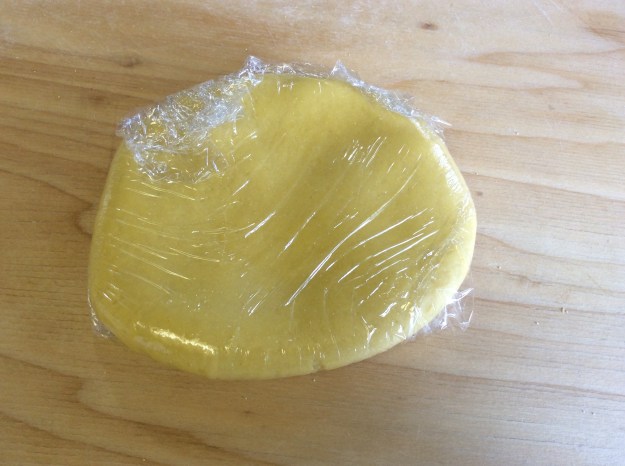
7. Roll out the pasta dough a few sheets at a time and keep any unused portion of pasta tightly wrapped in plastic. On your pasta roller, roll the pasta sheet to the second thinnest setting.

image

8. Remove the filling from the refrigerator. Using a small teaspoon, place a portion of filling about 1 inch from the bottom of the sheet. Continue placing portions of filling across the bottom of the sheet, leaving 1 inch space in between each.

image
9. Fold the bottom of the pasta sheet to partially cover the filling.

image
10. Fold from the bottom again, rolling the pasta while pinching between each pocket of filling. It is important to leave this “pinched” area between the agnolotti, or when the agnolotti are separated, they may come unsealed.

image
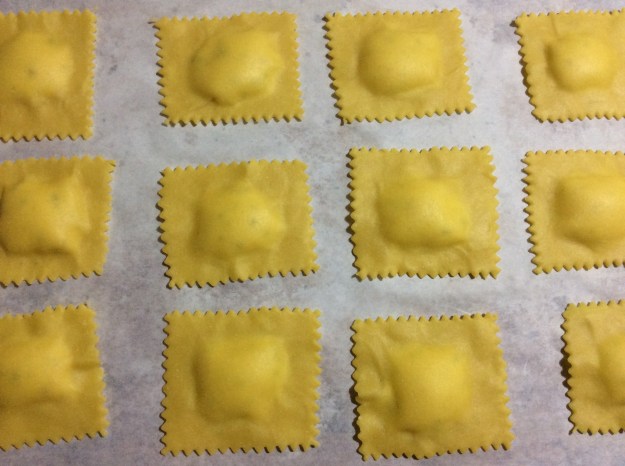
11. Run a crimped pastry wheel away from you and between the center of each pinched area to create the individual agnolotti. Place the filled agnolotti on a parchment-lined baking sheet. Place the baking sheet with the agnolotti inside the freezer until frozen.

image
12. Repeat the process until all the agnolotti is filled.

image.jpg

13. Fill a large pot of water halfway and add a generous amount of Kosher salt. Bring to a boil.
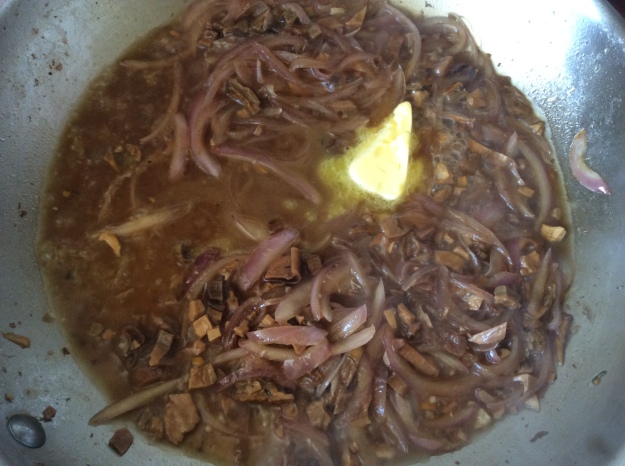
14. Meanwhile, in a large sauté pan over medium heat, add half the butter until melted. Add three sage leaves, sauté for one minute. Add 1/4 cup of the reduced pork or veal stock. Lower the heat to warm.
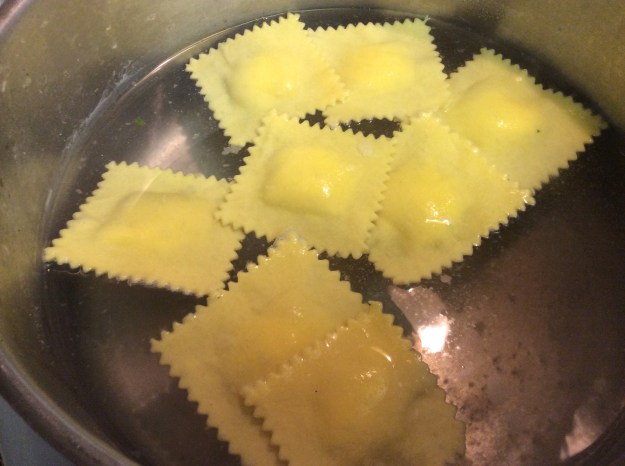
15. Once the water is boiling, add about 1/4 of the agnolotti. Once the pasta rises to the top cook for about one more minute. With a large slotted spoon, transfer to the sauté pan with butter sauce.

16. Bring the water back to a boil and add another 1/4 of the agnolotti. Once cooked, transfer to the same pan. Toss to coat. Transfer to a large serving platter.  Repeat the process with the remaining agnolotti or you can also freeze the rest in a plastic bag for up to 1 month.

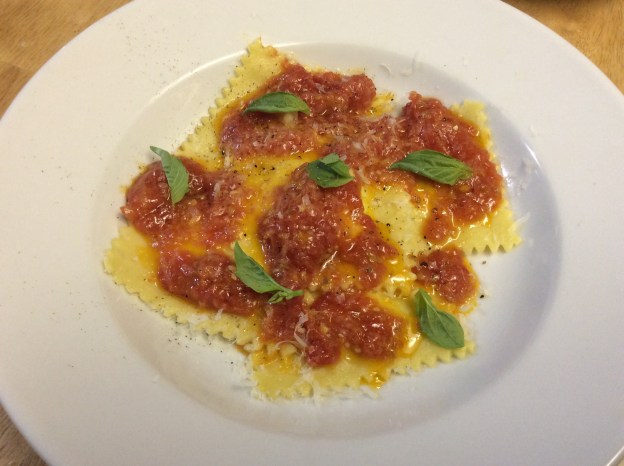
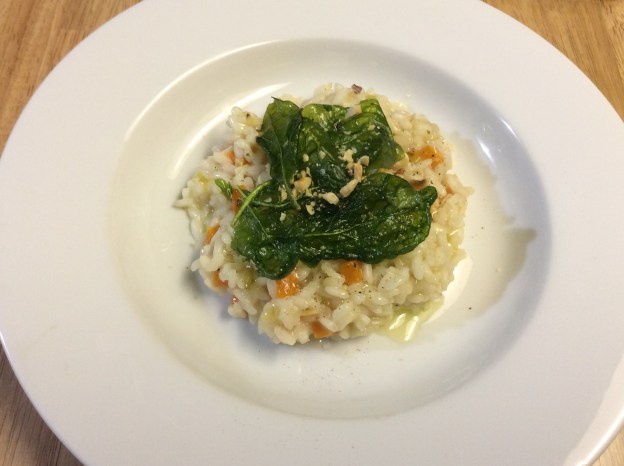
17. To serve, place about 8 to 10 pieces of agnolotti on a plate. Grate a generous amount of Parmesan cheese, a couple turns of a pepper mill, and sprinkle with a little sea salt. Served with a nice glass an Italian red wine.

image.jpg


Roasted Pork Shoulder

1/2 teaspoon of paprika
1/2 teaspoon of brown sugar
1/4 teaspoon cumin
1/4 teaspoon chili powder
1 teaspoon of salt
1/2 teaspoon of pepper
2 1/2 lbs. of pork shoulder
Leaves from 1 sprig of rosemary
2 cloves of garlic, smashed
1 onion, roughly chopped
2 carrots, roughly chopped
2 celery ribs, roughly chopped
1 bay leaf

1. Mix the first 6 ingredients in a small bowl and rub all over the pork. Then rub the pork with the smashed garlic and rosemary leaves. Let the pork rest for 30 minutes at room temperature.

image

2. Heat oven to 450°.

3. In a small roasting pan, add the pork. Scatter the onions, carrots, celery, and the bay leaves in the pan. Roast for 30 minutes.

image

4. After 30 minutes, turn the heat down to 325°. Remove the pork out of the oven and cover tightly with aluminum foil. Put the pork back in the oven and roast for about 1 hour and 15 minutes.

5. Cool to room temperature. Transfer the meat drippings into a container with a lid. Cover the pork with foil. Place both the pork and the drippings in the refrigerator until ready to use

Butternut Squash Risotto with Roasted Hazelnuts


It is difficult to find a well-executed risotto, even at the best Italian restaurants. Unlike many Italian dishes, risotto requires the chef’s undivided attention throughout the cooking process, which takes around 40 minutes. Restaurant chefs don’t have that kind of time to dedicate to a single dish, so instead they par-cook the rice during prep and then finish it off after the guest orders, cutting the final cooking time in half. While this process saves guests from a long wait for their food, it hurts the integrity of the dish. Perfect risotto needs to be stirred and watched constantly so that the rice cooks evenly. It is the dish that has sent more contestants home from Top Chef than any other. Clearly there is no place for risotto in a fast-paced cooking competition, because risotto waits for nobody.

Risotto is the perfect dish to cook at home on a Sunday evening or whenever you have an hour to spare. People who haven’t made it before often think it’s difficult, but it’s actually quite easy, it just requires some time and attention. Here is the perfect risotto recipe for the fall season.

Butternut Squash Risotto with Roasted Hazelnuts

Serves 4

Ingredients

1 cup of butternut squash, cut into 1/2″ cubes
Olive oil
5 1/2 cups of homemade chicken or vegetable stock (or low-sodium, store-bought)
1/2 cup of Chardonnay wine
5 sage leaves
1 small onion, finely diced
1 celery stick with leaves, finely diced
2 cloves of garlic, minced
12 ounces of Arborio rice (about 2 cups)
1/2 cup of freshly grated Parmigiano-Reggiano
2 tablespoons of unsalted organic butter
1/2 cup of roasted hazelnut, coarsely chopped
Sea salt
Fresh black pepper

Preheat oven to 350°

1. On a baking sheet, toss the butternut squash in olive oil and sprinkle with salt and pepper.

2. Roast in the oven for 10 minutes.

3. Remove from the oven and cool on a rack. Once cool, transfer the butternut squash to a plate and set aside.

image

4. In a medium-sized pot, heat the stock on medium low. (Keep the stock on the burner even after it is heated.)

5. In a large Dutch oven (like a Le Creuset), heat 3 tablespoons of olive oil on medium.

6. Add the onion, celery, garlic, and sage leaves. Stir constantly for about ten minutes or until they have softened. Remove the sage leaves.

image

7. Add the Arborio rice, making sure the rice is coated with oil. Stir for about two minutes or until the rice is translucent.

image

8. Add the Chardonnay to the rice and stir until evaporated.

9. Add one ladleful of stock to the rice and stir until evaporated.
image

10. Repeat this process one ladleful at a time, each time making sure it is cooked off before adding the next. This process should take about 20 minutes and the rice should be al dente.

11. Add the butternut squash and stir gently. Remove from heat.

12. Stir in the Parmigiano-Reggiano, butter and salt to taste. Close the lid and keep covered for two minutes.

13. Spoon the risotto into shallow bowls and drizzle with olive oil. Sprinkle roasted hazelnuts on top.

14. Serve immediately.