Category Archives: Uncategorized

Mongolian Beef

Growing up in Koreatown in LA, the Chinese food I ate was quite different from the Chinese food I know today. Most of the Chinese restaurants in Koreatown served Mandarin cuisine, and the owners, servers, and cooks were all Chinese who previously lived in South Korea. When communicating with their customers, they spoke perfect Korean, and when talking amongst themselves, they spoke Mandarin. The food served at these Chinese restaurants was adapted for the Korean palate, with lots of bold flavors. (They even served cabbage kimchee with every meal!) One of my favorite dishes at these Korean-Style Chinese restaurants is Mongolian beef.

Mongolian beef is a dish with a distinct hoisin flavor and lots of scallions. What makes this dish so unique is the texture of the beef – unlike most sautéed meat dishes, the beef is extremely tender. The trick, I learned, is to tenderize the beef with baking soda. Just 1/4 teaspoon will tenderize 8 ounces of beef. I tried this technique at home with flank steak and it worked like a charm, yielding the same tenderness as the Mongolian beef I’ve had at Young Dragon Restaurant. The key is to not let the beef tenderize in the baking soda too long, so be sure not to tenderize the meat until you have everything prepped. As always, please read the entire recipe before you start. Enjoy!

Mongolian Beef

Serving Size: 4 (with rice and side dishes)

8 ounces of flank steak (thinly sliced against the grain)*
1/4 teaspoon of baking soda
1 teaspoon of organic cornstarch
2 tablespoon of homemade chicken stock or low sodium chicken broth
2 tablespoons of organic soy sauce
1 tablespoon of hoisin sauce
2 teaspoon of sugar
1/2 teaspoon of fresh ginger juice*
Freshly grated ground pepper
2 tablespoon of sunflower or peanut oil
2 garlic cloves, minced
3 organic scallions, sliced in 2 inch pieces
Steamed jasmine rice
Kimchee for serving

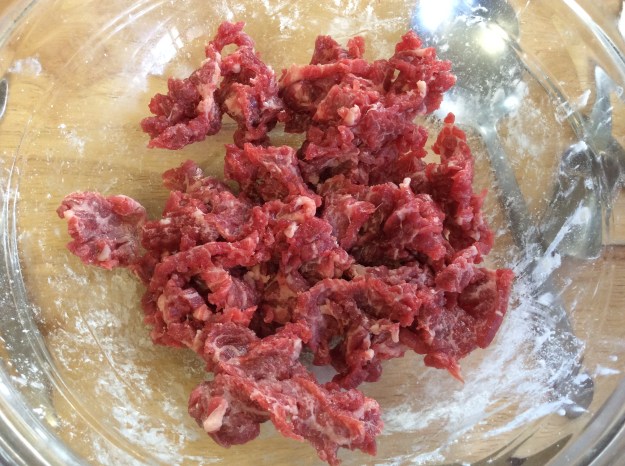
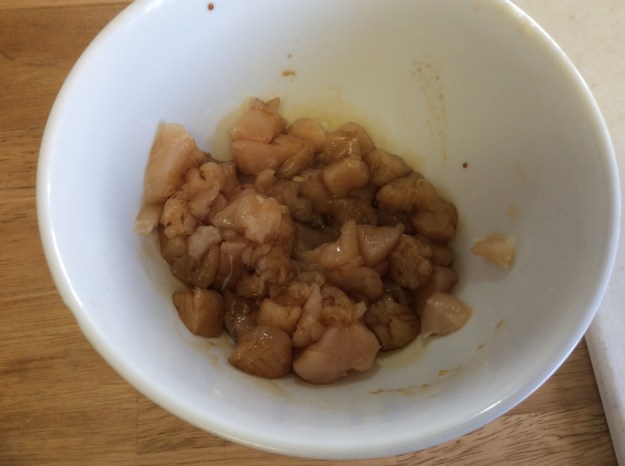
1. Place the flank steak in a small glass bowl. Sprinkle the baking soda all over the meat. Give it a good stir to coat evenly. Let the meat tenderize for 15-20 minutes.

imageimage

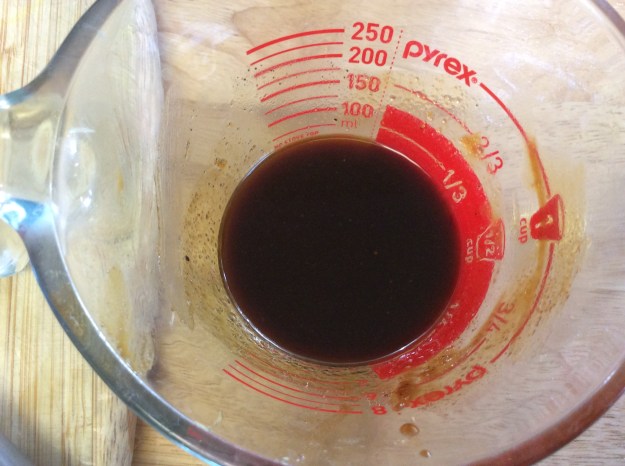
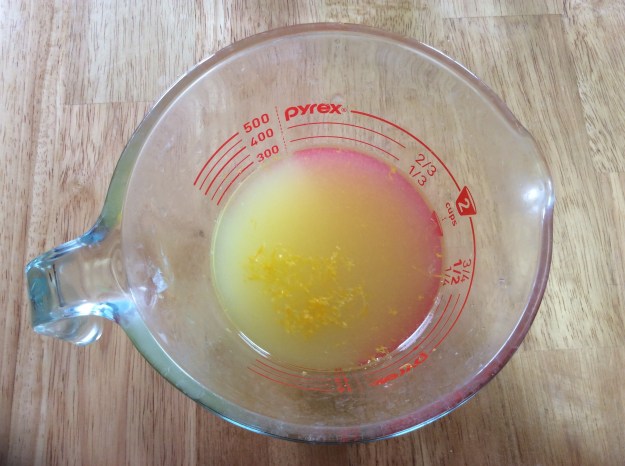
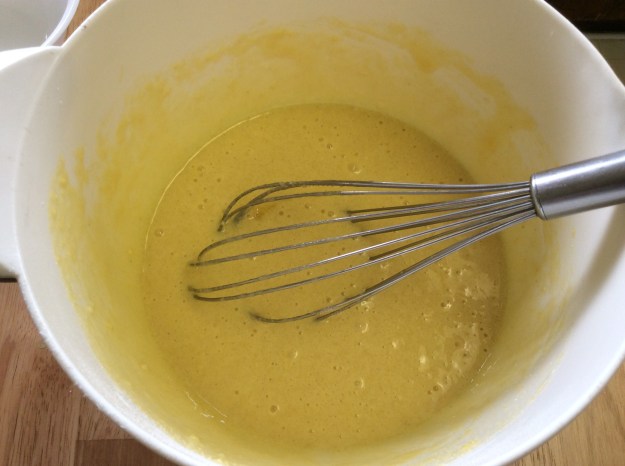
2. While the meat is tenderizing, in a glass measuring cup, add the chicken sock, soy sauce, hoisin sauce, sugar, ginger juice, and good pinch of freshly grated pepper. Whisk and set aside.

image

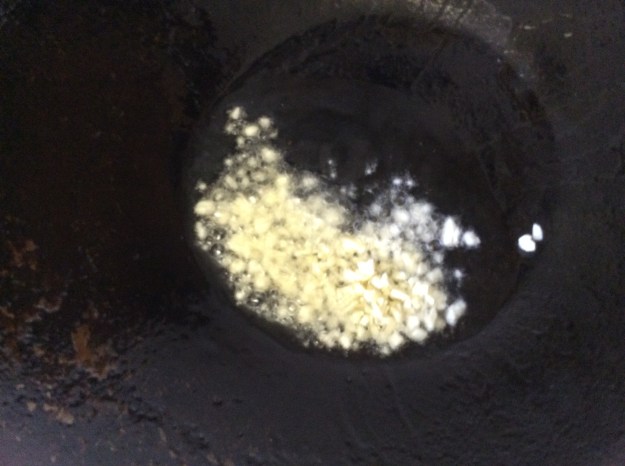
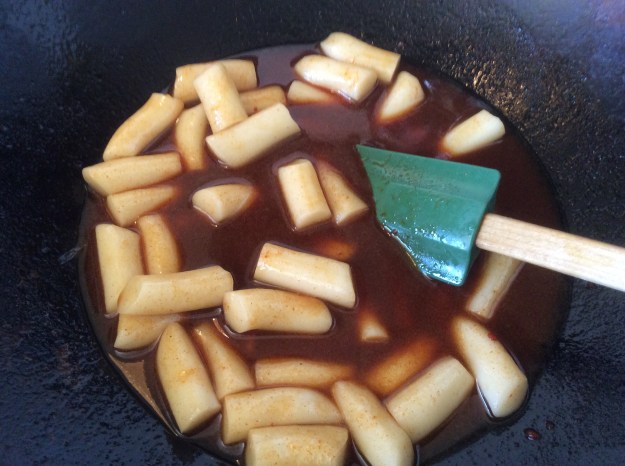
3. Once the the meat is tenderized, sprinkle the cornstarch and mix until all the meat is coated. Heat a wok or large stainless steel pan on high, adding 2 tablespoons of oil in the wok. Add the minced garlic and stir fry for 10 seconds.

imageimage

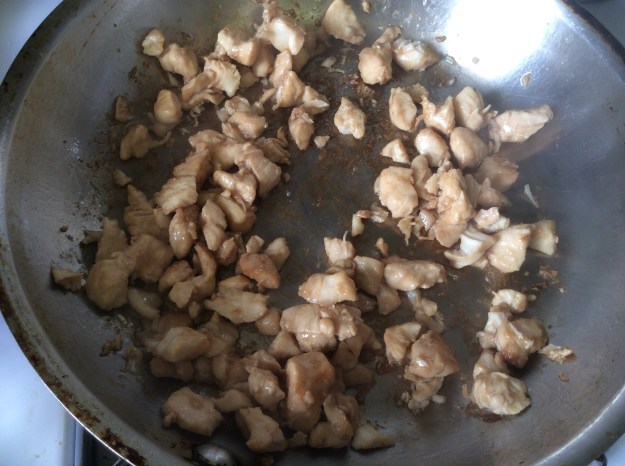
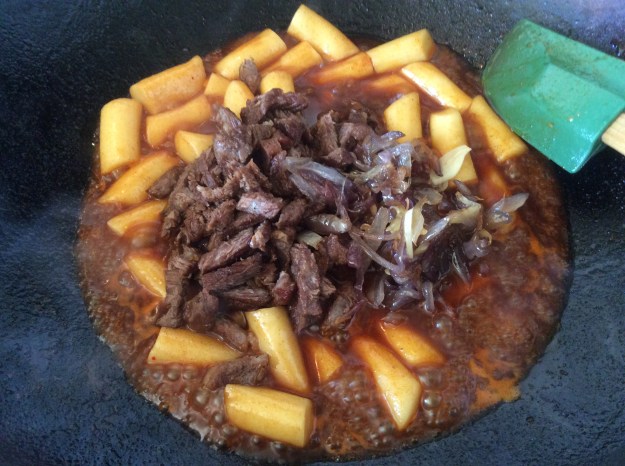
4. Add the beef, spreading it out so most of the meat touches the surface of the wok. Let it sit undisturbed for 1 seconds. Sauté until the beef is slightly pink (about 45 more seconds).

image


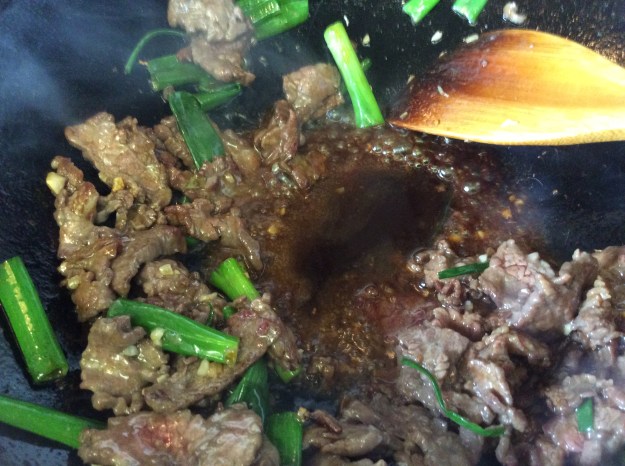
5. Add the green onions and stir for a few seconds. Quickly move the beef and green onion to the sides of the of the wok, creating a well.

image

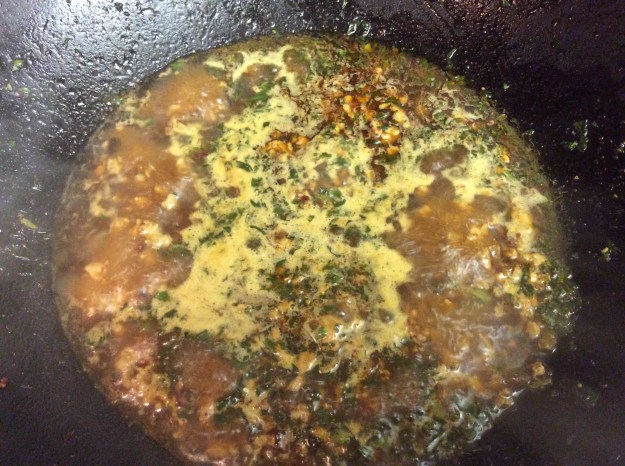
6. Add about 2/3 of sauce mixture into the center of the wok. Let the sauce thicken for about 30 seconds. Bring the meat down from side of the wok. Sauté into the sauce for 30 more seconds. Taste for seasoning and add more sauce, if needed.

image

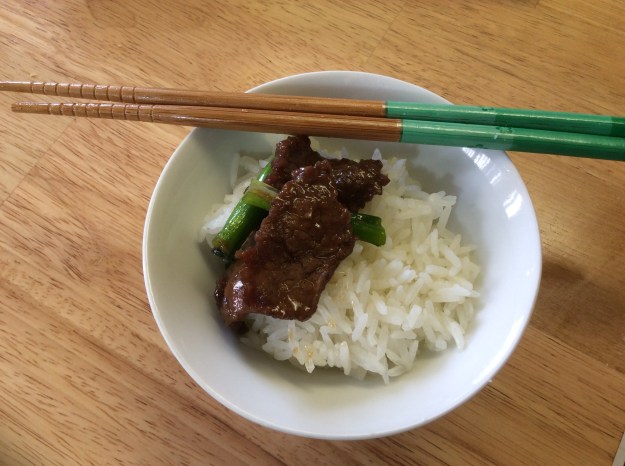
7. Transfer to a serving plate. Serve immediately with steamed jasmine rice, kimchee and other vegetable side dishes.

imageimage

*Cut the flank steak against the grain, just shy of 1/4 inch in thickness and about 2 inches wide.

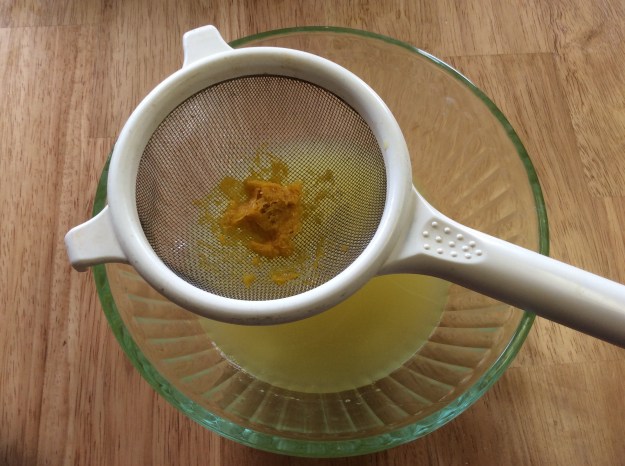
*To make ginger juice, finely grate about 1 teaspoon of ginger. Squeeze the grated ginger over a fine mesh seive. Discard the ginger solids and use ginger liquid for the recipe.


Refrigerator Strawberry Vanilla Jam

When strawberries are in season and plentiful at the farmers market, one of my favorite (and easiest) projects is to make strawberry jam. Not to be confused with preserves – which involves a specific preserving process – jam can just be jarred and will keep in the refrigerator for up to three weeks. I prefer to make my own jams because I find most store-bought versions to be too thick and too sweet, but one brand I do like is Bonne Maman, which is imported from France. I actually modeled my homemade jam after their preserves, which have the consistency and level of sweetness that I am looking for, and as a result my recipe uses 1/3 less sugar than most other recipes.

This recipe is relatively simple, but some attention is required during the active cooking process. The key to a successful jam is making sure you stir often so the sugars don’t burn on the bottom, and making sure not to overcook it. You want the jam to flow nicely when you spread it on bread, but not to be runny where it looks like a sauce. Testing the cooked jam on a cold plate will tell you what the consistency will be like once the jam cools.

This strawberry jam only uses five ingredients and can be made in less than 15 minutes, so you can make it whenever you run out. It also has lovely vanilla notes from the added vanilla seeds. Enjoy your jam session!

Refrigerator Strawberry Vanilla Jam

Yield: One 8-ounce jar

1 lb of fresh strawberries (washed, hulled, and sliced 1/4 thick) about 4 cups sliced.
2/3 cups of sugar
1 tablespoon of lemon juice
1 two-inch piece of vanilla bean
1/8 teaspoon of Fleur de Sel or flaky sea salt

image

1. Place a small plate in the freezer. Cut the vanilla bean in half lengthwise, down the middle. Scrape the seeds out using a small paring knife.

image

2. In a 12-inch copper or stainless steel pan, add the strawberries, sugar, lemon juice, and the seeds of the vanilla bean. Stir to combine.

image

3. Set on a burner at high heat. Cook for 10-12 minutes, stirring often. After 5 minutes, your mixture should have this consistency.

image

4. After about 9 minutes, remove the plate out of the freezer. At the 10 minute mark, test the jam’s consistency by placing a 1/2 teaspoon on the plate. It should be loose and not run down the plate. If it runs down the plate, cook for a couple more minutes, but don’t over cook. A good jam should not be too thick when refrigerated.

imageimage

5. Remove from heat and stir in the Fleur de Sel.

image

6. Spoon into a clean 8-ounce mason jar. Cool for 10 minutes. Add the lid and place in the refrigerator to chill. The jam keeps in the refrigerator for up to 3 weeks.

image

Maple Glazed Hot Cross Buns

“Hot cross buns, hot cross buns! One a penny, two a penny! Hot cross buns!” Whenever I sang this nursery rhyme as a kid, I thought, “Hot cross buns must be really good for someone to make a song about it!” Though I wasn’t Catholic, I always wanted to try one, but learned that the buns were traditionally sold only around Good Friday and Easter (the buns are eaten on Good Friday to mark the end of Lent). Also, the buns were much more common in England, where the recipe originated. Still, I loved the story and tradition behind the buns and eventually got to try one and loved it.

Hot cross buns are essentially individual spiced rolls with raisins, candied peel and marked with a cross on the top. Traditionally the cross is made with pastry dough, but I prefer the variation with icing on top. Also, in my recipe, I’ve used dried currants instead of raisins. I like using currants because they’re smaller in size, and you get a better fruit distribution throughout the dough. Finally, I’ve added a maple glaze finish which gives the buns a little more sweetness and sticky exterior. If you like dried fruit and spices, these buns are for you. Happy Easter and enjoy!

Maple Glazed Hot Cross Buns

Yield: 12 rolls

1 tablespoon of active dry yeast
1 cup of low fat milk
1/2 teaspoon of sugar
4 cups of bread flour
1/4 cup of sugar
1/2 teaspoon salt
1/2 teaspoon of ground cinnamon
1/4 teaspoon ground nutmeg
1/4 teaspoon ground allspice
1/8 teaspoon clove
1 large egg
1 egg yolk
1/2 cup of butter, cut in 1/2 in cubes (soften at room temperature)
1/2 cup dried currants or raisins

Egg Wash

1 large egg
2 teaspoons of low-fat milk
Pinch of salt

Maple Glaze

1/2 cup of real maple syrup
2 tablespoon butter

Maple Icing

3/4 cup of confectioner’s sugar
1 tablespoon of real maple syrup
1 teaspoon of milk
1/4 teaspoon vanilla extract

 
1. Heat the milk to 100°. Transfer to glass bowl.

image

2. Add the yeast and sugar. Set aside.

image

3. In the bowl of a stand mixer add the flour, sugar, salt, and spices. Quickly whisk the mixture and add the dough hook attachment.

image

4. Give the yeast and milk mixture a quick stir and add it to the flour mixture. Add the egg, egg yolk, and butter.

image

5. Knead the dough on the lowest mixer setting. Once the dough comes together, knead for about 5 more minutes until the dough is smooth.

image

6. Transfer the dough to a lightly-floured workstation.

image.jpeg

7. Fold in the currants. Shape into a ball.

imageimage

8. Cover with plastic wrap and leave at room temperature until it doubles in size (this should take about 1 1/2 hours).

image.jpeg

9. Cut the dough into 12 equal sized pieces. Cupping your hand, take one portion of the dough and roll it on a lightly-floured workstation until it looks a ball.

imageimage

10. Repeat until you get 12 balls, transferring each one to a parchment-lined baking sheet as you finish. (Make sure you space out the rolls a bit, because they will rise again).

image

11. Cover with plastic wrap and let it rise at room temperature for about 45 minutes.

image


12. Preheat oven to 350°. To make the egg wash, whisk the egg, milk and salt.

13. Remove the plastic wrap off the buns and brush each bun with egg wash.

image

14. Bake for 22-25 minutes. The top will be golden brown when ready.

15. While the buns are baking, make the maple glaze by adding the maple syrup and butter to a small sauce pan. Cook on medium for about 5 minutes, stirring occasionally. Remove from heat and set aside.

image

16. Once the buns are out of the oven, brush generously with the maple glaze. Let cool for about 10 minutes.

image

17. While the buns are cooling, make the icing by whisking the confectioner’s sugar, milk, maple syrup, and vanilla extract together in a bowl.

image

18. Place the icing in a piping bag with a small tip (4 mm) or alternatively, place the icing in a plastic baggie and cut a small hole in one corner. Pipe a cross on each bun.

imageimage

19. To serve, cut a bun horizontal and spread a little butter. These are best eaten the day they are made, but you can place any remaining rolls in an airtight container for up to 3 days. After the first day, they are best toasted with a pat a butter.

image

Mini Blackberry Cobblers

When I think of blackberry cobbler, Cynthia’s Restaurant (now defunct) on 3rd in Los Angeles comes to mind. Like many, I used to frequent the restaurant just for their famous blackberry cobbler, however, the owner was not too keen on diners who didn’t eat their entire meal (appetizer, entree and dessert) at the restaurant. The problem was, aside from their boneless fried chicken and their cobbler, everything else was mediocre at best. The restaurant survived as long as it did because of their blackberry cobbler, but in the end, their one famous desert could not save the restaurant. When the restaurant closed their doors, I was pretty bummed.

This easy blackberry cobbler recipe is a tribute to Cynthia’s version. The mini cobblers are made in tall, individual ramekins, and meant to be shared like the ones they served at the restaurant. My version has a crumble made with roasted, ground almonds and locally milled Sonora wheat flour, giving the dessert a nice nutty flavor. This recipe makes 3 mini cobblers either in 1 cup ramekins highlighting the berries or in shallow creme brûlée ramekins with a more even crumble-berry ratio. Either way, there is plenty of crumble topping for the cobblers. Also, you can substitute the blackberries with other berries or make mixed berry cobblers. Add your favorite vanilla ice cream on top, and you have a warm and cold comforting sweet dessert.

Mini Blackberry Cobblers

Yields: 3 mini cobblers (6 servings)

4 1/2 cups of fresh blackberries (washed and dried)
3 tablespoons of dark brown sugar
2 teaspoons of organic corn starch
2 teaspoon of lemon juice, freshly squeezed
1 recipe of crumble topping (recipe below)
Your favorite vanilla ice cream, for serving

1. Preheat the oven to 375 °.

2. Place blackberries in a medium mixing bowl. Add the brown sugar, corn starch, and lemon juice. Toss to coat the berries evenly.

image

3. Divide the berries evenly among 3 ramekins (either the tall 1 cup ramekins or the shallow creme brûlée ramekins).

imageimageimage

4. Top the berries with a generous amount of crumble. You may have some crumble mixture left-over.

image

5. Place the cobblers on a parchment-lined baking sheet. Bake for about 30-40 minutes. Check after 25 minutes. You want a nice golden brown crumble and the juices from the berries bubbling and overflowing. Remove from the oven and placed on a wire rack to cool for about 5 minutes.

imageimage

6. Serve warm with a large scoop of vanilla ice cream on top.

image


Crumble Topping

3/4 cup of Sonora wheat flour or unbleached all-purpose flour
1/2 cup of ground roasted almonds*
1/3 cup of dark brown sugar, packed
1/4 teaspoon of Kosher salt
5 tablespoons of cold unsalted butter, cut in 1/4″ cubes

1. In a medium bowl, add the flour, ground almonds, brown sugar, and salt. Stir well with a whisk or fork.

image

2. Add the cold butter to the dry mixture. Using your clean hands, incorporate the butter into the dry mixture by rubbing them between your fingers. You should get nice little clumps of dough.

imageimage

3. Cover the bowl with plastic wrap and place it in the refrigerator until ready to use.

*To make the roasted ground almonds, place 2/3 cups of whole raw almonds on a baking sheet. Roast for about 7 minutes. Cool. Pulse in a food processor until you get a coarse ground texture. Measure out 1/2 cup for this recipe.

Chicken and Mushroom Omurice

One of my favorite foreign films is Tampopo, a hilariously fun “ramen western.” The main storyline focuses on the quest to make the best ramen with bizarre food-related vignettes imbedded throughout the movie. One of my favorite scenes is when a vagabond sneaks into a restaurant kitchen and makes a perfectly cooked omurice (Japanese rice omelet) for a young boy. You can tell the vagabond was a skilled cook by the way he maneuvered the scrambled egg in a pan. Tampopo Omurice Clip. After watching that scene I wanted omurice so badly, I went into the kitchen made my own.

Although omurice originated in Japan, Koreans have adopted this breakfast dish and many Korean home cooks make the dish for their children. This rice omelet is so popular with Korean kids, in fact, there’s even a childhood song about it. So what is in omurice, you ask? The main ingredient is cooked rice, but the condiment that gives the rice a reddish hue is ketchup. I know the recipe sounds weird, but trust me, it’s pretty good and kids love it. My recipe has soy sauce to temper the tartness of the ketchup and sautéed shiitake mushrooms for more savory notes. You’ll get sweet, sour, salted and umami flavors in one bite. The trickiest part of this dish is making the perfectly football-shaped egg omelet, or you can fry the egg-like crepe and drape it over the rice instead. Either way it’s delicious! Enjoy!

Chicken and Mushroom Omurice

Serves 4

1 1/2 tablespoons of sunflower oil or other neutral oil (used in two steps)
1/4 cup of chopped onion, small dice
2 garlic cloves, minced
4 ounces of fresh shiitake mushrooms, stems removed and thinly sliced
1/4 cup of chopped roasted red bell pepper
2 tablespoons of organic ketchup*
1 tablespoon of organic soy sauce*
2 teaspoons of Maggi or 1/2 teaspoon of Kosher salt
1/2 teaspoon of brown sugar
3 cups of cooked short-grain rice
6 ounces of chopped, marinated, and cooked chicken (recipe below)
2 scallions, thinly sliced
2 tablespoons of fresh cooked peas or frozen peas
Freshly grated black pepper
8 eggs, beaten with a pinch of salt
1/2 cup of omurice sauce (recipe below)

image

1. Heat a wok or large sauté pan over medium-high heat. Add 1 tablespoon of oil. Then add the chopped onion and sauté for about 2 minutes.

image

2. Add the mushrooms and the garlic to the wok and sauté for 3 more minutes or until all the liquid is evaporated. Add the chopped red bell pepper and sauté for one more minute.

image

3. Next, add the ketchup, soy sauce, Maggi, and brown sugar to the wok. Stir well. Cook the sauce until it starts to bubble.

image

4. At the cooked rice. Stir to coat the sauce over the rice. Add the cooked chicken and stir well for about 1 minute.

image

5. Finally, add the chopped green onions and peas and stir until they are evenly distributed into the rice mixture. Taste for seasoning to see if it needs salt or pepper. Turn off the heat and cover the rice to keep warm while making the omelet.

image

6. Heat a 6-inch nonstick pan on medium heat. Add a 1/2 tablespoon of oil. Add some beaten eggs to the pan, just enough to coat the entire pan (this will be about 2 eggs or 6 tablespoons)

image

7. Now you have to work quickly. Once the eggs start to cook on the bottom, quickly tilt the pan away from. Start folding the egg using your wrist to create an omelet that resembles a football. You want the center to be runny.

image

8. Place a mound of omurice rice mixture, the same size has the omelet, on a plate. Carefully placed the omelet on the mound of rice.

imageimage

9. Spoon some sauce on top of the omelet and sprinkle with some chopped green onions. Make 3 more omelets. Serve with Japanese pickles.

image


Marinated Chicken for Omurice

2 chicken tenders (about 6-7 ounces), chopped into 1/2 inch pieces
1 teaspoon of soy sauce
1 teaspoon of sake
1/2 teaspoon of sugar
1/2 teaspoon of organic cornstarch*
1 teaspoon of sunflower oil.

1. Mix all ingredients in a bowl and let marinate for 20 minutes.

image

2. Heat a medium sauté pan over medium-high heat. Add 1 tablespoon of oil to the pan and add the marinated chicken in one layer. Leave undisturbed for about one minute.

image

3. Flip the chicken over and cook for another 30 seconds.

image

4. Quickly sauté for about 1 more minute. Transfer to a bowl and set aside for the omurice recipe.

image


Omurice Sauce

1/2 cups of organic ketchup*
1 tablespoon of brown sugar
1 teaspoon of mirin
1 teaspoon of organic soy sauce*
1/2 teaspoon of mustard powder

1. Place all the ingredients in a small nonreactive sauce pan. Stir well breaking up the brown sugar.

image

2. Cook over medium heat for about 3 minutes or until the sauce starts to bubble.

image

3. Turn off heat and cover with a lid until ready to use.
*If at all possible, try to use organic corn-based or soy-based products. Most of the corn syrup, cornstarch, and soy products sold in the stores are GMO.

Dark Chocolate Chunk Cookies

The chocolate chip cookie is the quintessential American cookie. You can find chocolate chip cookies in most bakeries and every pastry chef has his or her own version. As simple as the chocolate chip cookie may seem, you’ll notice how every cookie is different. Some chocolate chip cookies are soft and cakey, while others are crispy and chewy. They also vary in size as well: thick or thin or big or small. Like many bakers, I have been in the search for what I consider to be the perfect chocolate cookie recipe. I’ve tested several dozen in my lifetime. After tweaking a couple of my favorites, I came up with this one.

This recipe will produce a soft and chewy cookie with a crispy edge. The secret to the chewy texture is the sugar ratio and the addition of cornstarch to the dough. The baking soda gives the cookie a nice crispy edge. Also, I use chocolate chunks instead of chocolate chips, so you get oozy chocolate with every bite. You won’t find any butter in this recipe, but trust me, you won’t notice the difference. And the best part about this recipe — you don’t need a mixer. Make a batch of these cookies and I guarantee you’ll make somebody happy. Enjoy!
Dark Chocolate Chunk Cookies

Yield: about 20 cookies

Ingredients

7 ounces of good quality dark chocolate or dark chocolate chips
1 1/3 cups of Sonora wheat flour or unbleached all-purpose flour
1/8 cup of organic cornstarch*
1/2 teaspoon baking soda
1/2 teaspoon of kosher salt
1/4 cup of sugar
2/3 cup of packed dark brown sugar
1/2 cup of coconut oil
1 large egg
1 teaspoon of vanilla extract


1. Chop the chocolate on parchment paper into 1/4 inch pieces. Place a sieve over a bowl. Using the parchment, transfer the chopped chocolate into the sieve. Set the chopped chocolate aside and save the collected chocolate powder for another use (like hot chocolate).

imageimage

2. Place the flour, cornstarch, baking soda and kosher salt into a small bowl. Whisk and set aside.

image

3. In a large bowl, add the sugar and brown sugar. Whisk together to break up any lumps. Add the coconut oil and whisk until incorporated.

imageimage

4. Add the egg and vanilla extract and whisk until just combined.

image

5. Add the flour mixture and chopped chocolate into the wet mixture. Using a rubber spatula, fold in the flour mixture until dough forms. Don’t over mix. Let it sit for 10 minutes at room temp.

imageimage

6. While the dough is resting, set oven to 350 degrees. Line 2 baking sheets with parchment paper.

7. Using an ice cream scoop (2 tablespoon size), form cookie dough and place the scoops 2 inches apart on the baking sheets.

imageimage

8. Bake for 9-11 minutes or until the edges are slightly golden brown, but don’t over bake them.

image.jpg

9. Cool on a wired rack for 15 minutes. They are best eaten when slightly warm with a tall glass of milk or a cup of coffee.

image.jpg

10. Store any leftover cookies in an airtight container for up to 3 days.

image.jpg

* If at all possible, try to use organic corn-based products. Most of the corn syrup and cornstarch sold in the stores are GMO.


Meyer Lemon Marshmallows

I was never a fan of marshmallows growing up. The only way I would eat them was toasted over an open fire or in s’mores with chocolate and graham crackers. But that all changed the moment I had my first homemade marshmallow from Little Flower Candy Company. Unlike the store-bought marshmallows that are dry on the outside and chewy on the inside, Little Flower’s marshmallows were soft with specks of real vanilla beans. They tasted incredible and melted in my mouth, and that’s when I fell in love with their marshmallows.

After that experience, I decided to make my own marshmallows and put together some s’mores kits as Christmas gifts for my neighbors. The kits were a hit, and since then I’ve experimented with different flavors. My latest version is a Meyer lemon marshmallow, and has quickly become one of my favorites. The Meyer lemon flavor is assertive but not overwhelming. They taste like mini Meyer lemon meringue pies.

Making marshmallows isn’t difficult but there is some technique involved. When making the syrup, make sure you don’t disturb the sugar when it is cooking or it can crystallize. Also, if you have a copper saucepan, I would highly recommend using it for this recipe. Copper pans are great heat conductors and are ideal for candy-making, but if you don’t have one, a stainless pan will be just fine. The most important thing is to make sure that the pan is clean, dry and doesn’t have an oily residue, as this can effect the outcome of the syrup.

As always, please read the entire recipe before you start. Once you have homemade marshmallows, you will never want the store-bought ones again! Enjoy!

 
Meyer Lemon Marshmallows

Yields: 3 dozen large or 12 dozen mini marshmallows

Ingredients:

2/3 cup of water
1/3 cup of Meyer lemon juice
Nonstick baking spray or sunflower oil
1 tablespoon of Meyer lemon zest, finely grated
1 3/4 cups of sugar
3/4 cup of organic light corn syrup*
1/4 cup of honey
1/4 cup of water
2 tablespoons of powdered gelatin
1/2 tablespoon of vanilla extract
1/2 teaspoon of Kosher salt
2/3 cup of organic confectioner’s sugar
1/4 cup organic cornstarch*

Special Equipment:

Candy thermometer
Stand mixer
Pizza wheel
Plastic wrap

Directions

1. Stir the 2/3 cup of water, lemon juice and zest in a bowl and set aside.

image

2. Spray the bottom of 9″ x 13″ pan with nonstick baking spray (or lightly brush with oil). Cover the bottom and sides of pan with plastic wrap, making sure it is smooth and adhering tightly to the surface. Spray on top of the plastic wrap to coat. Set aside.

image

2. In a medium saucepan add the sugar, corn syrup, honey and water. Stir just enough to combine. Get a cup of water and a pastry brush ready and set aside.

3. Place the saucepan over high heat and insert a candy thermometer. Dip the pastry brush in the water and brush the sides of the pan to prevent sugar crystals from forming. Cook until the sugar reaches firm ball stage on the candy thermometer. Do not stir. This will take about 8-10 minutes. Start checking at the 5 minute mark.

image

4. While the sugar syrup is cooking, add the lemon juice, water, and zest mixture to bowl in stand mixer. Sprinkle in the powdered gelatin. Let sit.

image

5. Check up on the sugar syrup. Once it hits the firm ball stage, immediately take the pan off the stove and let it cool. Keep the thermometer in the syrup and wait for it to drop in temperature to 220°. This will take roughly 7 minutes.

imageimage

6. Add a whisk attachment to the stand mixer with the gelatin mixture and set on the lowest setting. Slowly add the sugar syrup into the bowl. It’s important that you add the sugar syrup in a very slow stream. This will take about two minutes.

image

7. Once all the sugar syrup has been added, increase the speed to medium high. After about 10 minutes, turn off the mixer and add the salt and vanilla extract. Turn the mixer back on to medium high and beat or about another 10-12 minutes until the mixture becomes a thick and fluffy, like a meringue. Turn off the mixer.

imageimage

8. Using a rubber spatula, take the marshmallow mixture and spread it in the plastic wrap-lined pan. Spread evenly to ensure same thickness of marshmallow. Let stand at room temperature for about 3 hours.

image

9. Stir confectioner’s sugar and cornstarch and a small bowl. Sift 1/3 of the mixture over a large wooden board or a clean workstation. Take the pan with the marshmallow and flip upside down onto the cornstarch and sugar covered board. The marshmallow should easily fall out of the pan.

imageimage

10. Sift another 1/3 of the cornstarch mixture over the top of the marshmallow.

image

11. Spray the pizza wheel with baking spray on both sides. Cut into 36 large squares (or for smaller marshmallows, cut each of the 36 squares into 4 smaller squares). Dip the cut sides into the remaining cornstarch mixture to prevent it from sticking to the other marshmallows.

imageimage

12. To store, line an airtight container with parchment paper and dust the bottom with the cornstarch mixture. Place marshmallows in a single layer. Add another layer of parchment paper and repeat.

13. The marshmallow will keep for 1 week in the container.
Alternative flavor option: If you want a traditional vanilla-flavored marshmallow, substitute the 1/3 cup of Meyer lemon juice with 1/3 cup of water. Omit the lemon zest and add the seeds of 1 vanilla bean. Increase the vanilla extract from 1/2 tablespoon to 1 tablespoon.

* If at all possible, try to use organic corn-based products. Most of the corn syrup and cornstarch sold in the stores are GMO.

image


Tteokbokki: Spicy Korean Rice Cakes

Seollal, or the Lunar Korean New Year, is a very important holiday to Koreans. The celebration typically lasts for three days, with traditional games being played with family and young children bowing to their parents, grandparents and other elders, receiving “good luck” money as a reward. There is also a lot of eating, and one traditional food served this time of the year is Tteokguk: Korean Rice Cake Soup. As my mother explained it to me, since the rice cake is sticky, good luck is supposed to stick to you. She makes it every year and I usually have a bowl, but I am actually more of a Tteokbokki fan: Spicy Korean Rice Cakes. I decided I would make this dish as a part of my Lunar New Year celebration.

Tteokbokki is more of a Korean street food or snack, but the dish has become so popular, it’s being served at many restaurants and food courts all over Koreatown LA. Traditionally it is made with tubular Korean rice cakes (which look similar to string cheese), gochujang (spicy fermented, Korean bean paste), and fish cakes. Sometimes you can find hard-boiled eggs and ramen noodles in this dish, and my mom always added flank steak to her Tteokbokki. I took her version of the dish and elevated it by using fresh rice cakes, braised short ribs, and caramelized onions, while keeping the traditional flavors intact. When I tested this dish on a non-Korean friend, she called it a “spicy Korean gnocchi.” Though the texture of tteokbokki is definitely different than gnocchi, it’s an interesting comparison nonetheless.

Note that here is some oven time involved in making this dish, so make sure you read the entire recipe before starting. If you prefer, you can make the braised short ribs a day in advance. Enjoy!

Tteokbokki: Spicy Korean Rice Cakes with Braised Short Ribs

Serving Size: 4

Braised Short Ribs

12 ounces of bone-in short ribs (about 3 slices)*
1 tablespoon of sunflower oil or any neutral oil
Kosher salt
Freshly cracked pepper
1 carrot (roughly chopped)
1/2 red onion (roughly chopped)
2 garlic cloves crushed
1/3 cup of sake*
2 tablespoons of mirin*
3 tablespoons of organic soy sauce
1 1/2 cups of water
2 teaspoons of sugar
1/2 teaspoon of freshly cracked pepper

Preheat oven to 325°

1. Sprinkle the short ribs with salt and pepper.

image

2. Heat an enamel-coated cast iron pot or a Dutch oven to medium high heat. Add the oil. Sear the short ribs for about 2 minutes on each side. Cook them in 2 batches. Set aside.

image

3. In the same pot, add all the vegetables and sauté for 5 minutes.

image

4. Add the sake and mirin and deglaze the fond remaining from the short ribs, scraping the bottom of the pot. Reduce by half (about 2-3 minutes).

image


5. Add the soy sauce, water, sugar and pepper. Bring to a boil. Immediately skim off the excess fat layer and impurities. Turn off the heat.

image

6. Cover with a lid and transfer the pot to the oven. Braise for about 1 1/2 hours.

7. Remove from oven. Take the meat out and set aside, and then strain the broth and discard the solids. Set the broth aside.

image

image

8. Remove the bones. Cut the meat into small pieces, picking out the gristle. Set aside.

image
Tteokbokki

2 tablespoons of sunflower oil or any neutral oil (divided in half)
1/2 red onion (thinly sliced)
2 garlic cloves (thinly sliced)
Pinch of salt
1 jalapeño (sliced 1/4″ thick)
Broth from the braised short ribs
2/3 cup of water
2 tablespoons of Gochujang: Korean red bean paste*
1 teaspoon of sugar
2 teaspoon of sesame oil
1 pound of fresh Korean rice cake, cut in half*
2 green onion, thinly sliced
1 tablespoon of toasted sesame seeds, crushed*
Korean pepper flakes*
2 tablespoons of fried shallots, optional

1. While the short ribs are in the oven braising, heat a medium sauté pan to high and add 1 tablespoon of oil. Add the red onions and a pinch of salt and sauté for 2 minutes.

image

2. Add the garlic, and reduce the heat to low. Cook for 20-25 minutes, stirring every a couple of minutes. Remove from pan. Set aside.

3. Clean the bottom of the same pan with a paper towel, removing any excess onion bits. Heat it to high and add the remaining tablespoon of oil.

4. Add the jalapeño slices. Sauté for 1 minute and remove from heat. Set aside for garnish.

image

5. Place the broth from the braised short ribs, 2/3 of water, and 2 tablespoons of Korean red bean paste in large wok or sauté pan. Bring to a boil.

image

6. Add the fresh rice cakes and bring back to a boil and cook for one minute.

image

7. Add the caramelized onion mixture, the braised short ribs, sesame oil, and sugar. Reduce heat to medium. Cook until the sauce thickens and the rice cakes are soft and chewy (about 3-5 minutes).

image

image

8. To serve, divide the Tteokbokki into 4 bowls. Sprinkle with sliced green onions, fried jalapeño, sesame seeds, and fried shallots. Serve immediately.

image

*For the toasted sesame seeds, you can just add some sesame seeds to a dry pan. Toast over medium heat until golden brown. Transfer to a mortar and pound a few times with a pestle.

Mirin can be found in most Japanese Markets. You may omit the mirin and add one more teaspoon of sugar to the recipe. The rest of the ingredients can be found at any Korean Market. My favorite brands for the gochujang are Haitai or Wang.

Spicy Minced Chicken Noodles


I live in the San Gabriel Valley, the Asian food Mecca of Southern California. San Gabriel Valley is home to some of the best Chinese food outside of China. There is wide array of regional cuisines like Sichuan, Cantonese, Hunanese, etc. In addition to Chinese food, you can find Taiwanese, Vietnamese, Burmese, and even food from Borneo. From soupy dumplings to Hainan chicken, one will never run out of food options. One of my favorite noodle dishes out here is the minced pork noodle, made with a fermented bean sauce. Every restaurant has their own version, but it is always made with ground pork. I created my own version with organic ground chicken and spiced it up a bit. I use a chili pepper sauce made in San Francisco and noodles made nearby in Commerce (where I’ve actually visited the factory).

I tested this noodle dish at my office and it was a hit, even among those that don’t like spicy food. I may not be Chinese, but I have become very familiar with Chinese flavors, and based on the response I got, these noodles are as good as any noodle dish in the San Gabriel Valley. Once you have all the ingredients ready, the dish takes less than 20 minutes to whip up, but be sure to read the whole recipe in advance, as almost every step is 3 minutes or less and you’ll be moving quick! But don’t let that scare you off – once you make this dish, I guarantee you’ll enjoy it!

Serving Size: 2 large bowls of noodles

Ingredients

2 tablespoons of oil
3 cloves of garlic (minced)
8 ounces of organic ground chicken
1/2 cup of finely chopped choy sum leaves* or spinach leaves.
2 tablespoons of finely chopped preserved turnips*
2 tablespoons of chili pepper sauce*
2 tablespoons of organic soy sauce
1 tablespoon of Chinese black vinegar or balsamic vinegar
1/4 teaspoon of Chinese five spice
1 teaspoon of sugar
3/4 cup of homemade chicken stock or store-bought low-sodium chicken broth (cold)
2 teaspoons of organic cornstarch
12 ounces of fresh Chinese wheat noodles (medium thickness)*
1 green onion, thinly sliced
Fresh cilantro leaves
Chinese chili oil (optional)

image

Directions

1. Bring a large pot of water to boil.

2. Meanwhile, heat a wok or a large sauté pan on high heat. Add 2 tablespoons of oil.

3. Add the minced garlic. Sauté for 15 seconds.

image

4. Add the ground chicken. Sauté for 3 minutes, breaking up the meat.

image

5. Add the choy sum. Sauté for 1 minute.

image

6. Add the preserved turnips. Sauté for 30 seconds.

image

7. Add the chili pepper sauce, soy sauce, vinegar, five spice, and sugar. Sauté for 1 minute.

image

8. Add cornstarch in the chicken stock, making sure your chicken stock is cold. Mix well and and pour directly into the wok, stirring the meat. Cook until the sauce boils and thickens. This should take about 3-5 minutes. Turn off the heat.

image

image

9. Take the fresh Chinese noodles and put in the boiling water. Follow the cooking directions on the package. The brand I use takes 2.5 minutes.

image

10. Drain the noodles but don’t rinse. Divide the noodle into bowls.

image

11. Pour a generous amount of meat sauce over the noodles. If using, drizzle a tablespoon of chili oil over the sauce. Garnish with chopped green onion and cilantro.

image

12. Serve immediately.

image

*Here are photos of some hard to find ingredients I used in this recipe. Also, I added a picture of the choy sum before it was chopped up. You can find all these ingredients at a Chinese grocery store:


Meyer Lemon Bars

When I go to a bakery or cafe, I usually don’t select lemon bars for my sweet treat. I find most lemon bars too tart and sweet. Also, the traditional shortbread crust a little too tough. Now Meyer lemon bars on the other hand, are delicious, slightly tart with a hint of sweetness. Meyer lemons are naturally sweeter than regular lemons because they are a hybrid of lemons and mandarin oranges, requiring less sugar when when making Meyer lemon bars. Meyer lemons are also brighter yellow in color and have a thinner skin, giving the bars a neon-like color.

My Meyer lemon bar recipe has half the sugar of other lemon bar recipe. Some recipes put in the zest directly in the curd. I liked the added flavor from the zest, but then curd didn’t have the smooth texture. By infusing the lemon zest in the lemon juice, and then discarding the zest did the trick. I also add cornstarch to the crust to make it more crumbly. That way it didn’t feel like I was biting into a hard cookie. When Meyer lemon season comes along, I bake a couple of batches: one for my family and one for my sister-in-law. My sister-in-law doesn’t like anything with lemon flavor, but loves these lemon bars. I think that’s a good indication that this recipe is pretty good. Happy baking.

Baking Spray
1 1/4 cups of Meyer lemon juice (about 5-6 Meyer lemons)
1 Tablespoon of Meyer lemon zest
1 1/2 sticks of unsalted butter (12 Tablespoons) – soften
1/2 cup of sugar
1 teaspoon vanilla extract
1 1/2 cups of all-purpose flour
1 Tablespoon of organic cornstarch
1/4 teaspoon of Kosher salt
1 1/2 cups of sugar
6 large eggs
1/2 cup of all-purpose flour
1 1/2 teaspoon of baking powder
1/8 teaspoon of Kosher salt
Powder sugar for dusting

image

1. Coat the bottom and sides of a 13″x 9″ baking pan with not a nonstick baking spray. Set aside.

2. Add the lemon zest to the lemon juice. Set aside.

image

3. Heat the oven to 350°.

4. In a stand mixer, add the butter and 1/2 cup sugar and beat on medium speed until creamy (about 3 minutes).

image

5. Add the vanilla extract and beat for 30 more seconds.

image

6. In a small bowl, whisk the 1 1/2 of flour, cornstarch, and the 1/4 teaspoon of salt. Set the mixer to the lowest setting and slowly add the flour mixture half a cup at a time.

image

7. The mixture will come together and look like small peas. Turn off the mixer.

image

8. Using your clean hands, form a ball. Then flatten it and place it directly in the greased baking pan, pressing down until the bottom of the pan is evenly covered with the dough.

image


9. Using the tines of fork, prick the dough and several places. The will prevent the dough from rising and forming pockets.

image

10. Place the baking pan in the freezer for 10 minutes.

11. Remove the baking pan from the freezer and put it directly in the oven. Bake for roughly 30-35 minutes until slightly golden.

image

12. Place on a rack to cool.

13. Turn up the oven heat to 350°.

14. In a large mixing bowl, whisk the 1/2 cup of flour, baking powder, and 1/8 teaspoon of salt.

image

15. Add all the eggs into the flour mixture. And whisk until the mixture is smoot, but don’t over whisk.

image

16. Add the 1 1/2 cups of sugar and whisk again until smooth.

image

17. Place a sieve over a bowl, and pour the Meyer lemon juice and zest mixture into the sieve. Discard the Meyer lemon zest.

image

18. Add the Meyer lemon juice to the egg, flour, sugar mixture. Whisk just until the juice is incorporated.

image

19. Pour the Meyer lemon curd mixture over the baked crust.image20. Place in the oven and bake for 30-35 minutes or until the center is set and edges are golden

21. Cool on a rack for about 30 minutes.

image

22. Cut into 24 squares. Place the squares on top of a cooling rack. Place a parchment paper underneath the rack.

image

23. Dust Meyer lemon bars generously with the powder sugar. Dust only the ones you will be serving the day of and refrigerate the rest for up to three days. Dust remaining with powder sugar right before serving. This prevents the lemon curd from absorbing the powder sugar during refrigerating.

image