Author Archives: food4so

Pumpkin Muffins with Dark Chocolate Chunks

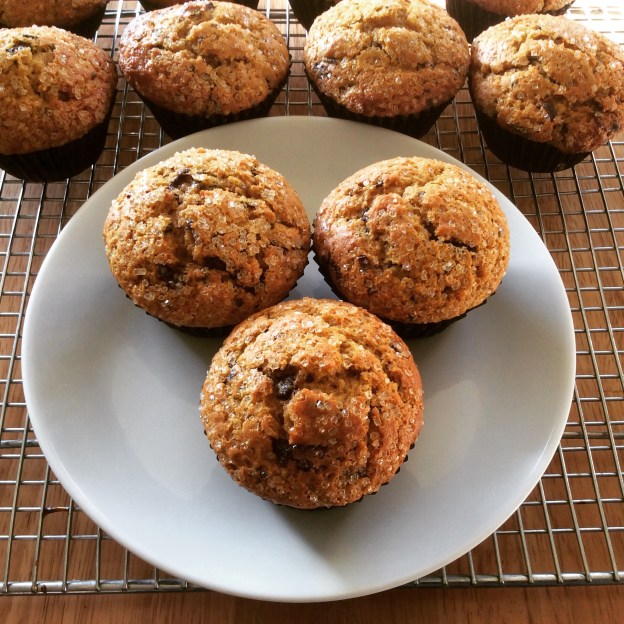
As we close in on Thanksgiving, here is a simple muffin recipe that is perfect for the holiday. Whether you are hosting Thanksgiving or showing up as a guest, these can be whipped up in no time and will definitely be a crowd favorite with the kids and adults alike. In fact, I find myself making some sort of muffin recipe at least once a week because my kids love them so much. The muffins themselves are just mildly sweet, but the chocolate makes up for it!

As with any recipe, it is important to use the best ingredients, as your recipe is only as good as the ingredients you start with. As long as you have everything on hand, the active prep time should be less than 20 minutes. The muffins also bake in less than 20 minutes. If you prefer, you can substitute the total amount of spices listed in the recipe below with 1 1/2 teaspoons of pumpkin spice, which you should have no trouble finding in the spice section of your supermarket during the holiday season. Happy baking!

Pumpkin Muffins with Dark Chocolate Chunks

Yield: 12 muffins

1 ½ cups of whole grain flour (like Sonora wheat) or unbleached AP flour
1 teaspoon of baking powder
½ teaspoon of baking soda
1 teaspoon of cinnamon
¼ teaspoon of ginger
1/8 teaspoon of cloves
1/8 teaspoon of nutmeg
½ teaspoon Kosher salt
¾ cup of organic sugar
½ cup neutral oil (sunflower or coconut oil)
2 eggs
1 teaspoon of vanilla extract
8 ounces of organic pumpkin puree (homemade or store-bought)
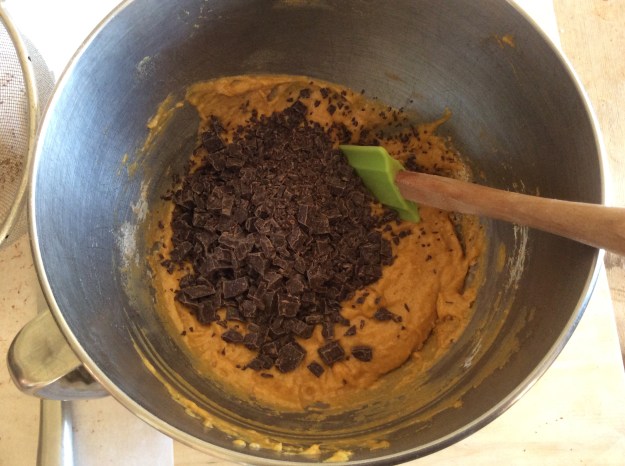
5 ounces of dark chocolate, chopped into ½”pieces (52% cacao)
Crystal or turbinado sugar for topping

1. Preheat Oven to 400°. Line muffin pan with 12 cupcake liners.

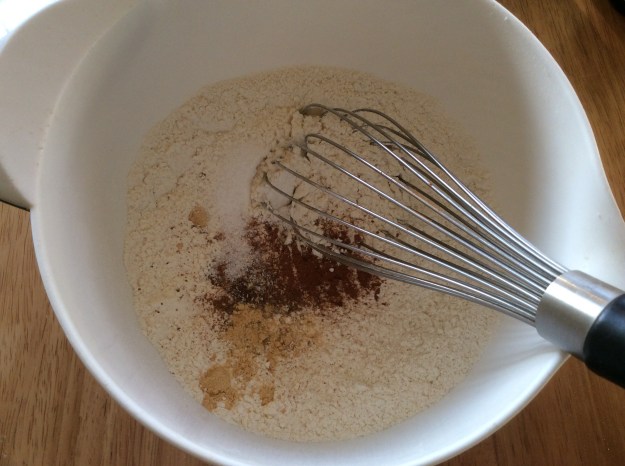
2. In a medium bowl add all the dry ingredients (the first 8 ingredients). Whisk and set aside.

image

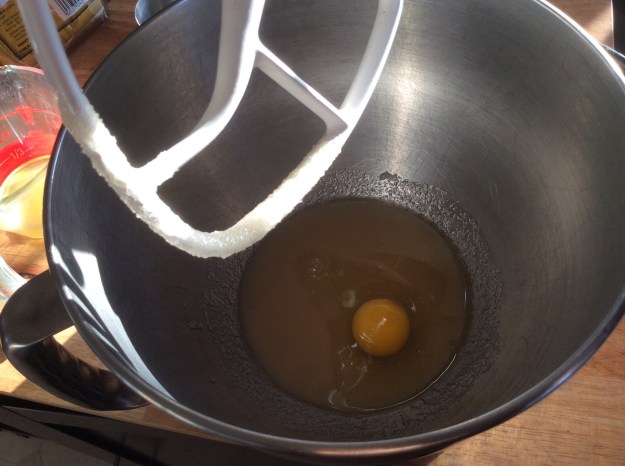
3. In a stand mixer with a paddle attachment, add the sugar and oil. Set on medium speed until completely blended.

image

4. Add the eggs, one at a time until just blended.

image

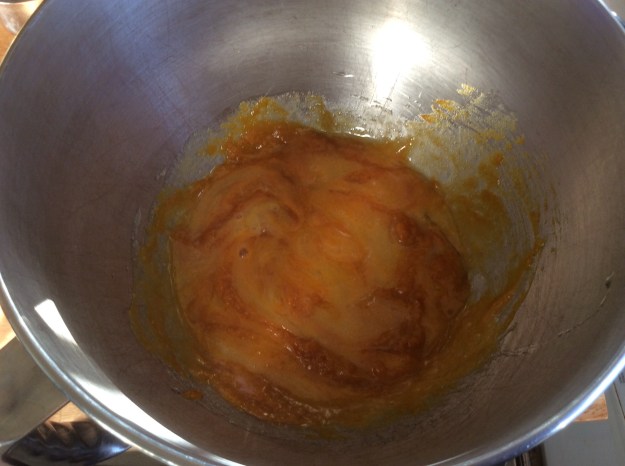
5. Add the vanilla and pumpkin puree mix until smooth.

image

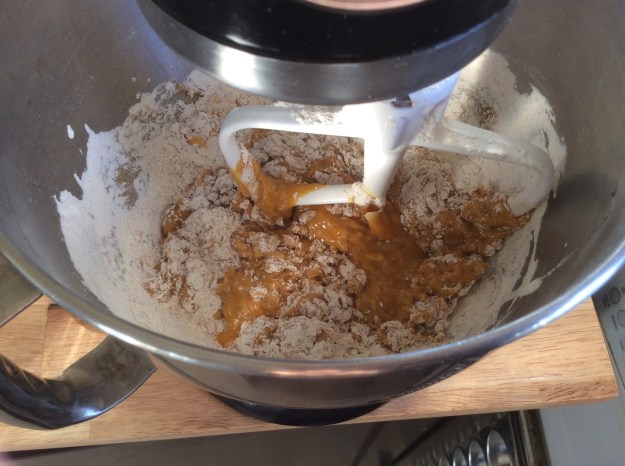
6. On the lowest speed setting, slowly add the dry ingredients until just blended.

image

7. Remove the bowl from the mixer.  Using a rubber spatula, gently fold in the chocolate chunks in until evenly distribute. Don’t over mix.

image

8. Using a large ice cream scoop, scoop into the liners.

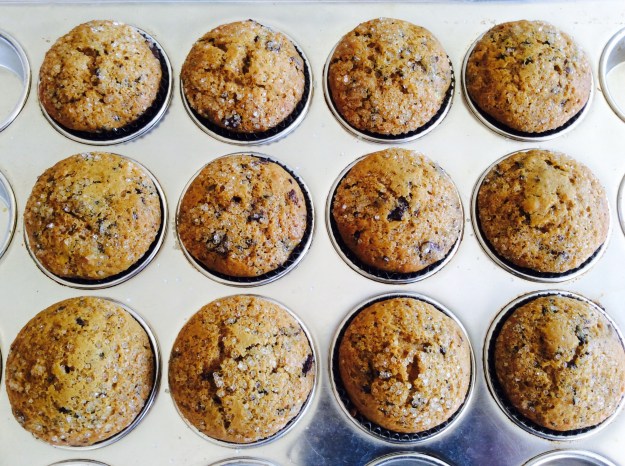
9. Using a teaspoon, sprinkle the crystal sugar on each section of the muffin batter.

image

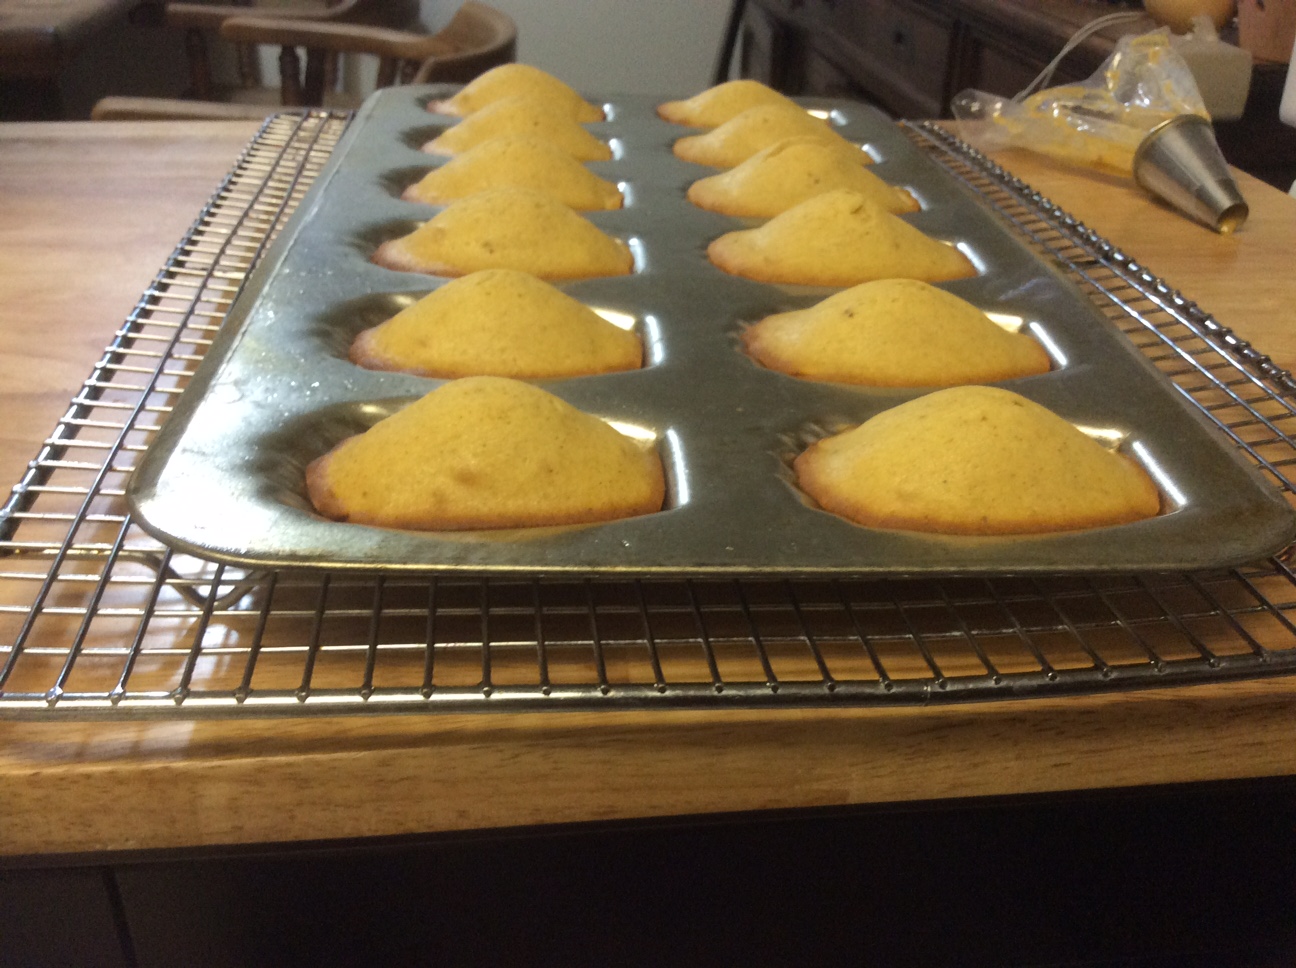
10. Place the muffin pan in the oven and bake for 18-20 minutes or until toothpick comes out clean when inserted in the center of the muffins.

11. Let the muffins cool in the pan for 5 minutes; remove and then transfer to cooling rack.

image

12. Enjoy them warm with a cup of milk or coffee.

Fried Brussels Sprouts and Shallots with Asian Dressing

Thanksgiving is one of my favorite holidays of the year. It’s the one meal I get really excited about cooking. I usually spend a day planning the menu, a couple of days prepping the ingredients, and several hours cooking in the kitchen. Aside from the turkey or ham that is central to the meal, there are side dishes that my family looks forward to every year: roasted Brussels sprouts, savory pain de mie stuffing, cauliflower gratin, among others. My family raves about how yummy everything tastes and it puts a smile on my face. Cooking is a true labor of love.

But cooking a Thanksgiving meal wasn’t always easy or fun for me. I remember my humble beginnings, cooking my first Thanksgiving meal back when I was in junior high. My immediate family and my Korean neighbors (there were a total of 20 guests) were excited about their first traditional Thanksgiving dinner…only to learn the centerpiece of the meal was missing from dinner table. I completely miscalculated the cooking time of a 22 lb. turkey and it still had a couple more hours left to cook in the oven when everyone arrived. Since my guests were hungry, they ate the stuffing, candied yams, and mashed potatoes while the turkey was still roasting. A couple of guests even ran back to their places and brought over some rice, kimchee and several ban chan for the table. When the turkey finally came out of the oven, it ended up being dry and pretty bland, a major disappointment after such a long wait. I felt awful and vowed to never make the same mistake again. Next year, the turkey was ready early!

As we ramp up for Thanksgiving this year, I will be posting a couple of my favorite side dishes. Here is a great Brussels sprouts dish with an Asian twist. It is flavorful, has a hint of heat and different layers of texture. This will be a great addition to any Thanksgiving table.

Fried Brussels Sprouts and Shallots with Asian Dressing

Serving Size: 6-8 as a side dish

2 tablespoons of organic soy sauce
1 tablespoon of fish sauce (Three Crabs brand)
2 tablespoons of organic sugar
1 teaspoon of Asian chili paste (Sambal Oelek)
1 large clove of garlic, minced
1 tablespoon of lemon juice
3 shallots, thinly sliced
2 cups of vegetable oil (sunflower oil)
Sea salt
1 pound of Brussels sprouts, quartered
¼ cup of toasted sliced almonds

1. In a small saucepan, combine the soy sauce, fish sauce, sugar, chili paste, and garlic. Cook over medium heat until the sugar is dissolved and the sauce thickens a bit (about 5 minutes).
2. Remove the sauce from heat, add the lemon juice and set aside to cool.
3. Place 2 cups of oil in a wok or a deep fryer. Bring the temperature to 275°.

image
4. Add all the shallots at once and fry for about 8-10 minutes or until the shallots are golden brown.
5. Remove from the oil with a slotted spoon or spider strainer and place in a colander lined with paper towels. Sprinkle with sea salt and set aside.

image
6. Increase the heat of the oil to 350°.
7. Add ¼ of the Brussels sprouts to the oil and fry for about 3 minutes or until golden brown. Transfer to a colander lined with paper towels. Repeat this process 3 more times. (Make sure you bring the oil temperature back to 350° each time before adding the Brussels sprouts.)

image
8. Transfer all the fried Brussels sprouts to a large bowl. Add the toasted almonds.
9. Add 2 tablespoons of the sauce and toss to coat. Taste to see if it needs more sauce. If so, add one more tablespoon of the sauce and toss to coat.

image
10. Transfer to a serving bowl. Top with shallots and serve.

Breakfast Strata


Many Americans have their go-to potluck recipe and it’s usually some type of casserole dish that can feed a large group. Growing up in a Korean household, casseroles were foreign to me.  I made my first casserole in 7th grade after purchasing a used Sunset cookbook at a garage sale for 25¢, which I read from cover to cover. The first casserole dish I made was Chicken Casserole with frozen vegetables, cream of mushroom soup, and bread crumbs.  I made it and thought I cooked it incorrectly because it didn’t taste very good.  I tried other casserole recipes, but everything was a disappointment until I came across a strata recipe.  This one was different from the rest, layered with bread, cheese and an egg custard. It was essentially a savory bread pudding.  It was so good that this became my favorite casserole recipe.  Years later, I added my own spin to it by including different ingredients like bacon, mushrooms, tomatoes, green onion, Swiss chard, etc.

Here is a great one to serve during the Holidays for a family brunch. It has my favorite breakfast ingredients: eggs, turkey sausage, spinach, mushrooms, and cheese.  It’s a one-pot breakfast. You can even assemble the ingredients the night before and place it in the refrigerator, then pop it in the oven the next morning and viola, breakfast is served.

Breakfast Strata

Serving Size: 6-8

Ingredients

1 Tablespoon of onion

Olive oil

½ an onion, chopped

3 cloves of garlic, minced

6 ounces of turkey sausage (casing removed, rolled into ½” balls)

4 ounces of sliced cremini mushrooms

8 ounces of fresh baby spinach

Pinch of red pepper flakes (optional)

2 cups of low-fat milk

5 extra-large eggs

1 tablespoon of Mailie Dijon mustard

6 ounces of grated Comte (Gruyere or Mild White Cheddar)

2 ounces of Parmigiano-Reggiano

10 ounces of day old country white, cubed

6 basil leaves, chopped

  1. Heat a large skillet to medium. Add 2 tbs. of olive oil and onion and sauté for 2 minutes. Add garlic and sauté for 30 more seconds. Add the turkey sausage, mushrooms, a pinch of salt, black pepper and red pepper flakes.  Sauté until golden brown. Remove the sausage and mushroom mixture from pan and set aside.
  1. Add spinach to the same pan and sauté until wilted. Remove liquid. Add the spinach to the mushroom mixture.
  1. In a large bowl whisk eggs. Add milk, mustard, ½ teaspoon salt and pinch of pepper. Whisk until combined. Set aside.
  1. Mix the Comte and Parmigiano a small bowl. Set Aside.
  1. Begin the layering process. Add 1/3 of the bread on the bottom of the casserole dish. Add ½ of the sausage mixture and 1/3 of the cheese mixture, evenly spreading over the bread. Repeat and top with bread mixture. Save the last 1/3 of cheese mixture and basil leaves.
  1. Pour the liquid mixture over the layered ingredients. Press down to absorb. Add the remaining cheese mixture and basil leaves. Cover with aluminum foil. Place in refrigerator for 30 minutes.
  1. Preheat oven to 350°.
  1. Add the strata with aluminum foil in the oven for 30 minutes.
  1. Increase the oven temperature to 425 degrees. Remove the foil. Bake for an additional 5-10 minutes or until golden brown. Remove from oven and place on the cooling rack. Let cool for 10-15 minutes. Cut and serve with a side salad.

image

Butternut Squash Risotto with Roasted Hazelnuts


It is difficult to find a well-executed risotto, even at the best Italian restaurants. Unlike many Italian dishes, risotto requires the chef’s undivided attention throughout the cooking process, which takes around 40 minutes. Restaurant chefs don’t have that kind of time to dedicate to a single dish, so instead they par-cook the rice during prep and then finish it off after the guest orders, cutting the final cooking time in half. While this process saves guests from a long wait for their food, it hurts the integrity of the dish. Perfect risotto needs to be stirred and watched constantly so that the rice cooks evenly. It is the dish that has sent more contestants home from Top Chef than any other. Clearly there is no place for risotto in a fast-paced cooking competition, because risotto waits for nobody.

Risotto is the perfect dish to cook at home on a Sunday evening or whenever you have an hour to spare. People who haven’t made it before often think it’s difficult, but it’s actually quite easy, it just requires some time and attention. Here is the perfect risotto recipe for the fall season.

Butternut Squash Risotto with Roasted Hazelnuts

Serves 4

Ingredients

1 cup of butternut squash, cut into 1/2″ cubes
Olive oil
5 1/2 cups of homemade chicken or vegetable stock (or low-sodium, store-bought)
1/2 cup of Chardonnay wine
5 sage leaves
1 small onion, finely diced
1 celery stick with leaves, finely diced
2 cloves of garlic, minced
12 ounces of Arborio rice (about 2 cups)
1/2 cup of freshly grated Parmigiano-Reggiano
2 tablespoons of unsalted organic butter
1/2 cup of roasted hazelnut, coarsely chopped
Sea salt
Fresh black pepper

Preheat oven to 350°

1. On a baking sheet, toss the butternut squash in olive oil and sprinkle with salt and pepper.

2. Roast in the oven for 10 minutes.

3. Remove from the oven and cool on a rack. Once cool, transfer the butternut squash to a plate and set aside.

image

4. In a medium-sized pot, heat the stock on medium low. (Keep the stock on the burner even after it is heated.)

5. In a large Dutch oven (like a Le Creuset), heat 3 tablespoons of olive oil on medium.

6. Add the onion, celery, garlic, and sage leaves. Stir constantly for about ten minutes or until they have softened. Remove the sage leaves.

image

7. Add the Arborio rice, making sure the rice is coated with oil. Stir for about two minutes or until the rice is translucent.

image

8. Add the Chardonnay to the rice and stir until evaporated.

9. Add one ladleful of stock to the rice and stir until evaporated.
image

10. Repeat this process one ladleful at a time, each time making sure it is cooked off before adding the next. This process should take about 20 minutes and the rice should be al dente.

11. Add the butternut squash and stir gently. Remove from heat.

12. Stir in the Parmigiano-Reggiano, butter and salt to taste. Close the lid and keep covered for two minutes.

13. Spoon the risotto into shallow bowls and drizzle with olive oil. Sprinkle roasted hazelnuts on top.

14. Serve immediately.

Sautéed Green Beans with Garlic


Din Tai Fung is a world-class Taiwanese restaurant, best known for their soupy dumplings (xiao long bao). The first restaurant opened in Taipei in 1980, and at one point was included on the New York Times list of the top ten restaurants in the world. They expanded to the US in 2000, setting up shop in Arcadia, CA, and due to their popularity – the wait to get seated is frequently more than an hour – have since opened three more locations in Southern California. But the competition for soupy dumplings is intense in the San Gabriel Valley, and what keeps Din Tai Fung at the top of many people’s list are some of the other items on their menu. For me, that item is the green beans with garlic.

It’s simple, but Din Tai Fung executes it perfectly. The beans are crispy with a blistered skin, garnished with minced garlic, Taiwanese pickles and a touch of salt. Once I start eating them, I can’t stop! After deconstructing the recipe years ago, I have been making these green beans at home for my family, and I think my version is pretty darned close to Din Tai Fung’s. The trick to achieving the blistered skin is to flash-fry the green beans before sautéing them. Give them a try – I hope you’ll love them as much as I do!

Sautéed Green Beans with Garlic

Serving Size: 4 (side dish)
1/2 pound of organic green beans (cleaned and trimmed)
1 1/2 cups of vegetable oil (for deep frying)
1 tablespoon of minced Taiwanese pickled cucumbers or pickled turnips*
2 cloves of garlic (minced)
Kosher salt or sea salt

1. After washing, cut the green beans in half and dry with paper towels. Make sure they are completely dry – it will affect the flash-frying process.

image

2. Line a large colander with a few paper towels. Set near the frying area.

3. In a large wok or enamel coated cast iron pan, bring the oil to 350°. I use a candy thermometer for this step, but if you have an electric fryer, you could use that instead.

4. As soon as the oil reaches 350°, add 1/3 of the green beans to the oil and fry for approximately 30 seconds. This is a critical step, as it is how to achieve the blistering effect while keeping the crunchy texture. If the green beans are fried too long, they will lose their crispness, and if too many green beans are fried at once, the oil temperature will drop and the skin will not blister.

image

5. Using a spider strainer or tongs, transfer the beans to the colander to drain the oil.

6. Bring the oil back up to 350° and repeat this process two more times, frying 1/3 of the green beans each time.

7. Heat a large sauté pan on high and add one tablespoon of oil. Immediately add the Taiwanese pickled cucumbers and sauté for 30 seconds. Add the garlic and sauté for 15 more seconds. Add all the green beans, sprinkle with salt, and sauté everything together for 30 seconds. Make sure the green beans are coated with garlic and pickles.

image

8. Transfer to a plate and serve immediately with rice and your choice of protein.

image

*You can find them in any Chinese grocery store.

For more information on the restaurant, you can visit their website: http://dintaifungusa.com

Spaghetti with Easy Roasted Tomatoes


When I was a kid, I saw a Chef Boyardee commercial on TV, with a child on the screen, happily devouring some stringy orange noodles. The commercial made it look so appetizing, I followed my mom to the store the next day and bought a few cans. This was my first introduction to spaghetti: soft and mushy pasta, orange tomato sauce, and little pieces of processed beef. I was more than just disappointed, I felt lied to by the advertisers who made this stuff look good. Yet all my friends at school loved spaghetti! How could it be? I knew there had to be something better out there.

I bought every different spaghetti product I could find. Kraft’s Tangy Italian Spaghetti kit in a box (Tomato Paste Not Included), Anthony’s spaghetti noodles with Ragu, Creamette spaghetti with Prego…they were all mediocre at best. I finally had my first good spaghetti experience at a mom and pop restaurant in LA called Andre’s – it’s still there, across the street from the Farmer’s Market on 3rd – but that didn’t stop my quest. One day I went to an Italian market and bought some pasta imported from Italy (the kind wrapped in blue butcher paper), and on a shelf in the back, I found what became my epiphany sauce: Rao’s Marinara Sauce, made with imported San Marzano tomatoes (canned), olive oil, and a handful of fresh basil. It immediately became my go-to spaghetti sauce.

My goal was to capture the delicious flavors of the Raos sauce, but using fresh tomatoes. I think you’ll find this an easy recipe to follow along with. Just make sure you set aside 1 and 1/2 hours; one hour of that time will be spent roasting the tomatoes in the oven.

Spaghetti with Easy Roasted Tomatoes

Serves 2-3

Ingredients

10 ounces of Mini San Marzano or Mini Sugar Plum Tomatoes
1/4 cup of extra virgin olive oil (plus extra for drizzling)
1/2 teaspoon of sea salt (plus extra for serving)
2 garlic cloves (thinly sliced)
10 small basil leaves (extra for serving)
6 ounces of fresh or dried spaghetti (or your favorite pasta)
Freshly grated Parmiggiano-Reggiano
Red pepper flakes (optional)

1. Preheat the oven to 300 degrees F.

2. Wash the tomatoes and dry completely with paper towel. Add the tomatoes in an small oven-proof casserole pan, add the olive oil, and salt. Toss well.

image

3. Roast the tomatoes for 30 minutes.

4. Take the tomatoes out of the oven, toss in the sliced garlic, and put it back in the oven for 30 more minutes.

5. While the tomatoes continue roasting, get a large pot of water to boil. Add a handful of Kosher salt.

6. Remove the tomatoes out of the oven. Immediately, toss in the small basil. Let rest until the tomatoes are cool enough to handle.

image

7. Add the pasta to the boiling water. Cook until al dente.

8. While the pasta is cooking, peel the skins off the tomatoes. The skins will slip right off. Throw the skins away.

9. Transfer the tomatoes with the liquid into a large sauté pan. Smash the tomatoes with a fork. Heat the tomatoes over medium-high heat. Add the pasta with a little pasta water. Toss the pasta with the tomatoes. Taste for salt.

11. Divide the pasta into 2 serving bowls.

12. Top with grated Parmigiano-Reggiano, fresh basil leaves, a drizzle of olive oil, and sprinkle of sea salt. Add red pepper flakes, if using.

13. Serve with a glass of Italian red wine and enjoy!

Pumpkin Madeleines


Despite the triple-digit temperatures here in Southern California, autumn has arrived and pumpkin fever is in full effect. Apparently there is a shortage of the gourd this year, but you would never know it walking into your local Trader Joe’s. You can’t go more than three feet in an aisle before coming across some pumpkin-enhanced product: pumpkin bagels with pumpkin cream cheese, pumpkin kringle, pumpkin butter, and even pumpkin coffee. The pumpkin has evolved far beyond its modest pie-filling beginnings.

Now, while I’m a huge fan of all things pumpkin, I understand that for many pumpkin fatigue will set in quickly (if it hasn’t already). Before that happens, though, I want to share one of my favorite fall recipes: Pumpkin Madeleines.

I love madeleines, but as Dominique Ansel explained so perfectly, madeleines have a short and fleeting life – they are best right out of the oven, and if you wait too long, their light, airy texture goes away. In fact, at his New York bakery the madeleines are made to order and customers are instructed to eat them on the spot. Of the many madeleine recipes I have tried, Dominique’s is the best; here is my version of it, colored with that most popular of autumnal flavors.

Pumpkin Madeleines

Serving: About 20 cookies

Ingredients

1 stick of organic butter (8 Tbsp)

1 tablespoon organic brown sugar

1 tablespoon honey

1/3 cup organic sugar

1/2 teaspoon Kosher salt

1 1/4 cup unbleached flour (like Sonora wheat)

1 1/2 teaspoon of pumpkin spice mix

1/2 teaspoon baking powder

2 extra large organic eggs, at room temperature

1/4 cup pumpkin purée (fresh or canned)

1 teaspoon vanilla extract

Nonstick butter spray

Organic powdered sugar

Special Equipment

Madeleine Pan

Piping bag with 1/2″ tip (or Tablespoon scoop)

Directions

Night Before

  1. Melt the butter, brown sugar, and honey in a small sauce pan over low heat. Keep the mixture warm over very low heat.
  2. Stir the dry ingredients with a whisk in a large mixing bowl. In a small mixing bowl, whisk eggs, pumpkin purée, and vanilla until smooth. Create a well in the center of the dry ingredients. Slowly add the wet mixture into the well while whisking in the dry ingredients. (Similar to making pasta.)
  3. When the wet ingredients are completely incorporated and the batter smooth, add the warm butter mixture.
  4. Mix the warm butter into the batter with a rubber spatula until complete incorporated.
  5. Press the plastic wrap pressed directly onto the surface of the batter, to prevent a skin from forming. Add another plastic wrap on the top of the bowl.
  6. Refrigerate overnight. This step helps create the lovely signature hump.

Day Of

  1. Preheat the oven to 375 degrees.
  2. Transfer batter into a large piping bag with 1/2 tip. Fill the bag 2/3 they way. (If you have a piping bag, use a small stainless 1 Tablespoon scoop.)
  3. Spray non-stick butter spray in the Madeleine pan, buttering each of the molds evenly.
  4. Pipe the madeleine batter into the molds so that it fills each about three-quarters of the way to the top.
  5. Bake the madeleines for about 5 minutes on the center rack. When you see the batter develop a hump in the center, rotate the pan 180 degrees. Bake for about 5 minutes more or until toothpick test comes clear.
  6. Unmold on to a wired rack. Quickly transfer to  serving plate and sift with powdered sugar. Serve immediately with coffee or tea.

Madeleines are best when eaten within 10 minutes out of the oven.

IMG_2227IMG_2228

So’s Special

This is my spin on a famous breakfast dish called Joe’s Special, which I first had at Original Joe’s Restaurant in San Francisco. The dish consists of scrambled eggs, ground chuck, garlic and spinach. It is delicious, and I would get it with mushrooms added and a side of crusty bread. Also, I’m told that many home cooks in SF make this dish because it is relatively easy to whip up.

I really love Joe’s Special, but I wanted a lighter and healthier version. So I replaced the ground chuck with ground turkey, replaced the eggs with tofu, and instead of serving it with crusty bread, I serve it with steamed Jasmine rice. I also added a little oyster sauce for some umami flavor. Essentially I took an Italian-American dish and made it Asian-American. This version has become one of my family favorites.

So’s Special

4 Servings

1 Tablespoon sunflower oil or olive oil

5 cloves garlic, minced

1 medium yellow onion, finely chopped

8 ounces of organic ground turkey

8 ounces of fresh heirloom spinach (blanched, squeezed dry in cheesecloth, and chopped)

4 ounces organic firm tofu (squeezed dry in a cheesecloth)

1 Tablespoon of premium oyster sauce

Kosher salt and freshly ground black pepper, to taste

Pinch of red pepper flakes (optional)

¼ cup of freshly grated Parmigianino-Reggiano

2 cups of steamed jasmine rice

Garlic-chili sauce (optional)

  1. Heat oil in a wok or 12″ skillet over medium-high heat.
  2. Add garlic and onion and cook until soft, about 5 minutes.
  3. Add ground turkey and cook on medium-high heat until all the liquid evaporates, about 10-15 minutes.
  4. Add spinach and cook for 2 more minutes.
  5. Add the tofu and the oyster sauce cook mixture is slightly dry, about 7 minutes.
  6. Season with salt and pepper to taste.
  7. Add a pinch red pepper flakes.
  8. Spoon over steamed Jasmine rice.
  9. Serve with garlic-chili sauce.

For the Original Joe’s Special recipe, click this link.

Olive Oil Cake with Candied Orange Slices


One of my favorite restaurant desserts is the Olive Oil Cake at Union Restaurant in Pasadena. It’s not fancy or complicated, yet it tastes so good. It’s the dessert you think about once you leave the restaurant!

What makes this dessert so special is the flour that they use. The restaurant takes pride in using locally-milled Sonora Wheat Flour from Grist and Toll. Here is my copycat version of the dessert I love so much. Enjoy!

Olive Oil Cake with Candied Orange Slices
Serves 8-10 

2 ½ cups Sonora Wheat flour (or unbleached AP Flour)

1 ½ teaspoons baking powder

½ teaspoon of kosher salt

¾ cup of organic sugar

Zest of 1 large orange

3 extra-large eggs (at room temp, beaten)

1 cup of extra virgin olive oil

¾ cup of low-fat milk

Juice of 1 orange (about ¼ cup)

1 teaspoon of vanilla extract

Candied orange slices (recipe link) – made in advanced

Honeycomb Ice Cream or Vanilla Bean Ice Cream for serving

Local honey for serving

  1. Preheat the oven to 350 degrees. Spray a 9-inch spring form pan with non-stick olive based spray.
  2. Add all the flour, baking powder and salt in a medium bowl and whisk. Set aside.
  3. In mixing bowl, add the sugar and orange zest and rub together with your fingers.
  4. Place the bowl with the sugar mixture on the mixer. Mix on low using the whisk attachment. Add the eggs and increase to medium for 30 seconds. Reduce to low, add the olive oil, milk, orange juice and vanilla. Mix until just blended. Remove from mixer.
  5. Using a large rubber spatula, fold in the flour mixture until just blended.
  6. Transfer batter to the greased spring form pan.
  7. Bake in the center of the oven for about 35-40 minutes, or until the top is golden brown and toothpick inserted comes out clean.
  8. Cool in pan for 30 minutes.
  9. Removed the ring. Arrange candied orange slices on the top of the cake in a beautiful pattern.
  10. To serve, cut a slice of cake. Remove the candied oranges and set aside. Place in a toaster oven until toasty.
  11. Serve with a drizzle of honey and ice cream.

IMG_2193