Category Archives: Uncategorized

Pecan Malt Syrup Tart

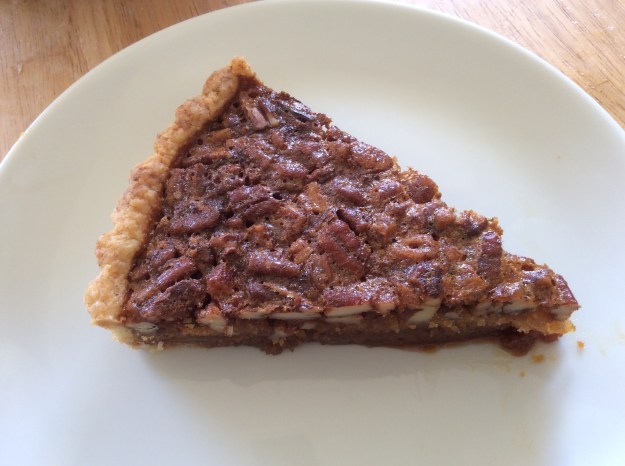
Of all the wonderful pies I’ve had over my life, my favorite from back when I was a child is pecan pie. This southern classic has to be one of the sweetest pies I have ever eaten, and I recall baking it middle school with a pre-made pie shell and both light and dark corn syrups. This was the default recipe one found on the side of every Karo corn syrup bottle and back then, when it came to desserts, the sweeter the better. Now as an adult, I find pecan pies to be cloyingly sweet, but I still have fond memories of the dish, so I started experimenting with ways to reduce the sugar level while maintaining the integrity and the custardy structure of the pie.

My solution is, rather than using corn syrup for the entire pie, I substitute half of it with barley malt syrup, as malt syrup has less sugar than corn syrup. Plus it has a malty flavor that I love! I also reduced the amount of sugar in the recipe and added more pecans. And of course, I made my own pie shell. Overall, the recipe is pretty easy. There is some advanced preparation required with the par-baked pie shell, but you have that ready, it’s easy as pie. I recommend you make this dish for Thanksgiving or your next holiday gathering. Enjoy!

1 par baked 10-inch tart shell (see recipe below)
2 cups of pecans, chopped
4 eggs, room temperature
1/2 cup of sugar
1/2 cup of organic corn syrup*
1/2 cup of organic barley malt syrup
1/2 teaspoon of salt
2 teaspoons of vanilla extract
1/2 cup of unsalted melted butter, cooled
Special equipment:
10-inch tart pan
Pie weights or dried beans

1. Heat the oven to 350°

2. Spread the chopped pecans on a baking sheet and toast for 5 minutes. Let cool.

image

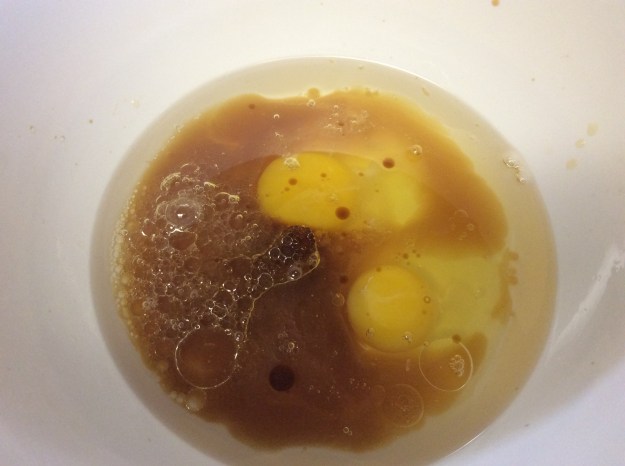
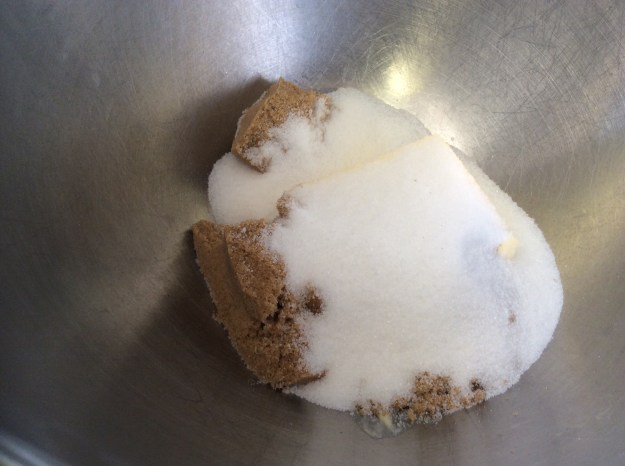
3. In a large bowl, add the eggs and sugar and whisk for about 1 minute.


4. Add in the corn syrup, malt syrup, salt, vanilla extract and melted butter and whisk until combined.

image

5. Put the par-baked tart shell and the pan on top of a baking sheet. In the tart shell, add cooled pecans and spread evenly.

image

6. Give the custard mixture a final whisk and pour over the pecans.

image

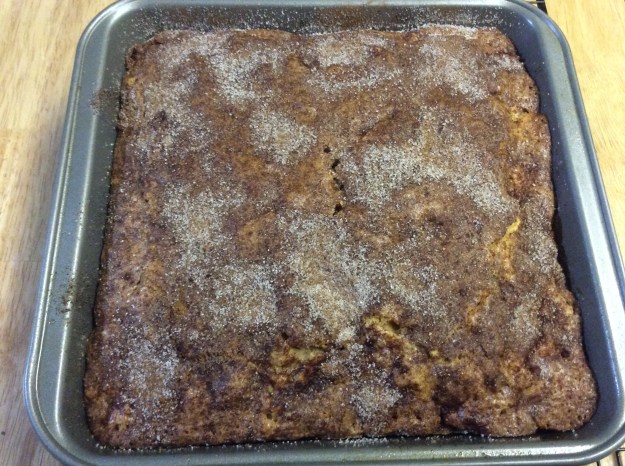
7. Place the pecan tart in the oven and bake for about 35-40 minutes (turning the tart at the halfway mark) until the center is set.

imageimage

*Organic Light Corn Syrup and Barley Malt Syrup can be found in most natural foods market like Sprouts or Whole Foods.

One 10-inch Tart Shell

1 cup of flour
2 tablespoons of sugar
1 teaspoon of baking powder
1/2 teaspoon of salt
1/2 stick of cold butter (cut into cubes)
1/8 cup of cold water

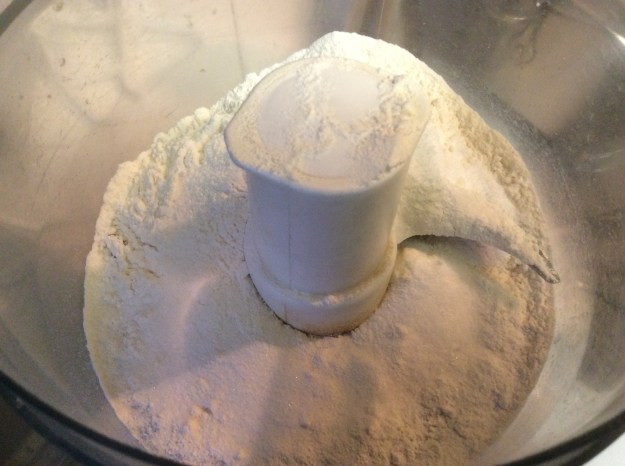
1. To make the tart crust, place the flour, sugar, baking powder, and salt in a food processor. Pulse 3-4 times.

image

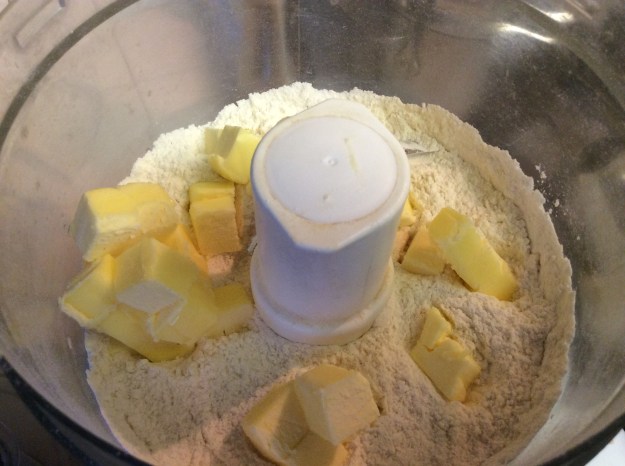
2. Add butter. Pulse 3 to 4 times.

image

3. Add water. Pulse 2 to 3 times until the dough comes together.

image

4. Move the dough to work station and gently knead it until it just comes together, and then form into a disk. Do not overwork the dough or it will yield a tough crust.

image

5. Wrap with plastic wrap and place in the refrigerator for at least 2 hours.

6. Heat the oven to  325°

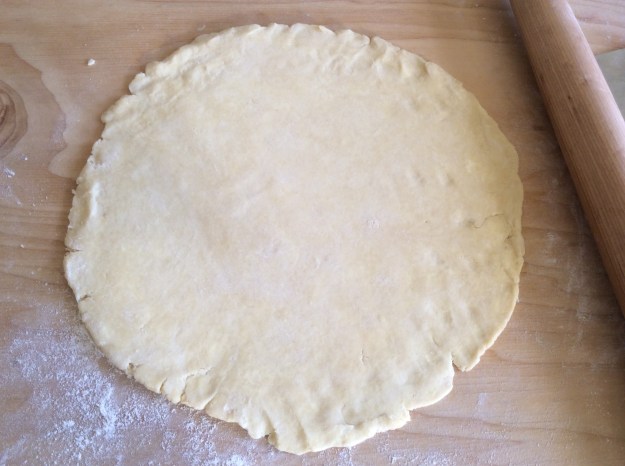
7. Roll out the tart crust wide enough to cover the tart pan. This will be roughly be 13 inches in diameter

image

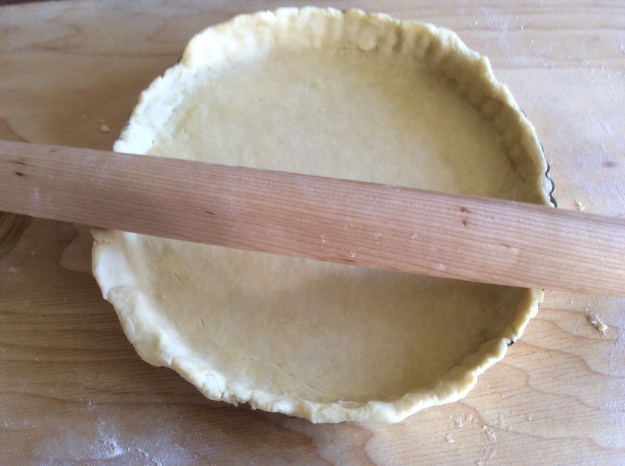
8. Press the crust down into the pan. Using a rolling pin, roll over the crust and to cut the portion hanging over the tart pan.

imageimage

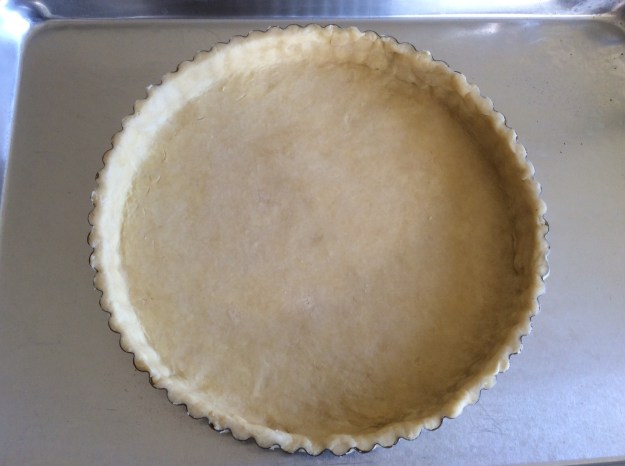
9. Place the crust and pan in the freezer for 5 minutes.

10. Meanwhile, cut out a round piece of parchment paper about 12-inch in diameter.

11. Remove the pie crust from the freezer and line the parchment paper over the crust. Add the pie weights. Par-bake for 20 minutes.

12. Once out of the oven, remove the pie weights and parchment paper. Let the shell cool completely on a wired rack.

Advertisement

Sautéed Corn with Dried Shrimp

With Thanksgiving around the corner, fresh corn is plentiful at your local supermarket and at the farmers market. When I find heirloom corn at the farmers market, I get excited about all the different things I might make with it – Johnny cakes with fresh corn, creamed corn with tarragon, cornbread with bacon – but every so often I want corn with Asian flavors. With that in mind, here is a unique corn recipe inspired by the Vietnamese street food Bap Xao Tom Bo. You can find this popular buttery shrimp and corn dish at mobile food stands in the streets of Saigon. In the traditional recipe, the corn is sautéed in butter, then small dried shrimp is added, followed by a little fish sauce, green onion, and finally a little hot sauce. Also, the dried shrimp is traditionally sautéed without soaking them first. In my version, I prefer to soak the dried shrimp in hot water to mellow out the shrimp flavor and to soften them a bit, otherwise I think the shrimp flavor can be a bit overpowering. I also add a little soy sauce and dark caramel sauce to balance out the fish sauce. Finally, I add fried shallots for a crispy texture. This corn dish is best eaten right away. Enjoy!

Sautéed Corn with Dried Shrimp

Serving Size: 4
3 tablespoons of unsalted butter
5 scallions, thinly sliced
1 lb of fresh cut or frozen organic corn*
10 small dried shrimp (soaked in hot water for 20 minutes and chopped)**
1 tablespoon of fish sauce
1 teaspoon of organic soy sauce
Freshly grated black pepper
1-2 teaspoon of Sambal Oelek (garlic chili sauce), more for serving***
1/2 tablespoon of Vietnamese caramel sauce (optional)
1/4 cups of fried shallots

1. Heat a large sauté pan over medium-low. Add the butter and half of the scallions. Sauté for about 2 minutes.

image

2. Add the dried shrimp (after it is soaked and chopped). Sauté for 1 minute.

image

imageimage

3. Add the corn and increase the heat to medium-high. Sauté for 2 more minutes (3-4 minutes for frozen corn).

image

4. Add the fish sauce, soy sauce, a couple of turns of the pepper mill, chili sauce, and caramel sauce. Sauté for 30 more seconds. Add the remaing scallions and sauté for 30 more seconds.

image

5. Divide among 4 bowls and top with fried shallots and serve with extra chili sauce.

image

*If using fresh corn try to find heirloom corn at your local farmers market. Most corn sold at the supermarket tend to be genetically modified.

**Dried shrimp can be found at most Asian supermarkets. Store the remaining shrimp in an airtight freezer bag.

image

***Sambal Oelek or garlic chili sauce are available at most Asian supermarkets.

image.jpeg

Birthday Cupcakes with Organic Sprinkles

Whenever my 4-year old sees sprinkles on donuts or cookies at bakery, I can’t steer him away from them. I make suggestions for other healthier options, but he’s insistent on the confetti-speckled treats. He, along with most kids, are drawn to the cute little, colorful dots. The sprinkles make kids smile from ear to ear. As a mom who’s constantly looking for healthier alternatives, I try to avoid foods with artificial coloring, so I recently started using sprinkles with natural food coloring. The colors are derived from natural vegetable dyes. Although the colors are little more pale and not as vibrant, the kids don’t notice the difference.

What better time than my son’s 9th birthday to use these sprinkles. They are perfect toppers and decoration for birthday cupcakes. Here is a simple birthday cupcake recipe using the best ingredients. The frosting is light and not too sweet and the cake is moist and tender. The sprinkles add a nice crunchy texture. These cupcakes are popular with the kids, but the leftovers were a hit with the adults at my office as well. Enjoy!

 
Birthday Cupcakes with Organic Sprinkles

Yield: about 1 dozen

1 1/2 cups cake or pastry flour
2 teaspoons of baking powder
1/2 teaspoon of sea salt
6 tablespoons of unsalted organic butter, at room temperature
1/2 cup of organic sugar
2 large organic egg whites
1 large organic egg
2 teaspoons of vanilla extract
1/3 cup of low fat organic milk
Vanilla bean frosting (recipe below)
3 oz of organic or natural dye sprinkles*

1. Heat oven to 350°. Line a muffin tin with 12 cupcake liners.

2. In a medium bowl, add the flour, baking powder, and salt. Whisk to combine. Set aside.

image

3. In a stand mixer with a paddle attachment, beat butter and sugar on medium speed for 2 minutes. Scrape the sides.

image

4. Reduce the speed to low. Add the egg whites one at a time, and then the whole egg, beating well between each addition. Add the vanilla extract. Scrape.

image

5. Alternate 1/2 of the flour and then 1/2 of the milk. Repeat. Stop the mixer once the batter is just combined.

image

6. Remove the bowl off the mixer. Fold in 2 oz of the sprinkles.

image

7. Using a large ice cream scoop, divide the batter into the cupcake liners. (Make sure you level out the batter evenly to the top, no more and no less to ensure perfect size for icing.)

image

8. Bake for 18 to 20 minutes until the toothpick comes out clean.

image

9. Cool on a wire rack until cool before frosting.

image

10. Using an off-set spatula, spread a generous amount of vanilla bean frosting on each cupcake. Decorate with the remaining sprinkles.

image
Vanilla Bean Buttercream Frosting

1 cup of unsalted organic butter, at room temperature
1/2 teaspoon of Kosher salt
1/4 vanilla bean, seeds scraped
3 cups of organic powdered sugar
2 teaspoons of vanilla extract

1. On a stand mixer on medium speed, add the butter, salt and vanilla bean seeds. Beat for 2 minutes.

imageimage

2. Reduce the speed to the lowest setting and add the powdered sugar, 1/2 cup at a time, making sure that the sugar is incorporated before adding the next 1/2 cup.

image

3. Add the vanilla extract and increase the speed to medium and beat until cream about 1-2 minutes. The frosting should be light and fluffy.

image

4. Place in an airtight container and keep at room temperature until ready to use.

image

*India Tree and Sprinkels brand offers sprinkles with natural dyes.

imageimage

Pumpkin and Swiss Chard Lasagna

I was hesitant to post a recipe with pumpkin this season because of pumpkin spice overload. Come fall, most markets dedicate a whole section to products with pumpkin spice. Trader Joe’s started this trend a few of years ago and other supermarkets quickly followed suit. There is pumpkin spice in chips, crackers, BBQ marinade, and even in kombucha. It has gotten so out of control, Anthony Bourdain said “I would like to see the pumpkin spice craze drowned in its own blood. Quickly.” Even though this lasagna recipe doesn’t contain any pumpkin spice, pumpkin has gotten a bad rap, kind of an instance of guilt by association.

Despite Bourdain’s loathing of pumpkin spice, pumpkin is a wonderful autumnal ingredient perfect for savory dishes. This pumpkin lasagna recipe is a nice change from your traditional meat sauce lasagna. There are two layers of pumpkin purée and one layer of Swiss chard/ricotta, and the dish is topped with béchamel, mozzarella and Parmigiano-Reggiano. There is also sage brown butter in the pumpkin purée, which adds a layer of nutty and woody flavor. There is some advanced preparation involved before assembling the lasagna, so plan ahead. This a good dish for a crowd, or if you omit the chicken stock, a nice vegetarian option at a potluck. Serve it with a side salad for a complete meal. Enjoy!

Serving Size: about 12

Non-cooking spray, preferably olive oil-based
Béchamel sauce (see below)
1 lb. of lasagna noodles, no-boil
Cooked Swiss chard (recipe below)
Pumpkin layer (recipe below)
Ricotta layer (recipe below)
1 cup of grated mozzarella
1/4 cup of grated Parmigiano-Reggiano
1/2 cup of chicken stock or low sodium chicken broth (optional)

1. Preheat oven to 375°

2. Spray the bottom of a 13″ x 9″ x 3″ baking pan with non-stick cooking spray. Ladle and spread half of the béchamel sauce on the bottom of the baking pan.

image

3. Place 4 lasagna sheets, overlapping, on top of the béchamel layer.

4. Spread 1/2 of the pumpkin mixture on top of the lasagna noodles.

image

5. Add another layer of lasagna sheets.

6. Spread the remaining ricotta mixture on top of the lasagna sheets.

image

7. Evenly spoon all of the Swiss chard mixture and top with 1/2 of the grated mozzarella.

imageimage

8. Add another layer of lasagna sheets.

9. Spread the remaining pumpkin mixture on top of the lasagna noodles.

image

10. Add another layer of lasagna noodles.

11. Ladle and spread the remaining béchamel, then the remaining mozzarella, and finally the grated Parmigiano-Reggiano. If using, pour the chicken stock along the sides. Cover the lasagna with aluminum foil. Bake for 45 minutes.

image

12.  Remove foil and increase the heat to 400° and bake for 10 additional minutes.

13. Place the lasagna on a cooling rack. Let cool for at least 20 minutes before slicing and serving.

image


Swiss Chard

2 tablespoons of olive oil
3 cloves of garlic, thinly sliced
1 1/2 cups of chopped onions
1 teaspoon of chopped thyme leaves
Pinch of red pepper flakes
8 cups of chopped Swiss chard
2 teaspoons of lemon juice
Salt and pepper to taste

1. Heat a large sauté pan over medium heat. Add the olive oil. Add the garlic and sauté of for 15 seconds. Add the onions and thyme leaves. Sauté for 3 minutes.

image

2. Add all of the Swiss chard and red pepper flakes. Sauté and cook until tender, about 5-6 minutes. Season to taste.

image

3. Add the lemon juice and transfer to a bowl until ready to use.

image

Béchamel sauce

2 tablespoons of unsalted butter
2 tablespoons of flour
2 cups of low-fat milk, heated
3/4 teaspoon of sea salt
1 pinch of ground nutmeg (half of 1/8 teaspoon)
Freshly ground pepper

1. Heat a medium sauce pan over medium heat. Add the butter and stir until melted.

2. Slowly rain in the flour while whisking to prevent clumping. Cook while whisking for about 1 minute.

image

3. While whisking, slowly add the heated milk. Add the salt, nutmeg, and pepper. Continue to whisk and cook until the sauce thickens and the mixture bubbles on the sides. Turn off the heat. Set aside until ready to use.

image

Pumpkin layer

2 tablespoons of butter
8 fresh sage leaves
3 cups of cooked pumpkin (fresh or canned)
3/4 cup of grated Parmigiano-Reggiano
1/2 teaspoon of sea salt
Pinch of nutmeg
Freshly ground pepper

1. In a small sauté pan, melt the butter over medium heat. Add the sage leaves. Cook until the butter turns brown and toasty. Turn off the heat, remove the sage leaves and set aside.

image

2. In a large bowl, combine the pumpkin, Parmigiano-Reggiano, salt, nutmeg and few turns of the pepper mill. Stir to combine.

image

3. Add the brown butter. Stir well and set aside until ready to use.

image

Ricotta layer

1 1/2 cup of ricotta
1/2 cup of grated Parmigiano-Reggiano
1/2 teaspoon of salt
Freshly ground pepper

Mix all the ingredients in a small bowl. Set aside until ready to use.

image

Tom Kha Gai

Tom Kha Gai was one of the first Thai recipes l learned how to make back in college. This fragrant chicken coconut soup has a lovely balance of many flavors: spicy, savory, sour, and slightly sweet. The wonderful flavors come from the combination of a variety of ingredients: galangal root, Kaffir lime leaves, garlic, lemongrass, lime juice, fish sauce, chili paste and coconut milk. The coconut milk adds a level of creaminess without making the soup heavy. This Thai dish and a few others were taught to me by an incredibly talented Thai chef who was in the United States on a temporary work visa. Over the course of a few lessons, she taught me this dish along with several others, but unfortunately her visa expired and she had to return to Thailand. I am forever grateful to have met her and to have learned from her the basic foundations of cooking Thai food.

Over time, I made some modifications to this recipe. Instead of the traditional straw mushrooms that most Thai restaurants use in this soup, I added brown beech mushrooms. You can’t find fresh straw mushrooms in the US, only canned versions, and I find that the beech mushrooms are similar in size to the straw mushrooms and have a similar texture. Also, I marinate the chicken pieces and poach them prior to adding them to the soup, which gives the chicken a tender and velvety texture. It is an extra step, but I think it is well worth it in the end. Enjoy!

Tom Kha Gai

Serving Size: 4
8 ounces of boneless chicken breast, thinly sliced
1 Tablespoon of Mirin
1/4 teaspoon of baking soda
Kosher salt
8 ounces of Brown Beech mushrooms, trimmed and washed
1-2 teaspoons of Thai chili paste*
1 tablespoon of minced fresh lemongrass
1 clove of garlic, minced
3 cups of homemade chicken stock or low-sodium chicken broth
6 Kaffir lime leaves, divided
3 two-inch lemongrass stalks, bruised with back of a knife
5 slices of galangal, 1/4″ thickness
3 tablespoons of fish sauce (add more to taste), Red Boat or Three Crabs brand
2 teaspoons of organic sugar
1 1/2 cups of Thai coconut milk**
2 tablespoons of fresh lime juice and extra lime wedges for serving
Sea salt to taste
Red jalapeño slices
Thai bird chili slices, optional
Cilantro sprigs for serving

image

1. In a small bowl, add the sliced chicken and Mirin. Stir. Sprinkle the baking soda all over the chicken. Stir. Set a timer for 15 minutes. Don’t over marinate to ensure a perfect texture.

image

2. Add a quart of water in small pot. Add 1 tablespoon of Kosher salt. Bring to a boil. Add the mushrooms. Boil for 1 minute. Using a spider strainer, remove the mushrooms and transfer to a bowl.

imageimageimage

3. Bring the same water back to a boil. Add the marinated chicken, reduce heat to a simmer and poach for 1 minute. Turn off heat and set aside.

image

4. Heat a 2-quart pot to a medium-high heat. Add the chili paste, garlic, and minced lemongrass. Stir and cook for 1 minute. Pour in the chicken stock, add 3 Kaffir lime leaves and bring to a boil. Strain the stock and return stock to the pot.

image

imageimage

5. Add the lemongrass stalks, galangal, the fish sauce, sugar and coconut milk. Bring to a simmer. Add salt to taste.

6. Strain the poached chicken and add it to the soup along with the mushrooms and simmer for 1 more minute. Add the lime juice, 3 Kaffir lime leaves, a few slices of the red jalapeño, and the Thai bird chili (if you like it really spicy).

imageimage

7. Ladle in individual bowls with a couple sprigs of cilantro. Serve with extra lime wedge.

image

*You can find Thai chili paste at your local Thai or large Asian supermarket. Make sure you purchase Thai chili paste in soy bean sauce.

image

**Thai coconut milk is available in the Asian food isle at you local supermarket.

image


Apple Cider Breakfast Cake

Growing up and living in Southern California, it feels like summer all-year round, but my favorite season is fall, and it’s such a treat to see fall foliage when I visit my friends in New Jersey and Delaware. I recently learned of Oak Glen, a small section of Yucaipa just an hour and a half away from LA, where you can experience fall like on the East Coast. Oak Glen is famous for their apple orchards, and the leaves on the apple trees transform to various shades of autumn. Visitors from all over Southern California make the trek this time of year to go apple picking and purchase delicious apple cider. My trip yesterday inspired me to make a breakfast cake using the apples from their farm.

This breakfast cake, similar to coffee cake, has layers of apple flavors with grated apples, chopped apples and apple cider. You also taste the lovely warm spices of fall like cinnamon, nutmeg, and cloves. The cake is incredibly moist with a nice crispy cinnamon and sugar topping. It’s perfect for breakfast, bunch or an afternoon snack and pairs well with hot apple cider or coffee. Enjoy and Happy Fall!

Apple Cider Breakfast Cake

Serving Size: 9 slices

1 2/3 cups of unbleached all-purpose flour
3/4 cup of granulated sugar
1 teaspoon of baking powder
1/2 teaspoon of baking soda
3/4 teaspoon of Kosher salt
1 teaspoon of ground cinnamon
1/4 teaspoon of freshly grated nutmeg
1/8 teaspoon of ground cloves
1/8 teaspoon of ground allspice
2 large eggs
1/2 cup of neutral oil like sunflower or organic canola
1 teaspoon of vanilla extract
1/2 cup of fresh-pressed apple cider*
1/2 cup of grated apples (Pippin, Fuji, Pink Lady or your favorite baking apple)
2 cups of diced apples, 1/2 inch (same apple type as above)

Topping
2 tablespoons of granulated sugar
1 1/2 teaspoons of cinnamon

1. Heat the oven to 325°. Grease a 9 x 9 square a pan with cooking spray. Set aside.

2. In a medium bowl, add the flour, sugar, baking powder, baking soda, Kosher salt, cinnamon, nutmeg, cloves, allspice. Whisk and set aside.

image

3. In a large bowl, add the eggs, oil, and apple cider. Whisk well.

image

4. Add in the flour and sugar mixture to the wet ingredients. Fold in with a rubber spatula until only a few streaks of flour are visible.

image

5. Add the grated and diced apples and gently fold to combine. Don’t over mix.

image

6. Pour the batter into the greased baking pan.

image

7. Whisk the topping ingredients in a small bowl. Sprinkle evenly on top of the batter.

imageimage

8. Bake in the oven for about 40- 45 minutes. Insert a toothpick in the center of the cake to test for doneness.

image

9. Place the cake on a wired rack to cool for at least 20 minutes before slicing. Serve warm with a cup of hot apple cider or coffee. Enjoy.

image

*You can find fresh-pressed apple cider at your local apple farm or farmers market during the fall. You can substitute store-bought cider if fresh-pressed Apple cider isn’t available.

image

Gemelli Pasta with Assorted Mushrooms

We normally associate October with pumpkins, Halloween, and all things fall, but did you know we have dedicated the whole month of October to pasta? It’s not surprising since pasta is one of America’s favorite foods. So in honor of National Pasta Month, I am sharing an easy pasta recipe with some delicious fall mushrooms. If you love mushrooms, you will enjoy this pasta recipe. Unlike most of my previous pasta dishes, this recipe is made with store-bought pasta and easy to prepare on a weeknight. This pasta dish has layers of umami flavor, from the porcini water to the truffle salt. Also, the mushrooms aren’t masked in a thick creamy sauce; instead they are sautéed, so you can taste each type of mushroom in the dish. Gemelli or penne works well with a sauceless recipe. There is a method to the madness of the 60+ types of traditional pasta shapes in Italy. The type of sauce and ingredients will dictate the appropriate pasta to use.

In this recipe I have a couple of optional ingredients. I like adding chopped toasted walnuts to provide a contrast in texture, but I made it optional since my son and husband prefer the pasta without nuts. Also, the truffle salt adds a wonderful fragrance to the dish, but it is expensive and not essential. If you happen to have some truffle salt in your pantry, definitely sprinkle some on the pasta, but don’t go out of your way to buy some. Either way, the pasta will be tasty. Enjoy!

Gemelli Pasta with Assorted Mushrooms

Serving Size: 4-6

1 ounce of dried porcini mushrooms*
1/2 cup of hot water
Extra virgin olive oil
3 garlic cloves (chopped)
12 ounces of dried gemelli or penne pasta
12 ounces of assorted mushrooms (cremini, shiitake, chanterelles, oysters, maitake, etc.)
1 1/2 teaspoons of chopped thyme leaves
Sea salt
Freshly grated black pepper
1/2 red onion, thinly sliced
1 tablespoon of unsalted butter
2 tablespoons of heavy cream (optional)
1/4 cup of chopped Italian parsley, plus extra for serving
1/3 cup of grated Parmigiano-Reggiano, plus extra shavings for serving
1/2 cup of toasted walnuts, chopped (optional)
Black truffle salt (optional)

1. Place the dried porcini mushrooms in a small bowl. Pour in 1/2 cup of hot water. Set aside.

image


2. Prep the fresh mushrooms by cleaning with damp cloth to remove any dirt. Slice and/or quarter the mushrooms. Set aside.

image

3. Heat a large sauté pan on medium high heat. Add 2 tablespoons of olive oil. Add the chopped garlic and sauté for 15 seconds.


4. Add the all mushrooms, chopped thyme, a pinch of sea salt, and a few turns of the pepper mill.

image

5. Meanwhile, add 3 quarts of water and a handful of Kosher salt in a large stock pot. Bring to a boil.

6. Sauté the mushrooms for about 8 minutes until the mushrooms are full cooked. Transfer to a plate. Set aside.

image

7. In the same large sauté pan, add 1 tablespoon of olive oil. Then add the sliced red onions and a pinch of salt. Sauté for 5 minutes over medium heat.

image

8. Add the pasta to the boiling water. Cook until al dente (See instructions on package).

image

9. Drain the porcini mushrooms and reserve the liquid. Finely chop the porcini mushrooms. Add the chopped porcini, the reserved liquid, and a pinch of sea salt to the pan with the red onions. Turn the heat up to high. Cook for 2 minutes.

image

10. Whisk in the the butter and cook for 1 minute.

image

11. Add the cream and cook for 1 more minute, stirring constantly.

image

12. Drain the pasta and reserve 1/2 cup of pasta water. Add the cooked pasta, the reserved sautéed mushrooms, the chopped parsley, and the grated Parmigiano-reggiano. Stir to combine and cook for 1 more minute. Add the reserved pasta water as needed to loosen pasta.Add salt and pepper to taste. Drizzle extra olive oil.

image

13. Spoon some pasta in a serving bowl. Sprinkle truffle salt, chopped walnuts, chopped parsley, and a few shavings of Parmigiano-reggiano.

image.jpeg

*I buy my dried porcini mushrooms from a mushroom vendor at my local farmers market. Dried porcini mushroom can also be found online or at a specialty gourmet market.

Chocolate-Peanut Butter Cookies

There is a reason why Reese’s Peanut Butter Cups is the best selling candy bar in the United States. The candy bar is the perfect marriage of chocolate and peanut butter and it’s one of my favorite candy bars. I never buy them, but every Halloween I find myself scavenging through my kids’ trick-or-treat bags, looking for that distinct orange wrapper. I wanted to capture that flavor in a cookie, and I chose to create a chocolate cookie with peanut butter flavor rather than a peanut butter cookie with chocolate flavor. At first glance, you wouldn’t know there was peanut butter in these cookies. They look like chocolate cookies with chocolate chunks, but once you take a bite, both the chocolate and peanut butter flavors are pronounced. It’s rich, soft, and slightly chewy. If you are allergic to peanut butter, you can substitute the peanut butter with an equal amount of almond butter. Either way, the cookies will be delicious. A tall glass of milk is a must for these cookies. Enjoy!

Chocolate-Peanut Butter Cookies

Yield: about 18 large cookies

1 1/4 cups of Sonora wheat flour* or unbleached all purpose flour
1/4 cup Valhrona cocoa powder
1 teaspoon of baking soda
3/4 teaspoon of sea salt
1/2 cup of unsalted butter at room temperature, preferably organic
1/2 cup of brown sugar
1/3 cup of granulated sugar
1/2 cup of organic creamy peanut butter (w/o sugar or salt)
1 large egg
1 tablespoon of vanilla extract
6 oz of good quality dark chocolate, chopped into 1/4 inch pieces

1. Preheat oven to 350°. Line 2 baking sheets with parchment paper.

2. In a medium bowl, combine the flour, cocoa powder, baking soda and salt. Set aside.

image

3. In a stand mixer, add the butter and the sugars. Beat on medium speed for 2 minutes.

image

4. Scrape the sides and add the peanut butter. Beat for 1 more minute.

image

5. Scrape the sides again and add the egg and the vanilla extract. Beat until just combined.

image

6. Set the mixer to the lowest speed. Slowly add the dry ingredients until just combined.

image

7. Finally, add the chopped chocolates and mix on low for about 15 seconds.

image

8. Using a 3-tablespoon ice cream scoop, scoop the cookie dough 2 inches apart on the baking sheet.

image

9. Press down with the palm of your hand to flatten.

image

10. Bake in the the oven for 8-10 minutes. Don’t overbake because you want the cookie to be slightly chewy and soft.

image

11. Transfer to a baking sheet and cool for 15 minutes. Serve warm with a tall glass of milk.

image

*I like to use the Sonora wheat flour from Grist and Toll.

Kimbap with Beef and Vegetables

Exactly one year ago today, I started my recipe blog. During the past year, I’ve had viewers from around the world visit my blog. To celebrate my one-year anniversary, I share with you my mom’s kimbap (Korean rice rolls) recipe. Kimbap are beautifully colorful and taste delicious. My mom made them for celebratory meals, and the thought of them made my brothers and I excited whenever one of our birthdays was around the corner. My mom would wake up before dawn to prep all the ingredients and once we were awake, it would only be minutes before we would begin devouring them. This recipe stays true to my mom’s original recipe – I haven’t altered it one bit, down to ingredients I wouldn’t typically use today.

The key to a successful kimbap is properly cooked rice. I typically use a little less water than what the directions call for on the package. The cooked rice should separate a bit when moving it around with a rice paddle. You want the rice fully cooked, not al dente like risotto rice, but also not too soft or mushy. Be sure to allow the rice to cool down a bit before placing it on the nori sheets. Note that there are 3 Japanese ingredients in this recipe that contain MSG or a derivative of MSG – takuan taro, kamaboko, and powdered sushi flavoring – so if you are sensitive to MSG, this is probably not the recipe for you. I searched for non-MSG versions of these three ingredients but they were difficult to come by, and I ultimately decided that maintaining the authenticity of the recipe was more important than using different ingredients that were MSG-free. If you try this recipe, though, you will experience a piece of my childhood through the flavors of one of my favorite comfort foods. Enjoy!

Kimbap with Beef and Vegetables

About 6 servings

Special Equipment: Bamboo Sushi Mat

Beef
1/3 lb. of brisket (cut into 1/3″ long strips, cut against the grain)
2 teaspoons of soy sauce
1 teaspoon of mirin
1/4 teaspoon of baking soda
1/2 teaspoon of sugar
Freshly grated black pepper

Vegetables and Other Fillings
2 large carrots (peeled, sliced into 1/4″ strips, boiled 2 minutes, and shocked in ice water – blotted dry)
1 bunch of spinach (washed, boiled 1 1/2 minutes, and shocked in ice water – squeezed dry)
2 teaspoons of sesame oil
1/2 teaspoon of salt
1 red kamaboko (Japanese fish cake) – 6 oz*
3 eggs, beaten well
Vegetable oil
1 takuan taro (Japanese picked daikon) – about 8 ounces, sliced 1/3″ strips**

Rice
6 cups of cooked short-grain sushi rice
2 tablespoons of roasted sesame oil
2-3 tablespoons of powdered sushi flavoring***

Other
5 sheets of unseasoned nori sheets
Roasted sesame seeds and black sesame seeds
Extra daikon for serving

1. In a small bowl, add the brisket strips, soy sauce, mirin, baking soda, sugar and a couple turns of the pepper mill. Stir well and let marinate for 20 minutes at room temperature.

image

2. In a small bowl, toss the carrots, 1 teaspoon of sesame oil, and a pinch of salt. Place the carrots on a platter.

3. In the same bowl, add the spinach, the other teaspoon of sesame oil, and a pinch of salt. Place on the platter next to the carrots.

image

4. Heat a 6-inch non-stick sauté pan on medium heat. Add a tablespoon of vegetable oil. Add a pinch of salt to the eggs and give them quick beating. Add the beaten eggs in the pan. You want to create an egg cake that will be 1/4″ thick when sliced. Flip and cook on the other side until fully cooked. You don’t want a runny center.

image

5. Transfer the cooked eggs to a cutting board. Let cool before slicing.

image

6. Take the kamaboko and slice out the pink portion and white portion into 10 equal strips. They will be about 1/3″ thick. Heat a small sauté pan on medium heat and add 1 tablespoon of oil. Add the kamaboko and sauté for 2 minutes. Transfer the kamaboko to the platter.

image

7. In the same pan, add the beef strips and cook on medium high until you get a nice sear on each side. This should take about 5 minutes. Transfer to the platter.

image

8. Add the cut pickled daikon on the platter.

imageimage

9. In a large bowl, add the cooked rice, 2 tablespoons of the powdered sushi flavoring and sesame oil. Using a rice paddle, mix until the powdered sugar and sesame oil is evenly distributed into the rice. Taste the rice and add more powder if needed.

imageimage

10. Lay 1 sheet of nori on the bamboo mat, long side down and the nori touching the bottom portion of the mat. Add about 1 cup of the rice and spread evenly throughout the nori, leaving about 1 1/2″ on the top.

image

11. Carefully add the filling (one of each) on the lower potion of the rice. You will need to add about 6 spinach leaves, evenly distributing the leaves so when cut, each one will have leafy greens.

image

12. Take a hold of the bamboo mat on the bottom side and, while rolling, press down to secure the filling and roll the kimbap away from you.

imageimage

13. Repeat four more times.

14. Slice the kimbap with a serrated knife into 3/4″ pieces. Place the pieces on serving plates and sprinkle the sesame seeds. Serve with miso soup and extra pickled daikon pieces.

imageimage


15. Kimbap are best eaten the same day they are made. Place any leftover pieces in a airtight container in the refrigerator. The leftover kimbap can be heated in the microwave for a few seconds or eaten at room temperature.


*This Kamaboko is processed in Los Angeles, California and it is my favorite Kamaboko brand. You can find it at most Asian markets.

image

** Here is the Takuan brand I use for this recipe. I tested quite a few brands and this one has the best flavor. You can be find this Takuan at most Japanese markets.

image

*** This is Japanese powdered sushi flavoring I use for the rice. You can find it at most Japanese and Korean markets.

image

Sticky Rice with Chinese Sausage and Shrimp

My first Chinese sticky rice experience was in high school at my friend’s house. My friend’s mom, Mrs. Young, was an amazing Chinese home cook and it was always a treat to have dinner at their place. Mrs. Young was originally from China, but lived in Vietnam before emigrating to the US, and you can taste the Vietnamese influence in her cooking. One of my favorite dishes that she made was her sticky rice. The sticky rice had tender pork, shiitake mushrooms and dried shrimp and was a beautiful caramel color. It was savory and slightly sweet and had the perfect texture. Mrs. Young was always kind of enough to pack extra for me to take home. It was best sticky rice I’ve ever had.

I lost contact with my friend about 15 years ago and for years have regretted not learning how to make her mother’s wonderful sticky rice. Since then, I have had many versions of the dish in the San Gabriel Valley and have finally come up with a good recipe for it. In this recipe, I have incorporated the steaming method my mom taught me when making Korean sticky rice for a dessert called yak-shik, but added all the Chinese flavors for sticky rice. Also, I added homemade Vietnamese caramel sauce to give it that great dark color. The combination of all the techniques and flavors produces a sticky rice close to my memory of Mrs. Young’s version. Try this recipe. I promise it won’t disappoint!

Sticky Rice with Chinese Sausage and Shrimp

Serving Size: 4-6

2 cups of sweet rice (medium-grain or short-grain), soaked in water for 30 minutes
Non-stick cooking spray, vegetable oil based
1 1/2 tablespoons of vegetable oil, divided
3 slices of ginger, 1/2″ thick and 1 1/2 inches long
2 Chinese sausages, casing remove and thinly sliced* or 1/2 cup of roasted pork strips
2 ounces of fresh shiitake mushrooms, thinly sliced**
1/4 cup of dried shrimp, soaked in warm water for 30 minutes***
3 scallions, thinly sliced and divided
1 tablespoon of mirin
2 tablespoons of organic soy sauce
2 tablespoons of oyster sauce
1/2 teaspoon of roasted sesame oil
Freshly grated pepper, to taste
1/2 cup of homemade chicken stock or low-sodium chicken broth
2 tablespoons of dark Vietnamese caramel sauce or 1 tablespoon of molasses****

1. In a medium steamer (2 quart-size), coat the steamer basket with non-stick cooking spray.

image

2. Give the sweet rice a good rinse over a fine-meshed sieve. Transfer the rinsed rice into steamer basket.

imageimage

3. Add a generous amount of hot water into the base of the streamer. Cover and steam over high heat for 30 minutes. Add additional hot water to the base of the steamer, as needed.

4. Meanwhile, heat a 12-inch sauté pan to medium-high. Add 1 tablespoon of vegetable oil. Add the ginger pieces and sauté for 30 seconds.

image

5. Add the Chinese sausage slices and the shiitake mushrooms. Sauté until the sausages get a little crispy (about 5-7 minutes).

image

6. Drain the soaked dried shrimp and add them to the pan. Sauté for 1 more minute.

image

7. Add the mirin and sauté for 30 more seconds. Remove the ginger pieces. In a small bowl, whisk the soy sauce, oyster sauce, sesame oil, 1/2 tablespoon of vegetable oil and a couple of turns of the pepper mill. Pour the mixture into the sauté pan. Add 2/3 of the sliced scallions.

image

8. Stir and cook for 1 minute.

9. Remove the lid off the steamer with the par-cooked sweet rice. Add 1/2 cup of chicken stock directly to the rice and stir to moisten the rice. Add the cooked sausage/mushroom/shrimp mixture and 2 tablespoons of dark caramel sauce on top of the sweet rice. Stir with a wooden spoon to coat the rice and evenly distribute the ingredients.

image

image

10. Replenish the base of the steamer with more hot water. Cover and steam for 20-30 more minutes (stirring a couple of times in between for even steaming) or until the rice is fully cooked.

11. Add the remaining sliced scallions on top of the cooked sticky rice.

image

12. Serve with chili sauce and pickled vegetables. Enjoy!

image

Sweet rice can be found in most Asian markets. Sweet rice is chalk white in color, unlike the more common translucent white rice. Make sure not to purchase the long-grain version, or the recipe will not be successful.   Shirakiku sells a 2-pound bag option.

image


*There are several Chinese sausage brands. I prefer Kam Yen Jan’s Chinese sausage. Unfortunately, it is difficult to find nitrate-free options.

image

**When purchasing fresh shiitake mushroom, try to purchase them locally or purchase the ones grown in the US. There are inferior versions being shipped from overseas you want to avoid.

image.jpeg

***You can find dried shrimp in the refrigerator section at most Asian markets. Make sure you soak the dried shrimp in warm water to reconstitute them before using.

image

****I make my own caramel sauce using Andrea Nguyen’s recipe. It is pretty easy to make and stores in a dark pantry. If you don’t want make your own, you can use molasses instead.

image